AR Profile
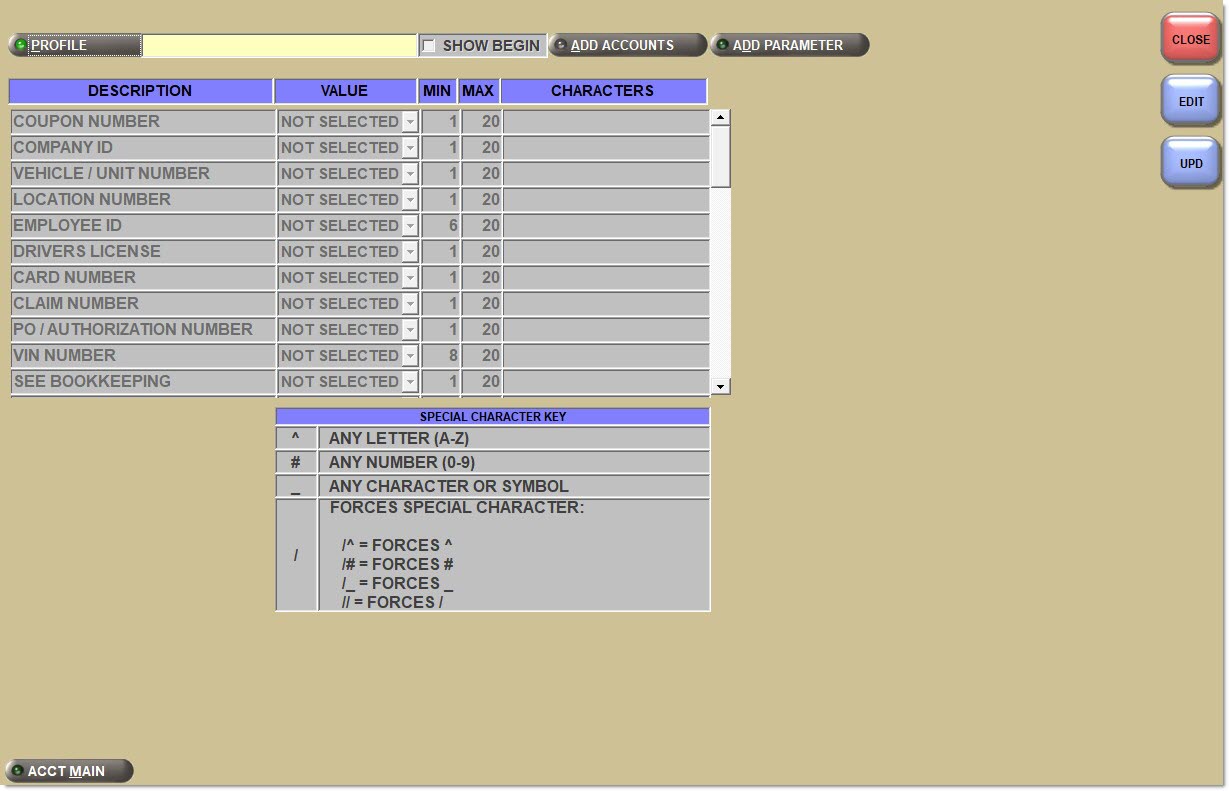
The Profile Parameter Setup screen is used to set up and maintain certain criteria that forces data to be entered at Point-of-Sale before a sale is allowed for certain customers. Profiles can be linked to all primary or main accounts. If a profile is linked to an account, as soon as that account is entered at Point-of-Sale, the Profile Parameter Setup screen displays to allow entry of necessary data.
Menu Path: Customer, AR Profile, Profile Parameter Setup screen
Menu Path: Customer, Accounts, Account Main, Main Account Entry screen, 'Profile Setup' button.
If a profile exists for a customer in the Main Account Entry screen, the button label displays 'Edit Profile'. If clicked, the Profile Parameter Setup screen displays with the profile setup for the customer in focus on the Main Account Entry screen.
Identifies the profile setup. Can be a value of up to 10 alphanumeric characters. Examples of a profile setup name would be 'Employees' or 'PO Numbers'.
Displays the 'Find Profile' window to locate an existing profile setup, when clicked.
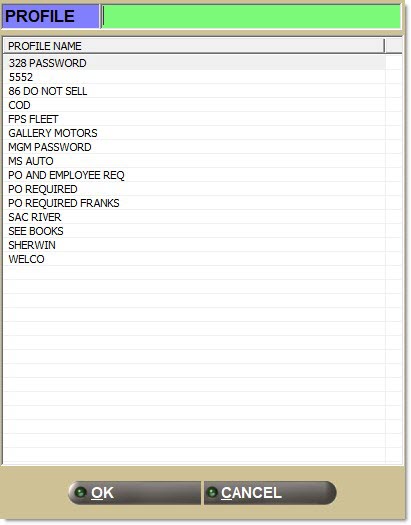
The 'Profile' button displays the 'Find Profile' window used to locate an existing profile setup. Select the desired profile and click 'Ok'.
The 'Add Accounts' button displays the 'Set Accounts' window used to select accounts that will use the selected Profile Parameter table.
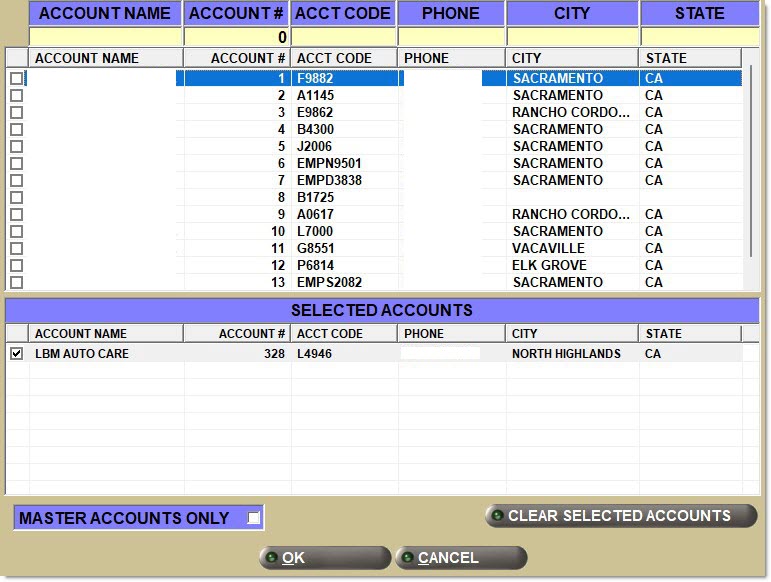
Search by 'Account Name', 'Account Number', 'Account Code', 'Phone', 'City', and 'State'. The 'Selected Accounts' grid populates as accounts are selected from the upper grid. To deselect selected accounts, uncheck the checkbox to the left of the account.
Check each account to link that account to the setup and click 'Ok'.
Accounts with the 'Account Control' of 'Master' do not normally display in the 'Set Accounts' window. To see 'Master' accounts, check the 'Master Accounts Only' flag. The system prompts "Making changes to master accounts will affect all accounts linked to each affected master. Are you sure you want to continue?" with 'Yes' and 'No' buttons. This simply means that selecting the Master will also affect all accounts linked to it and will not affect Master/Link account setups. This makes it easier to select all linked accounts at the same time without having to select them individually.
When 'yes' is selected, only accounts with the 'Account Control' of 'Master' display in the upper grid. Selecting Master accounts to move into the 'Selected Accounts' section selects the Master and all links under the Master. Only the Master account displays in the lower section. Closing and then reopening the window displays only the Linked accounts. If selected, both Master and Links are prompted with the 'Profile Date' pop-up at Point-of-Sale.
Click to add a new parameter to the available profiles.
The grid lists canned parameters in the 'Description' column whenever the screen is opened.
Displays the name of the predetermined or new parameter. If adding a new 'Description', can be a name of up to 60 alphanumeric characters. Example: 'Authorization Name'.
Displays a condition of the parameter.
Options are:
-
'Not Selected' - Will not display in the profile window at Point-of-Sale.
-
'Optional' - Capture the info, but it is not mandatory.
-
'Force Begin' - Data must be entered before the sale can be started.
-
'Force End' - Data must be entered before tender to complete the sale.
-
'Force Validate' - Available for 'Employee #' only. If selected, the program verifies the entered data against the employee data and verifies that the number given exists.
Sets the minimum number of characters that can be entered in the data field.
Sets the maximum number of characters that can be entered in the data field.
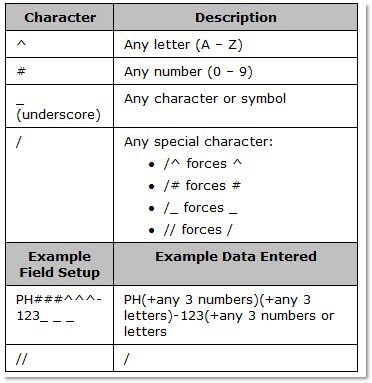
Sets the characters that can optionally or forced to be entered in the 'Profile Data' pop-up per selected 'Description' field at Point-of-Sale. Use the 'Special Character Key' chart to determine what data can optionally be entered.
Identifies the special characters that can be optionally entered in the 'Characters' field.
Procedure to Link Account to Setup Profile
To link an account to the setup profile, follow the steps below:
-
From the Menu, select Customer, A/R Profile. The Profile Parameter Setup screen displays.
-
Select a profile in the 'Profile' field.
-
Click 'Add Accounts'. The 'Set Accounts' window displays to allow selection of the accounts that will use the displayed Profile Parameter table.
-
Click each account to link the account to the setup.
-
Click 'Ok'.
Procedure to Add a New Parameter
To add a new parameter, follow the steps below:
-
From the Menu, select Customer, A/R Profile. The Profile Parameter Setup screen displays.
-
Click the 'Add Parameter' button. The cursor moves to the first available line under 'Description'.
-
Enter a name to define the new parameter (Example: 'Authorization Name').
-
Click 'Upd' to save the new parameter.
-
Click 'Edit' to change the setup of the new parameter.
-
Click 'Upd'.