Reason Codes
The REASON CODES screen is used to manually add new reason codes, edit existing codes or make codes inactive. Codes cannot be deleted; however, codes can be made inactive. Reason codes are at the enterprise level. Therefore, reason codes entered for one store are available to all stores. User Security permission is required for access to the screen.
Menu Path: Controls, Enterprise, Reason Codes, REASON CODES screen
Reason Code Setup
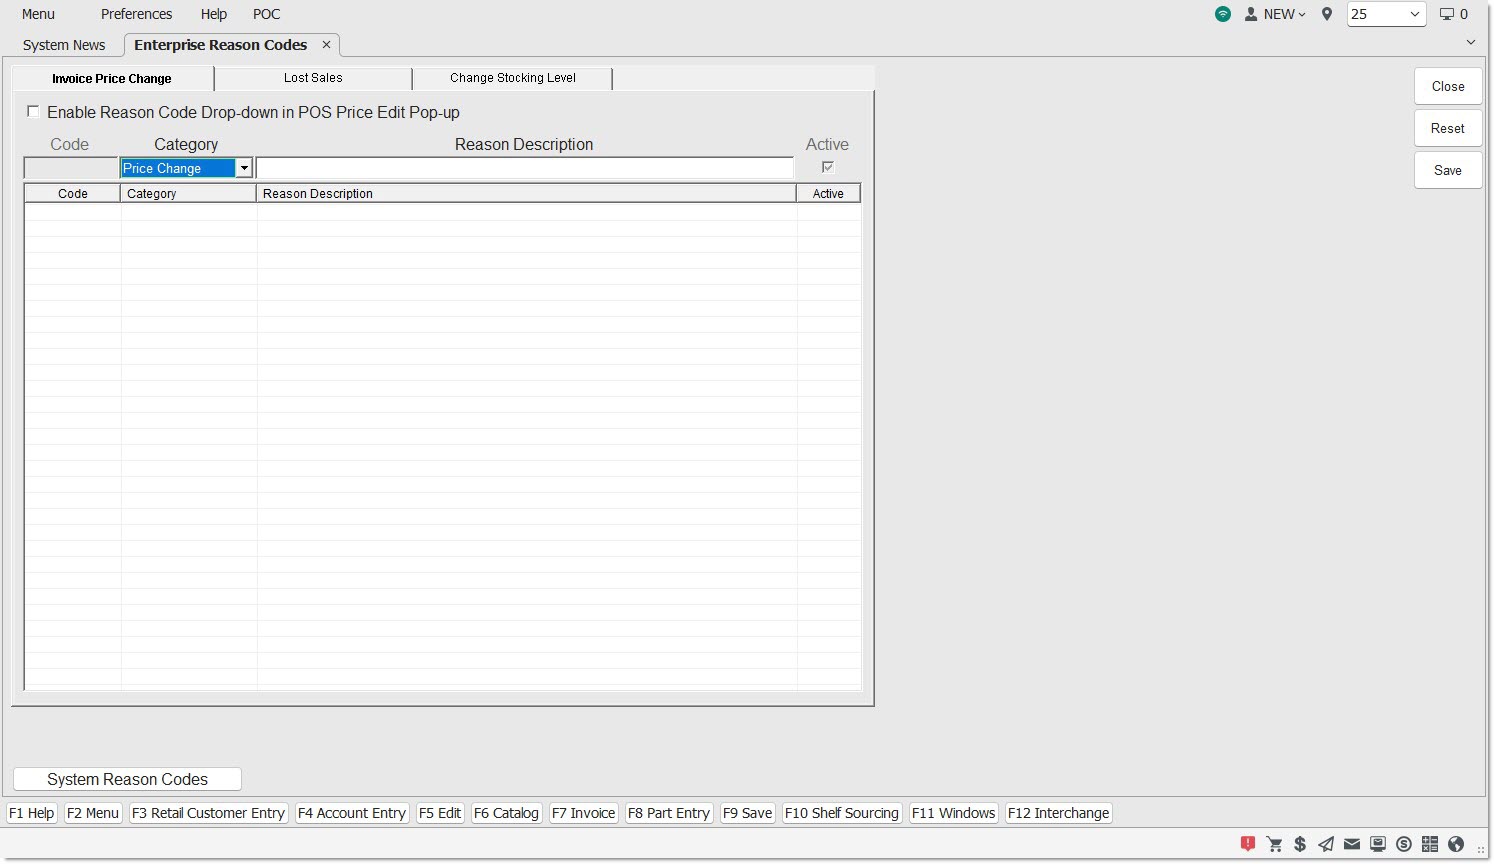
There are 3 tabs on the REASON CODES screen:
Displays the Price Change reason codes table used to record the reason a price change occurred.
ENABLE REASON CODE DROP DOWN IN POS PRICE EDIT POP UP
Determines whether the DISCOUNT/OVERRIDE REASON drop-down field displays in the 'PRICE EDIT' window on the Invoice Point of Sale screen.
-
Unchecked - The reason code grid is unavailable and the 'DISCOUNT/OVERRIDE REASON' field does not display in the 'PRICE EDIT' window.
-
Checked - The reason code grid is available and the 'DISCOUNT/OVERRIDE REASON' field displays in the 'PRICE EDIT' window.
Displays the Lost Sales reason codes table used to record the reason a Lost Sale occurred at the time a Lost Sale was captured at Point-of-Sale.
ENABLE REASON CODE POP-UP AT POS
Determines whether reason codes are required when recording lost sales at Point-of-Sale.
-
Checked - The Reason Code setup grid is enabled to allow setting up reason codes that must be selected at Point-of-Sale when a lost sale is entered for a part on the sell line. Uncheck the checkbox to disable the functionality. Existing Reason Codes will not be deleted. Lost Sale Reason Codes tracked at POS are not reported from the application.
-
Unchecked - The Reason Code setup grid is disabled.
Displays the stock change reason codes table used to record the reason a stocking level was manually edited.
ENABLE REASONS FOR STOCKING LEVEL CHANGE
Determines whether or not reason codes are needed when there is a stocking level change in the inventory.
- Checked - Stocking Level Changes in the inventory require a reason code to be recorded.
- Unchecked - Stocking Level Changes in the inventory do not require a reason code to be recorded.
Each tab has the same grid, with the following information displayed per tab:
CODE
Indicates the code number of the reason code used to represent the code on reports. Codes are automatically numbered when created, from 000 to 999, and display in numerical order. Numbers cannot be deleted or duplicated; however, can be made inactive.
REASON DESCRIPTION
Indicates the reason code description. Once created, can be modified. Displays in the REASON CODES screen and in the 'REASON' CODE drop-down field in the 'PRICE EDIT' window in the Invoice Point of Sale screen.
Indicates the reason code is active and available to use, when checked.
Values are:
-
Y - Active
-
N - Inactive
New codes default to 'ACTIVE (Y)' when created.
Inactive codes continue to appear on reports for transactions already recorded, but will not display in the 'REASON CODE' field in the 'PRICE EDIT' window at Point-of-Sale.
Procedure to Add a Reason Code
To add a reason code, follow the steps below:
-
From the Menu, select Controls, Enterprise, Reason Codes. The REASON CODES screen displays.
-
Click the appropriate tab.
-
Enter a reason in the 'REASON DESCRIPTION' text box.
-
Press the 'Enter' key. The Reason Code is saved and added to the grid and the next available consecutive number is assigned in the 'CODE' field. The new code defaults to 'Y (ACTIVE)' in the 'ACTIVE' field.
-
Click 'CLOSE'. The screen closes.
Procedure to Edit a Reason Code
To edit a reason code, follow the steps below:
-
From the Menu, select Controls, Enterprise, Reason Codes. The REASON CODES screen displays.
-
Click the appropriate tab.
-
Double-click the row to be edited. The selected row displays in the 'REASON DESCRIPTION' text box.
-
Make the necessary changes.
-
Click 'UPD'. The changes are saved.
-
Click 'CLOSE'. The screen closes.
Procedure to Make a Reason Code Inactive
To make a reason code inactive, follow the steps below:
-
From the Menu, select Controls, Enterprise, Reason Codes. The 'REASON CODES' screen displays.
-
Click the appropriate tab.
-
Double-click the row to be edited. The selected row displays in the 'REASON DESCRIPTION' text box.
-
Uncheck the 'ACTIVE' box for that code.
-
Click 'UPD'. The changes are saved.
-
Click 'CLOSE'. The screen closes.