Invoice Point-of-Sale
Invoicing Screen
The invoicing screen is the PartsWatch "Point-of-Sale" (POS) screen, providing the time and place where goods are sold and returned, whether in the store or online. Sales orders are made for both commercial and retail customers, pricing is calculated, inventory is updated and tickets are finalized, printed, and tracked for end-of-period reporting.
Menu Path: Invoicing, Invoicing Screen, Invoice Point of Sale screen, or press 'F7' from any screen.
memo
Starting an Invoice
Invoice Accelerator Keys
Accelerator keys are used to perform the same function as clicking the button.
1. Point-of-Sale Starts with a customer.
About Customers
Commercial Accounts vs. Retail Customers
![]() Accounts vs. Customers - 7 minutesAccounts vs. Customers - 7 minutes
Accounts vs. Customers - 7 minutesAccounts vs. Customers - 7 minutes
Whether called an "account" or a "customer" both main and retail accounts are available for sales and returns at Point-of-Sale.

![]() Customer Lookup 1 of 2 - 4 minutesCustomer Lookup 1 of 2 - 4 minutes
Customer Lookup 1 of 2 - 4 minutesCustomer Lookup 1 of 2 - 4 minutes
![]() Customer Lookup 2 of 2 - 4 minutesCustomer Lookup 2 of 2 - 4 minutes
Customer Lookup 2 of 2 - 4 minutesCustomer Lookup 2 of 2 - 4 minutes
When the Invoice Point of Sale screen opens, the cursor is positioned in the 'CUSTOMER LOOKUP' field in the upper-left corner.

2. Enter or select a customer.
- If an account number is set up in the 'DEFAULT ACCOUNT' field, pressing the 'Enter' key from the 'CUSTOMER LOOKUP' field starts an invoice for an unidentified retail customer.
- Enter the customer's name, phone number, account number, or account code and press the 'Enter' key.
The 'CUSTOMER LOOKUP' field searches by:
- Account Code / Customer Name (1-8 alpha and/or numeric characters)
- Account Code / Account Number (1-8 numeric digits)
- Account Number (10 numeric characters or 11 if the first character is a '1')
- Phone Number (10 numeric characters or 11 if the first character is a '1')
- 'BILL TO' name for main accounts (up to 32 alphanumeric/special characters)
- 'LAST NAME' for retail customers (up to 32 alphanumeric characters
Multi-store search also includes:
- Store Number
- Store Group
A search is made from the 'CUSTOMER LOOKUP' field for all identified retail customers as well as all main accounts regardless of their 'ACCOUNT TYPE'.
- 'COMMERCIAL', which is used to track most main customers with or without payment terms.
- 'RETAIL MAIN', which sets pricing, taxability, etc. for both identified and unidentified retail customers.
- 'STORE USE', which is normally a single account per store that is used to track items used by the store so that they can be reported separately from the same items that are sold to customers, such as paper towels or parts for delivery trucks.
Store Use account setup:
- Set the 'ACCOUNT TYPE' to 'STORE USE'.
- Check the 'STORE USE?' setting for parts that are used by the the store.
- Check the 'INVOICE ANY PART TO STORE USE ACCOUNT' setting to allow any part to be invoiced to the Store Use account regardless of whether or not the 'STORE USE?' setting is checked for the part.
If the 'DEFAULT SHOP ACCOUNT' setting is optionally set up, an icon displays on the right side of the border, and, if clicked, the default Store Use account will be in the focus on the Invoice Point of Sale screen to create a sales order for that account for stock used by the store.

- 'PARTNERSHIP', which is found from the 'PARTNERSHIP' button to select the account that will set the pricing for a retail customer for a single sale only.
- 'TRANSFER', which is used by multi-store environments for selling and moving stock between stores.
- 'EMPLOYEE', which gives special pricing or a percent off for shopping in the store to the employees.
After any initial optional processes, the cursor moves to the sell line in the middle of the Invoice Point of Sale screen, ready to enter the first part.
A search is not made from the 'CUSTOMER LOOKUP' field on any main accounts with an 'Account Type' of 'PARTNERSHIP'.
- If an exact match is found, the customer displays on the screen.
- If the wrong customer is found, press the 'Esc' key to return to the 'CUSTOMER LOOKUP' field to find a different customer.
- If more than one match is found, or no match is found, the 'FIND CUSTOMER' window opens to select the correct account or to start a new search.
- If a 10-digit phone number is entered and the customer is not found in the file, the system will search for the customer using ACXIOM, a 3rd-party phone number locator program.
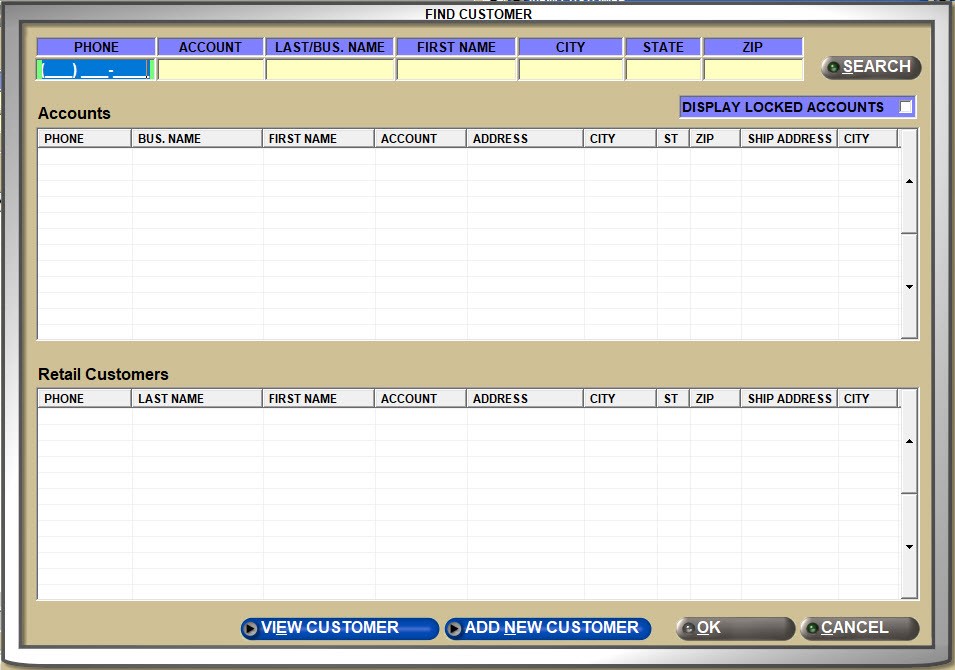
To search for a customer, click the 'CUSTOMER LOOKUP' button to display the 'FIND CUSTOMER' window:
- If a customer is not found from the 'CUSTOMER LOOKUP' field.
- To identify a retail customer.
- To add a retail customer.
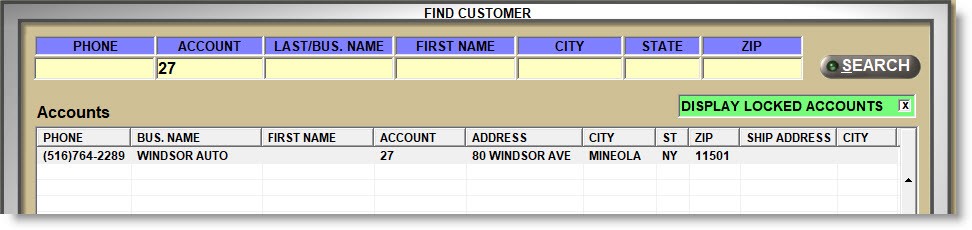
When the 'FIND CUSTOMER' window opens:
- Enter a value in one or more search fields ('PHONE ACCOUNT', 'LAST/BUS. NAME') and press the 'Enter' key or click the 'SEARCH' button to display the results.
-
If a single value is found, it will display.
-
If multiple values are found, the correct one can be selected from the displayed list.
-
If a customer is not found, "No Results Found" will display.
-
- Enter a "%" sign in the 'LAST/BUS. NAME' field to display all customers.
Double-click or highlight a selection in the 'FIND CUSTOMER' window and click the 'OK' button to display the account on the Invoice Point of Sale screen.
Add a New Retail Customer
Retail customers can be added from the 'FIND CUSTOMER' window, or added and changes can be made to existing identified retail customer from the Retail Customer Entry screen.
![]() Adding Retail Customers - 5 minutesAdding Retail Customers - 5 minutes
Adding Retail Customers - 5 minutesAdding Retail Customers - 5 minutes
Benefits of identifying retail customers by name and address:
- Quick lookup.
- Returns credit check to make sure the returns were actually purchased by the customers.
- Printouts of purchases customers may need for the bank or for taxes.
- Customer list export for mail merge.
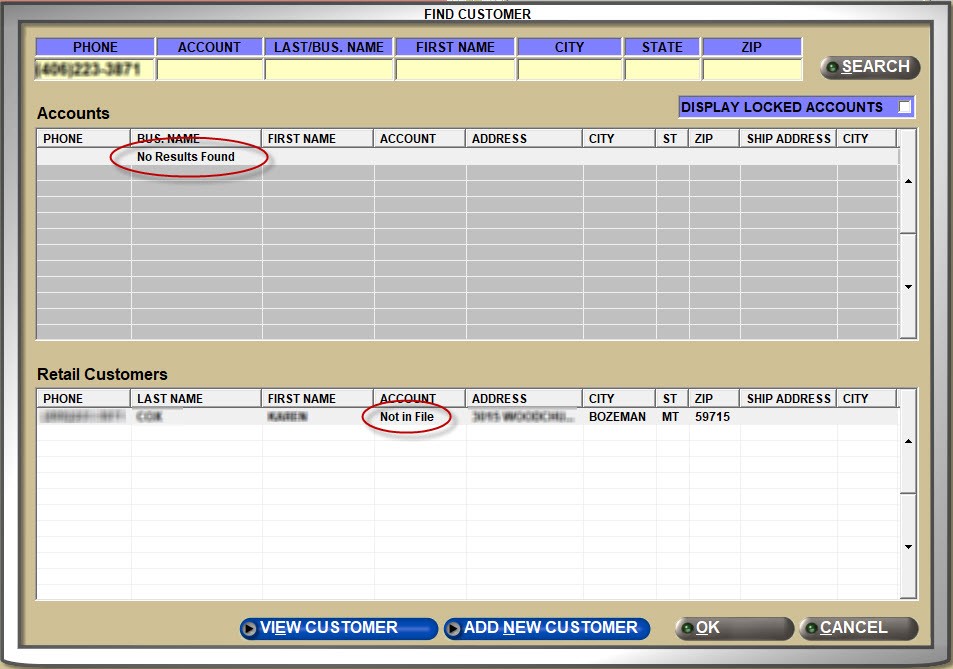
If a 10-digit (or 11-digit if the first number is '1') phone number is entered from the 'CUSTOMER LOOKUP' field or the 'FIND CUSTOMER' window and the customer is not in the file, the system will search for the customer using ACXIOM, a 3rd party phone number locator program.
If a match is found by ACXIOM, the customer will display as "Not in File" on the 'FIND CUSTOMER' window. If the customer is the correct one, double-click the customer or highlight the customer and click the 'ADD NEW CUSTOMER' button or 'OK' button and the 'ADD NEW RETAIL CUSTOMER' window opens to add the customer to the file as a retail cash customer.
If a match is not found for the customer, or multiple returns are found either in the file or through ACXIOM, the 'FIND CUSTOMER' window opens.
If ACXIOM is enabled
- When a phone number entered in the 'CUSTOMER LOOKUP' field or the 'FIND CUSTOMER' window is not found, the system automatically goes to the ACXIOM website and if it finds a match, the customer name and address display with "Not in File" as the account number.
- Double-click the row to open the 'ADD NEW RETAIL CUSTOMER' window with the customer information displayed. Or, highlight the customer and click the 'ADD NEW CUSTOMER' button to open the window.
- If a match is not found at all, "No Results Found" displays.
Whether or not ACXIOM is enabled or if a match is not found, clicking the 'ADD NEW CUSTOMER' button on the 'FIND CUSTOMER' window opens the 'ADD NEW RETAIL CUSTOMER' window to enter a new retail customer.
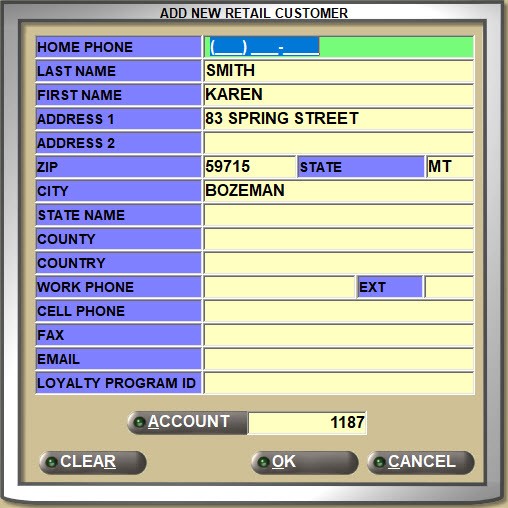
The cursor is in the 'HOME PHONE' field. If the customer was found by ACXIOM, available customer information will display. Add or enter the customer's information. At a minimum, the 'LAST NAME' must be entered for a new retail customer. The rest of the information including the phone number is optional.
The 'ACCOUNT' field defaults to the 'DEFAULT ACCOUNT' setting if enabled and allows selection of the main account that the retail customer will get its pricing and taxability from. Click the 'ACCOUNT' button to select a different Retail Main account to link the customer to. If the 'DEFAULT ACCOUNT' setting is disabled, an account with the 'ACCOUNT TYPE' of 'RETAIL MAIN' must be selected when the 'FIND ACCOUNT' window opens. More than one Retail Main account can be set up, for example, in order to give unidentified cash customer slightly better pricing than walk-in cash customers.
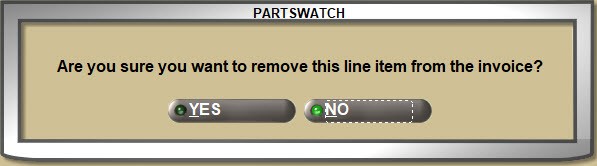
Highlight a field to edit the information. Click the 'CLEAR' button to clear the entire window and manually enter the information. Click 'CANCEL' without saving the customer. A prompt will open asking: "Do you want to save the changes?" Answer with the 'YES' button to add the customer and return to the Invoice Point of Sale screen with the customer in focus or click the 'NO' button to return to the Invoice Point of Sale screen to find a different customer.
If someone is added with the same phone number as an existing customer, it becomes another record. A lookup by the customer's name displays both customers. However, if both these customers are from the same household, the application opens the Retail Customer Entry screen ('F5' key) and 'MERGE' both into one account.
When starting an invoice, the logged-in counterperson is able to select a main commercial account that has been set up under 'MY ACCOUNTS', allowing these "special" accounts to optionally be found more quickly without having to remember their account number. This option is especially useful for stores with repeat high-volume customers or for any customers that require more attention for any reason.

Click the small drop-down arrow in the 'MY ACCOUNTS' field to display a list of accounts and then double-click a selection to display that customer to start a sales order.
If a selected customer has been set up to start the sales order in the catalog, when the account is selected, the CATALOG screen opens without additional keystrokes.
'MY ACCOUNTS' can be optionally set up on the EMPLOYEE SETUP screen by clicking the 'MY ACCOUNTS' button for the employee in focus.
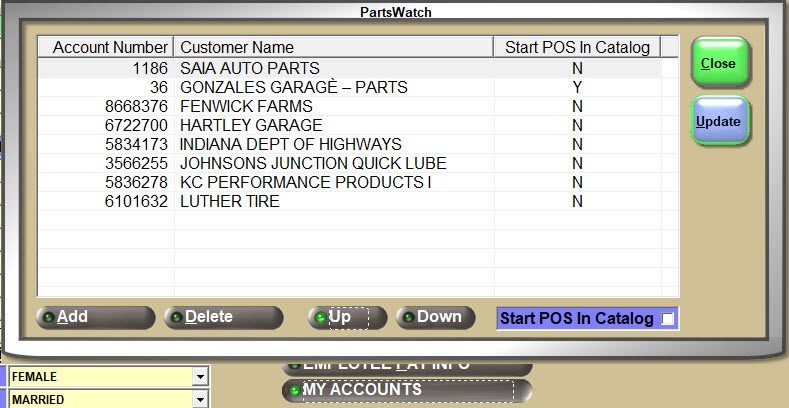
Click the 'Add' button in the window and the 'FIND CUSTOMER' window opens with wholesale accounts only. Search by 'PHONE' number, 'ACCOUNT' number or code, or the 'LAST/BUS. NAME', or alternatively, enter a percent sign (%) in the 'LAST/BUS. NAME' field to display all accounts.
Double-click the customer in the grid to add it and continue adding the customers frequently used by the employee at Point-of-Sale.
Highlight a selected account and click the 'Delete' button to remove it from the list.
Use the 'Up' and 'Down' buttons to order the rows, bringing the more important customers to the top of the list.
Check the 'Start POS in Catalog' field and when a customer is selected from the 'MY ACCOUNTS' list at Point-of-Sale, the CATALOG screen will open instead of the Invoice Point of Sale screen.
3. Customer information displays.
About Customer Information
When the customer is found, depending on the setup, customer fields are enabled and customer information displays in the upper sections of the screen.
Invoice Screen Title
Once a customer has been selected, the screen title text changes.
Display Account Number
- Checked - For commercial accounts, displays the account number in the screen title text for the Invoice Point-of-Sale screen. For retail customers, the account number associated with the customer record displays in the screen title text for the Invoice Point-of-Sale screen.
- Unchecked – Does not display the account number in the screen title text for the Invoice Point-of-Sale screen.
Note: If 'Use Account Codes' is checked on the A/R and Close Options screen, the 'Acct Code' displays instead of the account number. If the account's 'Acct Code' is blank, the 'Acct Number' displays.
Display Account Name
- Checked - For commercial accounts, displays the account name in the screen title text for the Invoice Point-of-Sale screen. For retail customers, the last name associated with the customer record displays in the screen title text for the Invoice Point-of-Sale screen.
- Unchecked – Does not display the account name in the screen title text for the Invoice Point-of-Sale screen.
Display Account Phone
- Checked - For commercial accounts, displays the account phone number in the screen title text for the Invoice Point-of-Sale screen. For retail customers, the home phone number associated with the customer record displays in the screen title text for the Invoice Point-of-Sale screen.
- Unchecked – Does not display the account phone number in the screen title text for the Invoice Point-of-Sale screen.


Optionally enter up to 20 alphanumeric and special characters in the 'PO' (customer purchase order number) field and/or 'MEMO' field that will be tracked with the invoice.
The '[1] CUST' and '[2] VEHICLE' tabs toggle between displaying customer information and vehicle information. The selection defaults to '[1] CUST' and displays:
- The customer's 'BILL TO' name, address, and 'PHONE' number for main wholesale accounts and the 'FIRST NAME', 'LAST NAME', address, and 'PHONE' for identified retail customers.
- The 'BILL TO' field name above the customer's name changes to 'AVL CREDIT' for main wholesale accounts and displays the amount the customer is able to charge.
- The linked RETAIL MAIN account's 'BILL TO' name, address, and 'PHONE' number displays for unidentified retail customers.

The '[1] CUST' and '[2] VEHICLE' tabs toggle between displaying customer information and vehicle information.
- Vehicles are normally saved when used for a catalog lookup.
- Click the 'VEHICLE' button to open a window listing all vehicles already set up for the customer. Double-click a vehicle to use it for catalog lookup for the current invoice. Click the 'ADD' button to manually add a vehicle or highlight a vehicle and click the 'EDIT' button to edit an existing vehicle.

- If a known vehicle does not display in the list, check the 'SHOW INACTIVE' setting to see if the vehicle is no longer used by the customer.
Select the 'YEAR', 'MAKE', 'MODEL', and 'ENGINE' and click the 'ACCEPT VEHICLE' button. The selected information displays in the center grid and cannot be edited. To edit a value, use the upper 'YEAR', 'MAKE', 'MODEL', and 'ENGINE' fields and again, click the 'ACCEPT VEHICLE' button.
If the vehicle is something besides a car or truck, such as a tractor or a lawn mower, check the 'CUSTOM VEHICLE' field and the 'YEAR', 'MAKE', 'MODEL', and 'ENGINE' will gray out and become unavailable. The center fields in the grid are available to manually enter the 'YEAR', 'MAKE', 'MODEL', 'ENGINE', and 'VEHICLE'.
Optionally enter the:
- 'VIN'
- 'PLATE'
- 'PLATE STATE'
- 'COLOR'
'VEHICLE CONDITIONS' for a lookup may display.
If the vehicle is no longer used by the customer, uncheck the 'VEHICLE ACTIVE' setting and it will no longer be included in the customer's list. Inactive vehicles can be reactivated if needed.
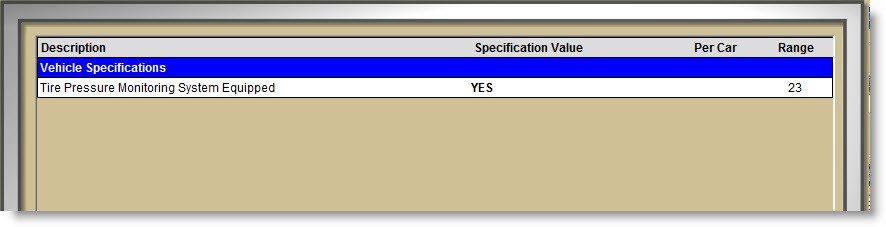
Click the 'SHOW SPECIFICATIONS' button to open a pop-up with the specifications to view/print.
Vehicles are saved for both commercial and retail customers, including unidentified retail customers regardless of whether the customer purchased something or not. However, vehicles cannot be added or edited from the 'VEHICLES' tab for unidentified retail customers.
When a vehicle is selected in Catalog lookup, and the 'CHANGE CUSTOMER' button is clicked, the vehicle is saved for the changed customer, even if it is an unidentified retail customer.
If a main wholesale customer has a 'DEFAULT SHIP TO' or a retail customer has a 'SHIP TO' address, it will display in the 'SHIP TO' section.

The 'SHIP TO' section displays:
The customer's 'DEFAULT SHIP TO' address if one is saved for main accounts only. If not, the 'BILL TO' name, address, and phone number display.
The customer's 'SHIP TO' address displays for identified retail cash customers if one has been set up. If not, the account's name, address, and phone number display.
The RETAIL MAIN account's 'BILL TO' name displays for unidentified retail customers.
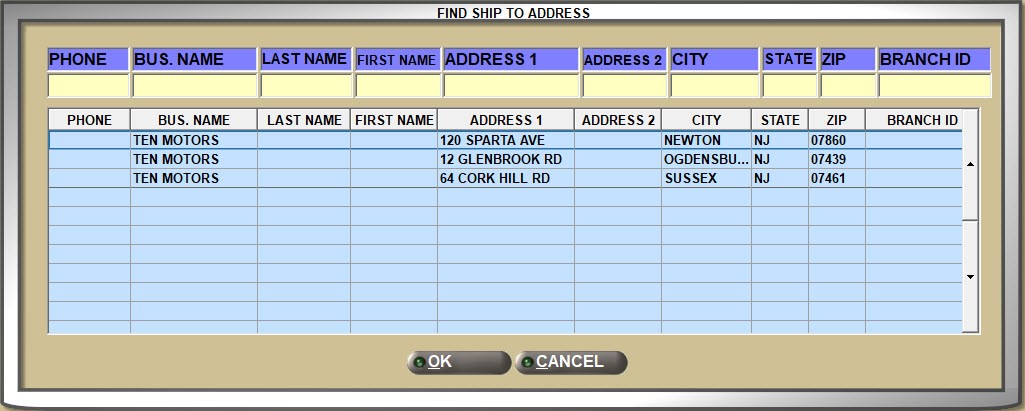
If the 'INVOICE DELIVERY SHIP BUTTON' User Security proc allows:
- Click the 'SHIP TO' button to open the 'FIND SHIP TO ADDRESS' window to select a 'SHIP TO' address to use for the current invoice.
- Click the blue grid area under the 'SHIP TO' button to open a 'SHIP TO ADDRESS' pop-up to enter or edit an address.
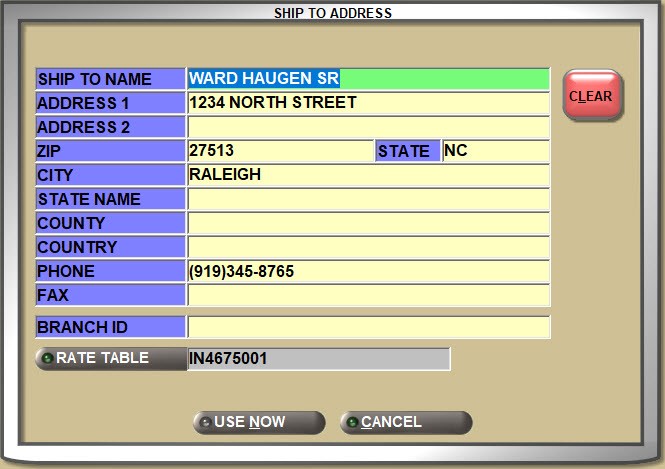
If an address is entered or edited, click the 'USE NOW' button to use the address for the current invoice only, or click 'SAVE' to save the address with the customer for future invoices for that 'SHIP TO'.
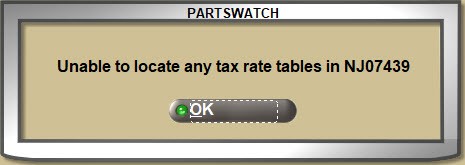
If the parts will be shipped to a different state than the selling store, the tax rate can be changed by clicking the 'RATE TABLE' button to display the 'BROWSE TAX RATES TABLES' window if the 'USE SHIPTO TAX TABLES' store setting is enabled.
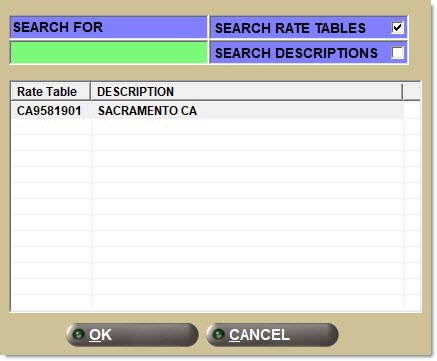
Select the 'Rate Table' and click 'OK' and the window closes. Click 'USE NOW' in the 'SHIP TO ADDRESS' window to apply the selected tax rate to the sale.
If a rate table is not found for the state, a prompt will open, however, the 'BROWSE TAX RATE TABLES' window still allows selection of a 'Rate Table'.
The customer's 'SHIP TO' address also displays in the 'FIND CUSTOMER' pop-up to assist in selecting the correct account.
For commercial customers only:
- With one or more 'SHIP TO' addresses saved, but none defined as the 'DEFAULT SHIP TO', by enabling the 'PROMPT FOR SHIP TO' setting, a prompt will display to choose a 'SHIP TO' address.

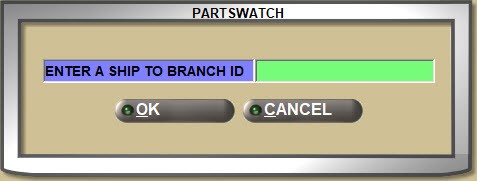
If 'SHIP TO BRANCH IDS' are used to make finding 'SHIP TO' addresses simpler, and if the 'PROMPT FOR SHIP TO BRANCH ID' setting on the account is enabled, a pop-up will open to capture the 'BRANCH ID' for the current sale.
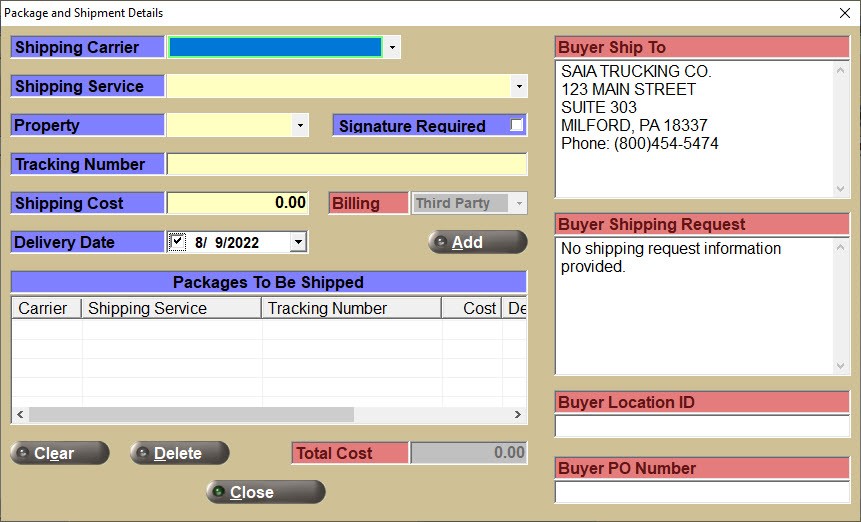
The 'SHIP' button to the right of the 'SHIP TO' field is grayed-out and unavailable until an item is added to the sales order. When enabled, click the 'SHIP' button to open the 'Package and Shipment Details' window used to capture information needed for manual shipping integration with national carriers (e.g. FedEx, UPS, etc.) This feature is used for EDI transmission only.
![]()
![]()
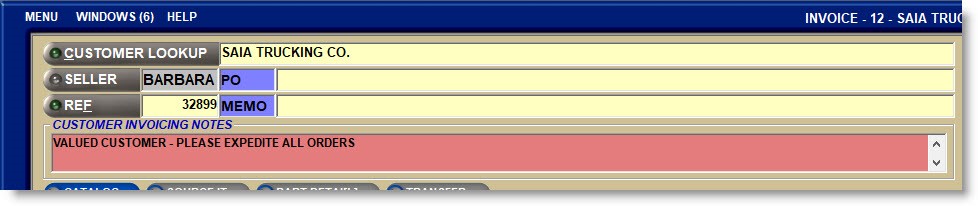
The customer's 'ACCOUNT NUMBER' or 'ACCOUNT CODE', name, and phone number display in the center-top of the screen border for all accounts, whether commercial or retail, to assist in identifying a sales order if more than one is open at the same time.

If customer account information is needed any time during a sale, clicking the 'VIEW CUSTOMER' button opens either the Account Entry screen for commercial customers, or the Retail Customer Entry screen for retail accounts, with the customer in focus. Closing the screen returns to the Invoice Point of Sale screen with the same customer still in focus.
If, at any time during the sale, it is discovered that the wrong customer is in focus, clicking the 'CHANGE CUSTOMER' button allows the selection of a new customer. If any items are on the sales order, pricing is re-calculated for the new customer.
When a vehicle is selected in Catalog lookup, and the 'CHANGE CUSTOMER' button is clicked, the vehicle is saved for the changed customer, even if it is an unidentified retail customer.
Some restrictions apply:
![]()
![]()
CUSTOMER INVOICING NOTES / Account Note
If an invoice note has been entered under the 'NOTES' button on the Account Entry screen, the note will display on the Invoice Point of Sale screen and print on the invoice if the 'PRINT' setting is checked and the invoice form is set up to print the note.
The 'eDELIVERY' field displays above the sell line if the 'DISPLAY eDELIVERY' setting is enabled for the store.
The 'eDELIVERY' field defaults to checked if the 'eDELIVERY' setting on the Account Entry screen is checked for the customer in focus. If the field is unchecked for the customer, then the 'eDELIVERY' field on the Invoice Point of Sale screen defaults to unchecked.
Either way, the field is available for edit.
eDELIVERY is subscription-based.
Partnerships are used to establish special pricing for retail customers on a per-sale basis and can be used for any of the store's customers, or used to give discounts to their customers or employees on a per-sale basis.
Any accounts that are used at Point-of-Sale to sell to customers that are identified with a partnership are setup with the 'ACCOUNT TYPE' of 'PARTNER' and the 'PAY TYPE' of 'CASH'. These accounts are not found from the 'CUSTOMER LOOKUP' field at Point-of-Sale and instead, are found from the 'PARTNERSHIP' button.
To start a Partnership sale, an identified retail customer must be in focus from the 'CUSTOMER LOOKUP' field on the Invoice Point of Sale screen.
Then, click the 'PARTNERSHIP' button and a window opens to find the correct account set up with the 'ACCOUNT TYPE' of 'PARTNER'.
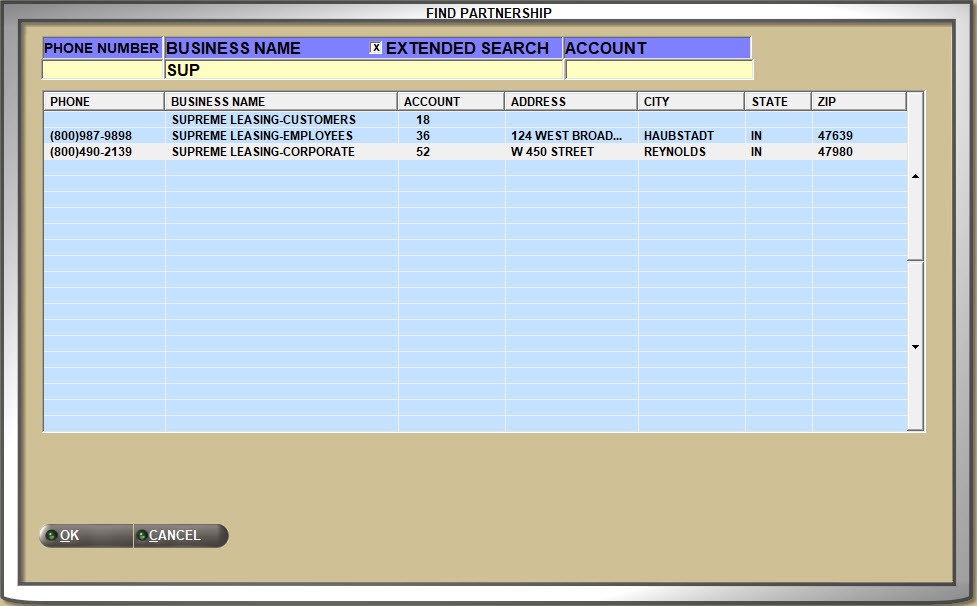
In the above example, a leasing company wants to be able to give discounted pricing not only for their customers who have contracts to maintain the vehicles during the lease, but for corporate-owned vehicles, as well as to allow a discount for their employees. In this case, three partnership accounts will be set up: one with pricing for the leasing company, another for their employee pricing, and yet another for their customer pricing for the length of the lease.
When the 'FIND PARTNERSHIP' window opens, the 'PHONE NUMBER', 'BUSINESS NAME' ('BILL TO'), or 'ACCOUNT NUMBER'/'ACCOUNT CODE' can be used to search for a partnership account. Only accounts with the 'ACCOUNT TYPE' of 'PARTNER' are found.
If an exact match is not found, click the 'EXTENDED SEARCH' field and enter as many characters of the 'BUSINESS NAME' that are known and all names that include those characters in the order they were entered will display. For example, enter ‘SJ’ and any partnership accounts with an "S" and then a "J" will display. The system ignores all characters between the characters entered.
Then, invoice as usual. The sale will get pricing from the selected 'PARTNER' account for the current sale only. Should the same customer buy from the store again, the 'PARTNERSHIP' must again be identified in order to get special pricing from the 'PARTNER' account.
Customer Profiles can be used to identify the retail customers using the Partnership account pricing. Any value can be set up as profile and the 'PARTNER' customers added to the profile. Each time a retail customer is linked to a 'PARTNERSHIP' account, the 'Profile' window will open to capture the required validation, for example, 'COMPANY ID', 'EMPLOYEE ID', 'DRIVERS LICENSE', etc.
Customer profiles used for partnerships are not reported from the application, but are available for "backend reporting".
Sales reporting tracks sales for the 'PARTNER' accounts or the retail accounts as needed.
4. Alerts or warnings may display.
A warning may display, invoicing may be prohibited, or require manager authorization if the account is 'OVER THE CREDIT LIMIT' or 'PAST DUE'.

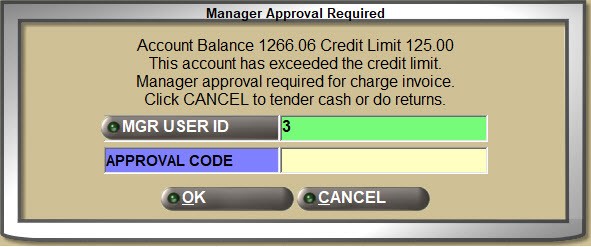
The warning will also display in the lower screen border.

If the customer is set to 'LOCKOUT', then an invoice cannot be created for sales or returns, however, payments can still be accepted as an ROA or posted in the POST ENTRIES screen.
Note: Control settings and securities control what can and cannot be done at Point-of-Sale.
- Per employee: EMPLOYEE SETUP and USER SECURITY SETUP control whether a feature is hidden, grayed-out and unavailable, or available, depending on the employee creating the invoice.
- Per transaction: Manager OVERRIDE SECURITY SETUP controls whether a feature is allowed, not allowed, or only allowed with manager authorization.
Selling Parts
5. The seller is tracked for the sale.
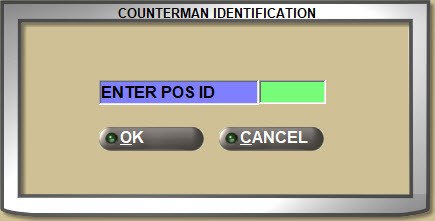
Once a customer has been selected, depending on the 'SELLER CHANGE' setting:
- A 'COUNTERMAN IDENTIFICATION' pop-up opens to allow entry of the unique 3-character 'POS ID' tracked as the 'SELLER' who created the sale and return tickets.
- The logged in 'SELLER' is tracked unless optionally changed.
- The 'COUNTERMAN IDENTIFICATION' pop-up does not open and the logged-in employee is tracked for the sale.
6. Start a new sales order or continue an existing one.
If a "sales order", also called a "ticket" or an "open reference" in PartsWatch, was previously started, click the 'REF' button to find and continue working on it. Parts can be added and deleted from an open sales order until it is finalized as an invoice.
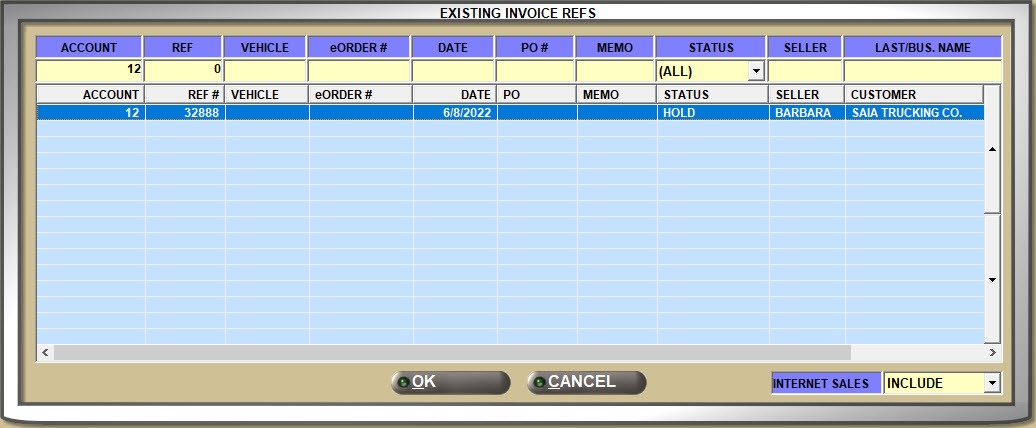
If the 'AUTO SHOW ACCT REFS' setting is enabled, if one or more open references exist for the customer in focus, a pop-up will display to select one and continue the sales order or to cancel and start a new ticket.
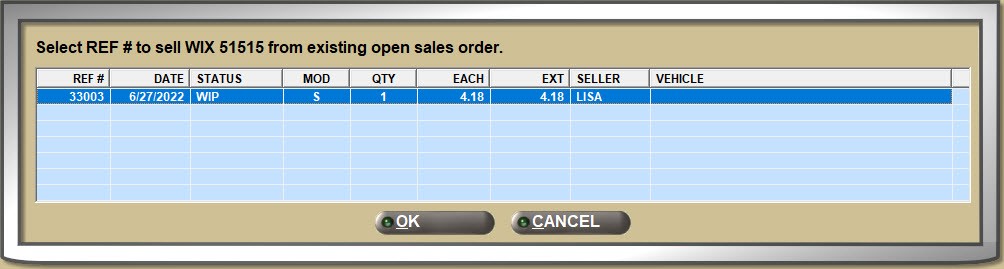
If the 'ALERT IF PART IS ON EXISTING OPEN REF' setting is enabled, a pop-up will open when a part is added to the sell line that already exists on an open sales order.
7. The cursor moves to the sell line.
About the Sell Line
![]() Selling Parts 1 of 4 - 6 minutesSelling Parts 1 of 4 - 6 minutes
Selling Parts 1 of 4 - 6 minutesSelling Parts 1 of 4 - 6 minutes
![]() Selling Parts 2 of 4 - 6 minutesSelling Parts 2 of 4 - 6 minutes
Selling Parts 2 of 4 - 6 minutesSelling Parts 2 of 4 - 6 minutes
![]() Selling Parts 3 of 4 - 4 minutesSelling Parts 3 of 4 - 4 minutes
Selling Parts 3 of 4 - 4 minutesSelling Parts 3 of 4 - 4 minutes
![]() Selling Parts 4 of 4 - 3 minutesSelling Parts 4 of 4 - 3 minutes
Selling Parts 4 of 4 - 3 minutesSelling Parts 4 of 4 - 3 minutes
Parts are added for sales and returns on the “sell line” in the center of the Invoice Point of Sale screen.
By default, the cursor will be positioned in the 'LINE' field, however, by EMPLOYEE SETUP, the cursor will be positioned in the 'MOD' (modifier) or the 'PN'/'SKU'/'UPC' (part) field instead.
Each field can be clicked with the mouse, or the 'Tab' or 'Enter' keys can be used to move the cursor to each field on the sell line.
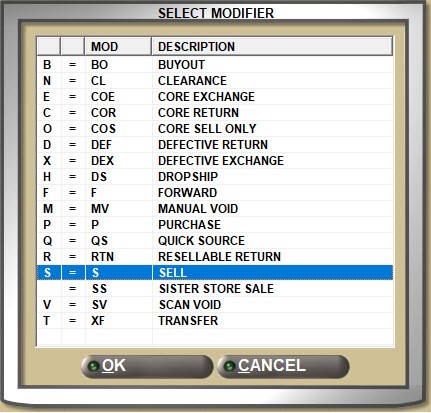
The 'MOD' field identifies the type of invoice and can be changed to other types of sales or to part or core returns.
The system defaults to start a sales invoice using the ‘S’ SELL modifier.
Click the 'MOD' button to open the 'SELECT MODIFIER' window to select a modifier or enter the modifier character "hot key" in the 'MOD' field to use that modifier.
Sell Modifiers
S = S SELL
Used to sell a part. Affects both stock and sales histories.
B = BO BUYOUT
Used to sell a part with insufficient sell quantity through sourcing. Affects sales histories. Does not affect stock quantities.
N = CL CLEARANCE
Used to sell out parts. Affects stock quantities. Does not affect sales histories.
H = DS DROPSHIP
Used to sell a part with insufficient sell quantity through sourcing without affecting sales histories or stock.
F = F FORWARD
Used to sell a part with insufficient sell quantity without affecting sales histories or stock, and without going through sourcing.
P = P PURCHASE
Used to sell a part with insufficient sell quantity without sourcing. Affects part histories. Does not affect stock quantities.
Q = QS QUICK SOURCE
Used to sell a part when the part is known to have insufficient sell quantity at the time it is entered on the sell line.
Primarily used when the 'USE QUICK SOURCING' setting is disabled. Selecting the QS QUICK SOURCING modifier before adding a part with insufficient quantity to the sell line forces the 'INSUFFICIENT QUANTITY-SOURCING' window to open to source the part using the BO BUYOUT modifier.
Multi-Store Sell Modifiers
SS = SS SISTER STORE
For multi-store environments, used to sell from a sister store.
The 'SISTER STORE SALE' setting determines the sister store functionality in the 'INSUFFICIENT QUANTITY - SOURCING' (Quick Sourcing) window:
- 'Never' - (Default) Sister store functionality is not enabled.
- 'By Default' - For stores that rarely or never use sourcing. Sister store selling functionality is enabled and a sale with insufficient sale quantity defaults to sourcing from a sister store. The 'SS' checkbox in the Quick Sourcing window defaults to checked, and, unless manually unchecked, the part will be sold from the sister store.
- 'Optional' - For stores that more often source items. Sister store selling functionality is enabled and a sale with insufficient sell quantity defaults the 'SS' checkbox to unchecked in the Quick Sourcing window. The 'SS' checkbox can be edited per sale and unless checked, Quick Sourcing behavior will be followed.
The following is an example of the 'INSUFFICIENT QUANTITY - SOURCING' window (Quick Sourcing) with the 'SISTER STORE SALE' setting set to 'BY DEFAULT'.

T = XF TRANSFER
Used to track sales for parts with insufficient sell quantity as "transfers" in order to report them separately from regular sourced sales.
Core Modifiers
E = COE CORE EXCHANGE
Used to sell a part and return the core at the same time.
Note: The COE CORE EXCHANGE modifier is not available for sales with customer backorders.
C = COR CORE RETURN
Used to return a core.
O = COS CORE SELL ONLY
Used to sell a core.
When a core is sold, at the time of invoice finalization, the system checks open CORE (or BATTERY if the 'BATTERY MANIFEST ACTS AS' field is set to 'CORE') and if the core is found, it is removed from the manifest. If the core is not found, the sale continues without adjusting a manifest.
Return Modifiers
D = DEF DEFECTIVE RETURN
Used to return a defective / warrantied part.
R = RTN RETURN
Used to return new, resalable parts.
X = DEX DEFECTIVE EXCHANGE
Used to exchange a part that was defective for the exact same part, on the same sales order at Point-of-Sale.
Regardless whether the return is started from an invoice found in Invoice Image or the DEX DEFECTIVE EXCHANGE modifier is selected from the 'SELECT MODIFIERS' window, both the returned part and the new part are added to the invoice in one step, without having to return the defective part and reselling the exchanged part.
The exchange displays in the invoice grid as a single line item showing the S SELL modifier, the return quantity, and the 'EACH' price from the original sale. The invoice 'TOTAL' is '0.00'.
Note: The modifier will not be available if the 'ALLOW SALES AND RETURNS ON THE SAME INVOICE' is checked for the account.
Void Modifiers
M = MV MANUAL VOID
Used to void a line item, the same way pressing the 'Del' (delete) key works.
V = SV SCAN VOID
Used to void scanned items.
Change the modifier if needed, or depending on where the cursor is positioned, enter a 'LINE' code or part number and press the 'Enter' key.
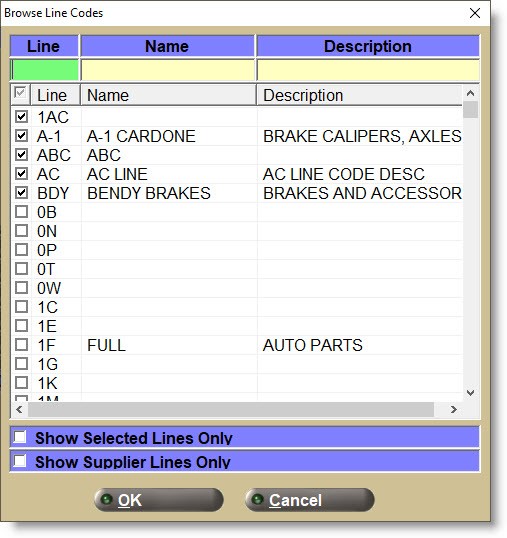
Enter up to 3 alphanumeric characters, and depending on the value in the 'LINE CODE SETUP' field, special characters that represent the manufacturer of the part to be sold or returned. The system validates that the code exists in the file and if not, follows NIF part functionality.
To find a line code, click the 'LINE' button to open a browser window with all available Line Codes from the file listed.
Enter an asterisk (*) in the 'LINE' field and press the 'Enter' key to open the 'Line Item Note' window used to enter information about a part.
If the 'ATTACH POS NOTE TO LAST PART' setting is:
- Enabled, entering a note and answering 'OK' automatically attaches the note to the previous part added to the sales order.
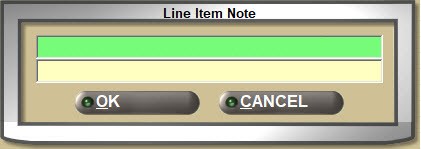
- Disabled, check the 'ATTACH NOTE TO THE FOLLOWING PART' field in the window and the part is attached to the next part added to the sales order. Leave the field unchecked, and the part is attached to the previous part instead. Enter a note and answer 'OK' and the system automatically attaches the note to the next part added to the sales order.
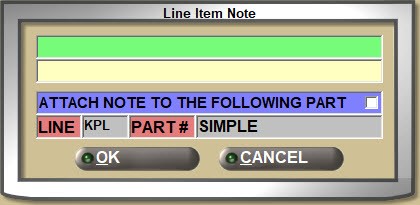
Either way, up to 2 rows of 40 characters, including spaces, can be entered and displays in the invoicing grid and prints on the invoice if the form allows.
Voiding a part with a line item note attached also voids the associated line item note. However, voiding a line item note that is attached to a part only removes the note and does not void the part.
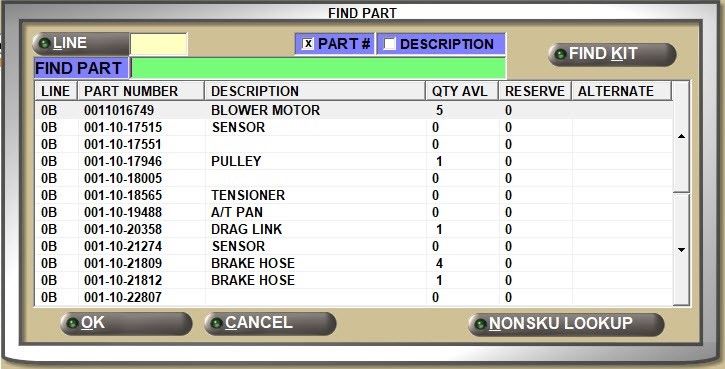
With or without a 'LINE' selected, enter a part number or click the 'PN/SKU/UPC' button to open the 'FIND PART' window to search for a part number.
If a Part Number is entered without a Line Code, and the part exists under multiple line codes, the 'Available Matches' window opens to select the correct one.
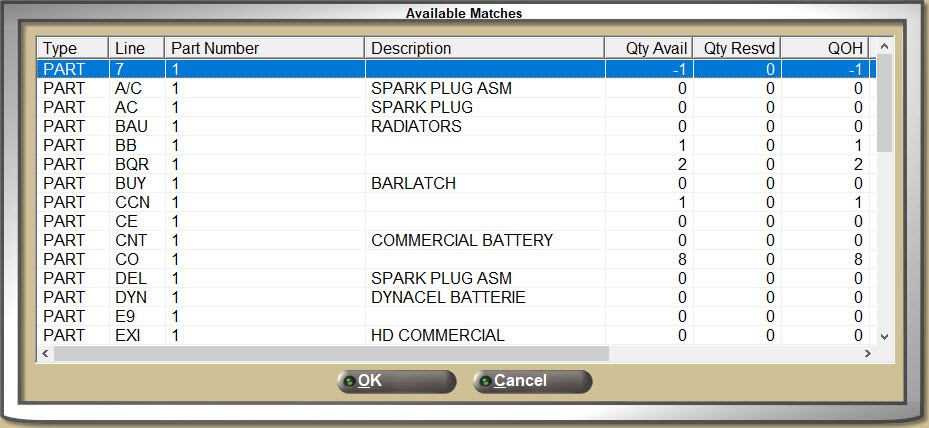
Parts from both the store's parts table and the nonSKU table display in alphabetical order by line code. If a part is not selected from the 'Available Matches' window and the 'Cancel' button is clicked, the 'LINE' field is system-populated with the designated 'NIF LINE CODE' and the user-entered part number as a write-in part.
When a UPC is identical to the part number, the 'Available Matches' window does not display. Instead, the part displays on the 'SELL' line.
Enter a part number in the 'LINE' field and if the part exists in a single line, both the 'Line' and the 'Part Number' will display. If it exists in multiple lines, the 'Available Matches' window displays with parts from both the store's parts table and the nonSKU table, in alphabetical order by line code and indistinguishable from each other.
If no matches are found or if 'Cancel' is clicked instead of selecting a part, the 'Available Matches' window closes and if the 'PROMPT TO ADD BARCODES' setting is enabled, the system prompts to add the barcode.
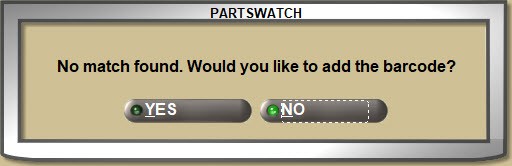
Answer 'YES' and the UPC Setup screen opens to enter the barcode.
If the setup is disabled, the 'LINE' field is auto-populated with the 'NIF LINE CODE' setup and the user-entered part number as a write-in part.
When a part is entered on the 'SELL' line, special characters do not have to be entered since the system does special character stripping. For example, if part number 10-1236 is entered as 101236, the part will be found and correctly displayed as 10-1236.
Barcode UPCs, SKUs, ALIAS, and OEM numbers such as GM and Motorcraft long numbers can be set up on the UPC Setup screen and if scanned or entered at Point-of-Sale, the part number will be found and displayed. If the 'PRINT ON INVOICE' setting is checked in the UPC Setup screen, the UPC, SKU, ALIAS, or OEM number will print on the invoice instead of the part number.
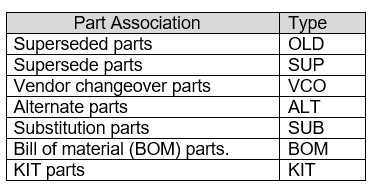
When the part entered on the sell line at Point-of-Sale has one or more replacement parts, they display with their quantity available for information or selection. Replacement parts are set up on the PART ASSOCIATION SETUP screen.
If the part number entered on a sales order has one or more replacements, then the replacements display either in a pop-up or in a grid on the Invoice Point of Sale screen for information or selection depending on the following settings:
- 'PROMPT FOR ALTERNATE PARTS'
- 'PROMPT FOR SUBSTITUTION PARTS'
- 'PROMPT FOR SUPERSEDE/VCO PARTS'
- 'PROMPT FOR SUPERSEDED PART WITH QTY'
If one or more of the above settings are enabled, then when a part with an alternate, a supersede, or a VCO is entered for a sale, a window will open with the replacements. If not enabled, any alternate, supersede, or association parts will display below the 'DESCRIPTION' field for viewing and/or selecting.
For convenience, the 'PROMPT FOR KITS IF PART IS COMPONENT' setting determines whether KIT/BOM parts display in the 'Replacement Parts' pop-up if the part entered on the 'SELL' line is a component of an existing KIT or BOM.
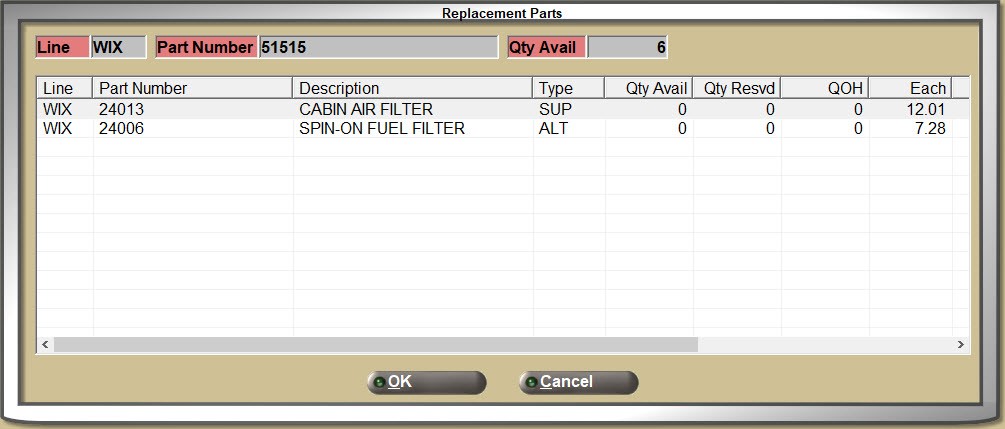
Depending on parts set up and the above settings, the 'Replacement Parts' pop-up will display the 'Line', 'Part Number', part 'Description', as well as the 'Type' of part:
The 'Qty Avail' (quantity available), 'Qty Resvd' (quantity reserved), 'QOH' (quantity on hand), and the 'Each' price also display. KIT parts display 'N/A' for the quantity available.
Optionally double-click an entry to select that part for the sale instead of the replaced part.
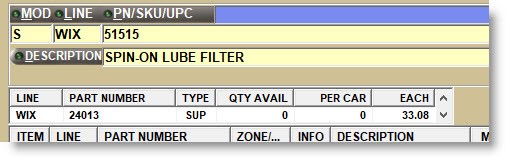
If none of the above settings are enabled, then any alternate, supersede, or association parts will display below the 'DESCRIPTION' field. The grid displays the 'LINE', 'PART NUMBER', 'TYPE', 'QTY AVAIL' (quantity available), 'PER CAR' value, and 'EACH' price.
Use the small up/down arrows to view additional replacements if there are any, and optionally double-click a selection to sell that part instead of the original part on the sell line.
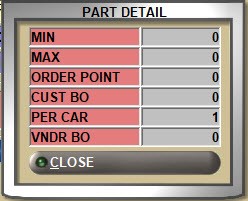
With a part on the 'SELL' line, click the 'PART DETAIL' button to open a pop-up with limited part information. Press the 'Enter' key or click the 'CLOSE' button to close the pop-up.
If the 'PART DETAIL POPUP' setting is enabled, the 'PART DETAIL' pop-up opens automatically for each part entered on the 'SELL' line. When the part is sold or canceled, the pop-up closes automatically.
If POS Reminders are set up, then a pop-up opens to remind the seller to ask certain questions or offer related items or information about the part entered on the sell line.

POS Reminders are set up from the 'POS REMINDERS' button under the 'Inventory Options' section of the SYSTEM GENERAL SETUP screen.
Enter a reminder in the blank field above the grid and press the 'Enter' key. The system will save the reminder with the next consecutive ID number. The cursor will return to the blank field to enter the next reminder.
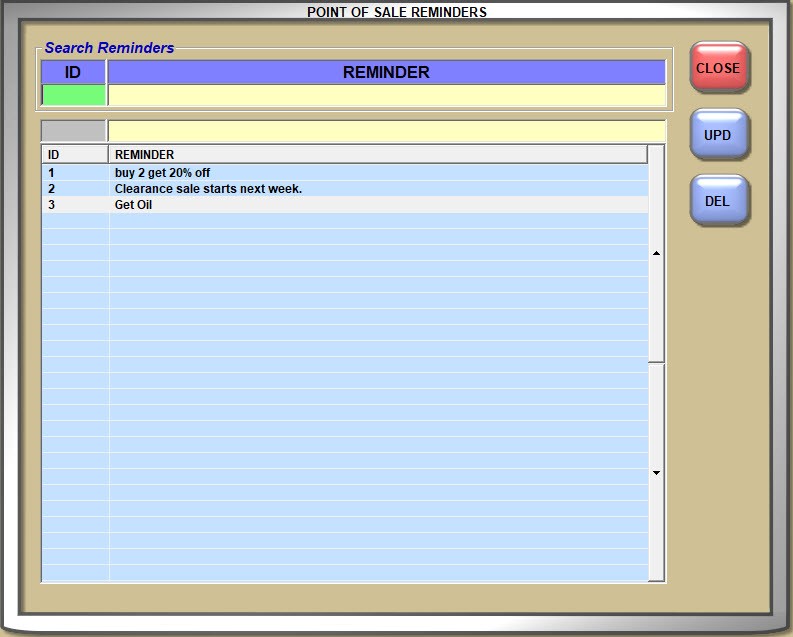
An unlimited number can be created, each with up to 100 characters.
The 'ID' and 'REMINDER' fields at the top of the window are used to find a reminder and uses type-ahead functionality to show results without having to type the full text.
Clicking the 'ID' and 'REMINDER' column headers in the grid re-sorts the reminders to assist in finding the right one.
Reminders can be edited by double-clicking the row in the grid and pressing the 'Enter' key when finished to save the changes.
Highlight a reminder and click the 'DEL' button, answer 'YES' to the "Are you sure you want to delete this reminder?" prompt and the reminder will be removed from all parts with that reminder. If a deleted reminder is re-entered, it must be re-added to any parts it was previously linked to.
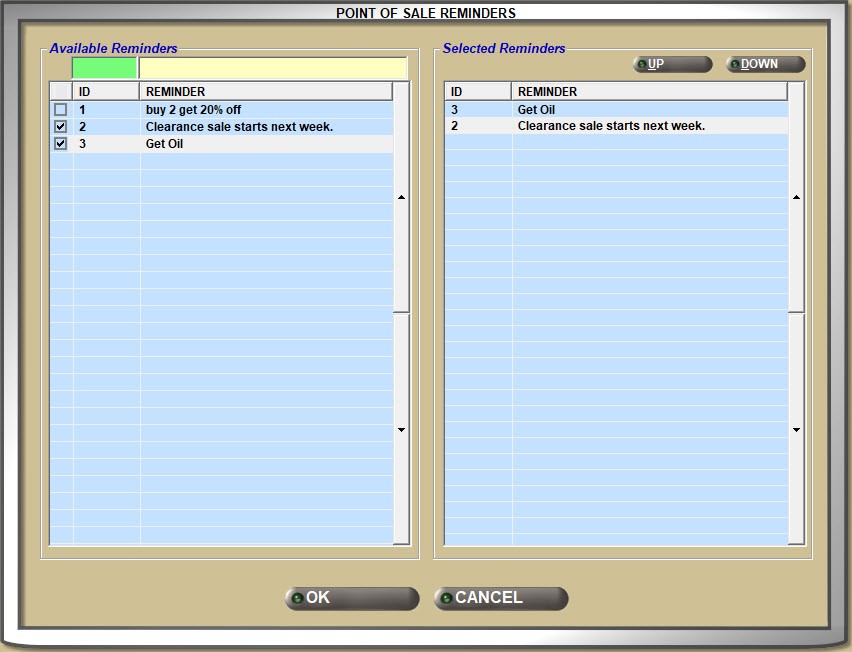
Then, per Part, click the 'POS REMINDERS' button on the Part Entry screen and add as many reminders as needed.
Once reminders are set up, per part, on the Part Entry screen, click the 'POS REMINDERS' button and check one or more reminders in the 'Available Reminders' section to copy those reminders to the 'Selected Reminders' section. Only the 'Selected Reminders' will display at Point-of-Sale for the part.
Use the small UP and DOWN arrows to order the reminders for display. Click the 'OK' button to save the reminders per part.
If a POS reminder is assigned to the part, the 'POS REMINDERS' pop-up automatically displays when the part number is entered at Point-of-Sale.
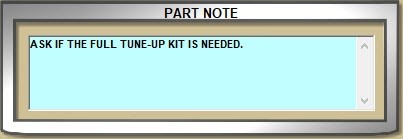
If the 'PART NOTE POPUP' setting is enabled and a PART NOTE is entered on the Part Entry screen under the 'NOTES' button, then a pop-up will open displaying the part note each time the part is entered on the sell line, and will print on the invoice if the 'PRINT' setting is checked on the note. The pop-up closes when the 'Enter' key is pressed or the part is canceled.
Part notes print on the invoice if the 'PRINT' setting is checked when entering the note and the fields are enabled on the invoice form.
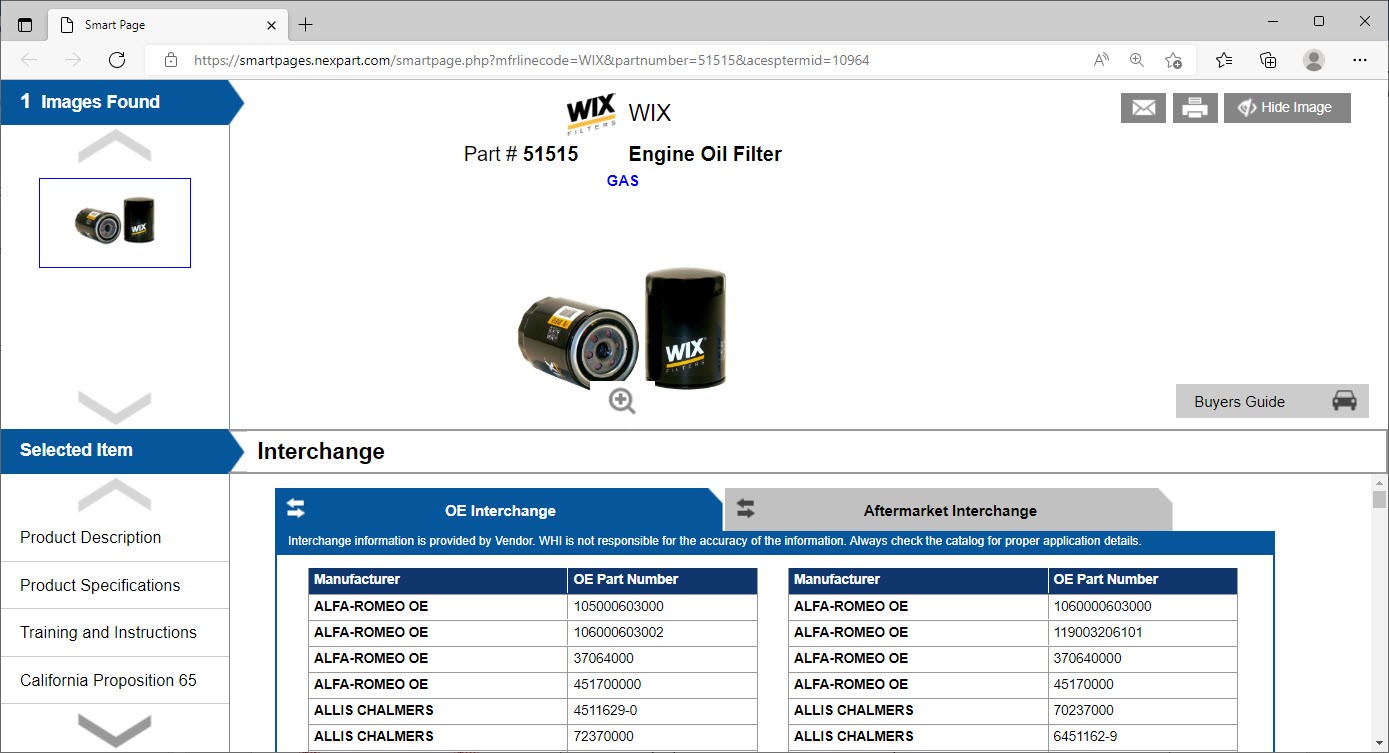
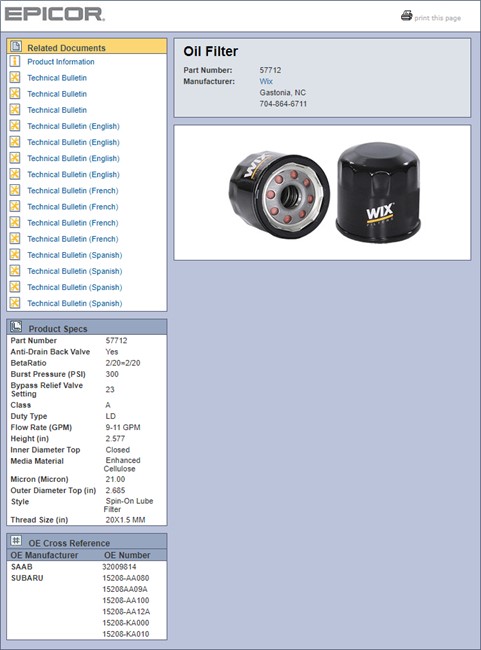
If the Smart Page link displays, then clicking the link opens a browser with the manufacturer part information.
If a link is not found, a pop-up will display stating that the page is not found.
If the 'DISPLAY LAST SALE WITHIN X DAYS' setting is set to a value between 1 and 99, a pop-up displays showing information from the last sale of the entered part, to the account in focus, in any store, provided there was a sale within that many days back from the current date.
For information only. The pop-up will automatically close when the part is sold or canceled.

With a part in the 'PN/SKU/UPC' field, the 'DESCRIPTION 1' from the part table displays in the 'DESCRIPTION' field if one exists. Depending on USER SECURITY SETUP, the description can be added if one doesn't exist or edited for both stocked and/or non-stocked parts.
Click the 'DESCRIPTION' button to open the 'FIND PART' window to search for a part by description.

If the 'Account Type' is 'Commercial', and the 'Display Credit Info on POS Screen' is checked on the Account Entry screen, and the 'Display Credit Info on POS Screen' is checked on the System Invoice Options screen, the application displays the customer's 'Available Credit', 'Credit Balance', and 'Credit Limit' fields, below the 'Description' button.

If the 'Account Type' is not 'Commercial', the application does not display any customer credit information.
If the 'Display Credit Info on POS Screen' is checked on the System Invoice Options screen and the 'Display Credit Info on POS Screen' is unchecked on the Account Entry screen, the application does not display any customer credit information.
Lost sales should be tracked each time a customer does not buy the item they came for. Lost sales also means lost revenue.
Lost sales can be manually recorded, and by setup, lost sales can be automatically recorded each time a part is entered on the sell line or the sourcing screen and the 'Esc' key is pressed, or the sales order is canceled for sales only. Lost sales are not recorded for returns.
To manually track lost sales:
- Click the 'LOST' field with the mouse and enter the quantity lost.
- 'Tab' from the 'PN/SKU/UPC' field or 'Shift'+'Tab' from the 'SELL' field to the 'LOST' field and enter the quantity lost.
- Enter an 'L' in the 'SELL' field and press the 'Esc' key. The lost quantity displays in the 'LOST' field.
- Enter an 'L' in the 'SELL' field and press the 'Enter' key twice. The lost quantity displays in the 'LOST' field.
To track a lost sale and to sell a quantity of the same part, after entering the 'L' and pressing the 'Enter' key, the cursor remains in the 'SELL' field with a quantity of '0'. Enter the 'SELL' quantity (without an 'L') and press the 'Enter' key again and the part moves to the invoice body grid with both the lost and the sell quantity.
By entering an 'L' in the 'SELL' field and pressing either the 'Esc' or 'Enter' key, the program uses the value of the 'POS DEFAULT SELL QTY' setting as the amount lost. If set to 'PER CAR' and that value is '0', the application defaults the lost quantity to '1'. If a value other than 'PER CAR' or '1' is lost, enter the quantity of the 'SELL' field followed by an 'L'. For example, enter '2L' to track a lost sale quantity of 2.
If the 'LOST SALES ON Invoice Point of Sale screen' setting is enabled, recorded lost sales will display in the invoicing grid. If no other parts are in the lower grid and the 'Esc' key is pressed or the 'CANCEL ORDER' button clicked to void the sales order, the screen is reset without printing the document.
To automatically track lost sales:
Depending on the 'TRACK ESC AT SELL QTY FIELD AS LOST SALE' setting, pressing the 'Esc' key at the 'SELL' field records the sell quantity as lost.
Depending on the 'TRACK CANCELED ITEMS AS LOST SALES' setting, lost sales will be tracked for canceled items.
Tracking Lost Sale Reason Codes
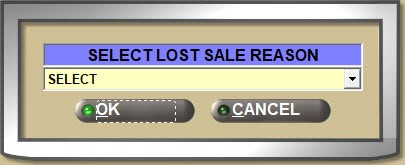
If lost sale 'REASON CODES' are set up, regardless how lost sales are recorded, pressing the 'Esc' or 'Enter' key opens a pop-up to capture the reason the lost sale was lost. A reason must be selected or the lost sale is not recorded.
Reason codes can be reported on the Lost Sales Report on the LOST SALES REPORT screen.
Processing Lost Sales
To process a recorded lost sale, the sales order must be printed as a 'WIP', 'PICK', 'PACK', 'DEPOSIT', 'QUOTE', or 'INVOICE'. Otherwise, the sales order must be canceled, or the 'PROCESS' button must be clicked.
If the 'L' is entered in the 'SELL' field and the 'Enter' key is pressed, canceling the part entered in the grid will not record another lost sale, nor will clicking the 'PROCESS' button after adding a lost sale with the 'L' modifier.
Lost sales can also be recorded from the CATALOG lookup screen.
Lost sales will print or not depending on the value of the 'LOST SALES ON INVOICE', 'LOST SALES ON PACK', and 'LOST SALES ON PICK' settings.
Reporting Lost Sales
Lost sales are tracked to the Lost Sales Report on the LOST SALES REPORT screen and the 'LOST SALES' field on the Part Entry screen at the time they are processed from Point-of-Sale.
Lost sales are tracked to the 'LOST SALES' field on the Part Entry screen for stocked parts.
Customer backorders can be manually recorded for sales with insufficient quantity that will be ordered for customers willing to wait.
Press the 'Enter' key at the 'PN/SKU/UPC' field and the cursor moves to the 'SELL' field with the quantity of ‘0’, ‘1’, or the 'PER CAR' quantity as set up in the 'POS DEFAULT SELL QTY' setting.
Until a part is entered, the 'SELL' field is labeled 'SCAN' to show the quantity that waill be sold if scanning is used to sell parts. However, as soon a Line or a Part Number is manually entered, the field label changes to 'SELL'.
When scanning parts, the click the 'SCAN' button ('Alt' + 'S' keys) before scanning, and the cursor will stop at the 'SELL' quantity field. This allows the sell quantity to be edited before adding the part to the invoice.
Part sell quantities are normally tracked as a whole number, however by 'QUANTITY DECIMALS' setup, the 'SELL' quantity will display as zero, 1 or 2 decimal places for parts entered on the sell line.
The decimal value will also display in the 'LOST', 'BKO', 'AVL QTY', 'QTY RESERVE', and 'ON ORD/INBOUND' fields.
The safety stock feature prevents stock from going below a specified quantity when filling a transfer PO or Sourced PO and helps control the minimum stocking level in the warehouse/hub store.
If the 'ENABLE SAFETY STOCK' setting is enabled, the warehouse/hub store only goes below the minimum stocking level when a direct customer sales order is involved at POS or via the Internet. The warehouse/hub store does not go below the minimum stocking level for stock replenishment or shelf sourcing purchase orders received from sister stores, or when initiating a "push" of merchandise to sister stores. To use this feature, the store must use the Order Point or Max value as its stocking level indicator and the Min value as its minimum "safety stock" level.
- For example, if a sister store sends a stock replenishment or shelf sourcing purchase order for a part with an Order Quantity of 5, and the original available stock in the selling store is 6 and the “safety stock” Min value is 2, then the revised available stock will be 4, so the Sell Quantity will be 4 with a Lost Sale or Back Order Quantity of 1.
- Using the same part as above, if the selling store created a new invoice to initiate a “push” of 6 units of this part to a sister store, and placed a Sell Quantity of 6 on the sell line, the system will prompt that the sale is not allowed.
- By comparison, if a customer had walked into the store to purchase 6 units of the same part, or a customer via the Internet ordered 6 units of the same part, or a sister store sent a customer sourcing purchase order with an order quantity of 6 for the same part, then “safety stock” rules will not be applied, so the original available stock of 6 would be used, and the Sell Quantity would remain 6.
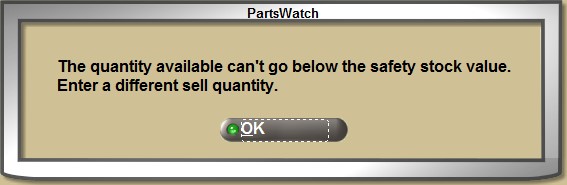
If, after applying the "safety stock" rule, the 'SELL' quantity would bring the store's available stock below the "safety stock" value, a prompt will display. Click 'OK' and focus will be returned to the sell quantity field to reduce the sell quantity or cancel the sale.
The quantity available in the store displays in 'AVL QTY' (quantity available) field for stocked parts.
For multi-store environments, if the 'SELL' amount is greater than the invoicing store's 'AVL QTY', the 'SHOW DC QOH AT POS' setting will provide the quantity available in the hub /sister stores for information only.
If the 'SHOW DC QOH AT POS' is set up as:
- 'ALWAYS', the hub/sister store numbers and quantities available display automatically.
- 'CONDITIONAL', a 'QOH' button displays and clicking it displays the hub/sister store numbers and quantities available.
- 'OFF', regardless whether or not the 'SELL' amount is greater than the invoicing store’s 'AVL QTY', the hub/sister store numbers and quantities available do not display.

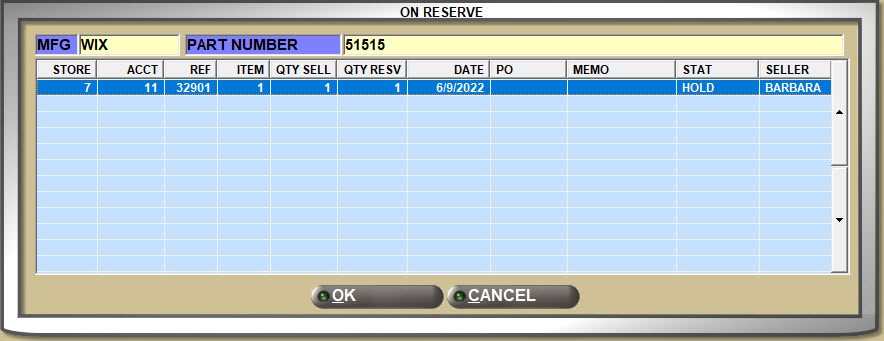
The 'QTY RESERVE' field displays the quantity of the part on the sell line that is reserved on other sales orders. This can be useful when a customer needs a part faster than the customer it is reserved for.

Click the 'QTY RESERVE' button to open a window listing the customers the part is reserved for.
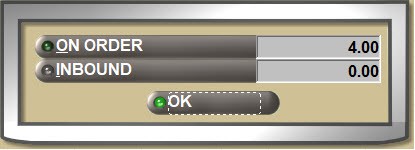
The 'ON ORD/INBOUND' field displays the quantity of the part on the 'SELL' line that is on a purchase order or is on an inbound shipment.
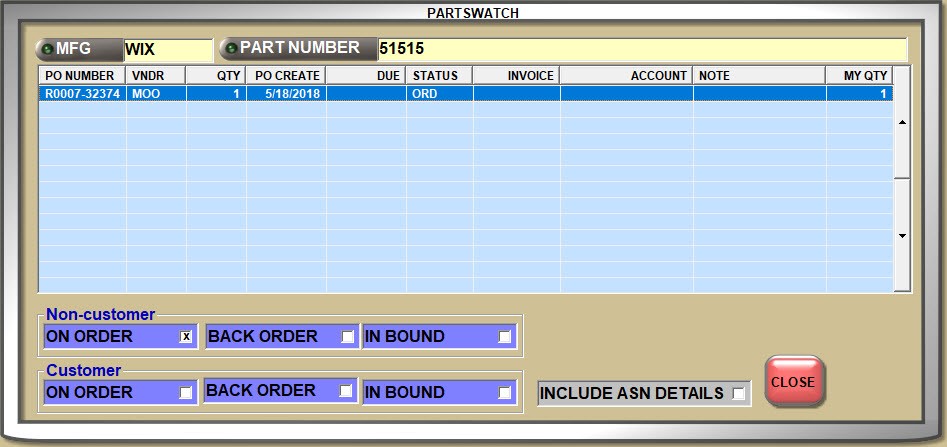
Click the 'ON ORD/INBOUND' button and click the 'ON ORDER' or 'INBOUND' button for additional information from a Purchase Order to know when the order is expected.
The window opens with either the 'ON ORDER' or 'INBOUND' information; however filters allow selection of the 'ON ORDER', 'BACK ORDER', or 'INBOUND' order information for stock as well as customer orders.
The 'MFG' and 'PART NUMBER' filters allow quick lookup of additional parts ordered.
About Pricing
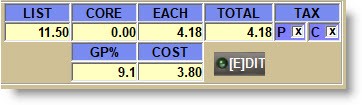
When a stocked part is added to the sell line, the 'LIST', 'CORE', 'EACH', and 'TOTAL' prices display as well as the part and core taxability and the 'GP%' and 'COST'. All pricing is controlled with User Security Setups.
Basic customer pricing is calculated from setups on the PRICE PLAN SETUP screen and can be affected by Promotions, Kits, Velocity Pricing, and Price Rounding, as well as manual editing at the time of the sale.
Core is tracked along with the part for lines identified as a 'CORE LINE' and when a part is entered for sale, the system will show both the core and the part price.
The store's 'COST' and 'GP%' display below the customer prices depending on COST SECURITY.
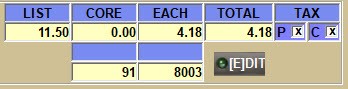
The field labels can be displayed or scrambled depending on the 'COST ON Invoice Point of Sale screen' setting on the EMPLOYEE SETUP screen, and the values displayed or hidden depending on the 'INVOICE COST ON POS SCREEN' and 'INVOICE GP% ON POS SCREEN' User Security Setup settings.
Depending on the:
- 'INCLUDE CORE IN POS GP%' setting, core is included in the GP% calculation or not.
- 'INCLUDE REBATE ADJUSTED COST IN POS GP%' setting, the rebate adjusted cost is used in the GP% calculation or not.
- 'INCLUDE DELIVERY SURCHARGE IN POS GP%' setting, delivery surcharges are included in the GP% calculation for selected 'ACCOUNT GROUP's or not.
Whether cost displays or not, depending on the 'COST AT POS' / 'CORE COST AT POS' settings, either 'CUR COST' or 'AVG COST / CORE COST' or 'CORE AVG COST' will be tracked for the sale.
If a percent is set up in the 'LOW COST MARGIN %' and 'HIGH COST MARGIN %' settings, when a price is calculated or manually edited for the part on the sell line, the system compares the percentage to the part price and if the margin is too low or too high and if the checkbox on the setting is:
- Checked, then the 'Manager Approval Required' pop-up will open to allow or not allow the sale.
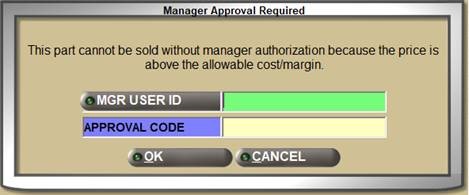
- Unchecked, then the sale is allowed without prompting or forcing a manager override.
If the 'WARN IF NO PRICING PLAN SETUP' setting is enabled, a warning displays when no pricing setups, including the account's default 'SELL LEVEL', are found in the pricing plan setups for both stocked and non-SKU parts.
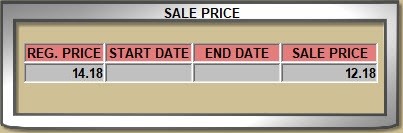
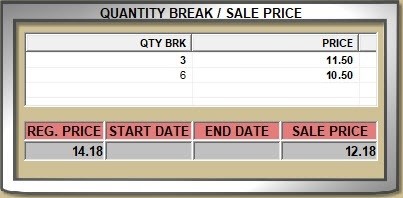
If the 'DISPLAY SALE DATE INFO AT POS' setting is enabled and Sale Date pricing has been set up, when a part that qualified for the special pricing is entered, a pop-up opens for information only.
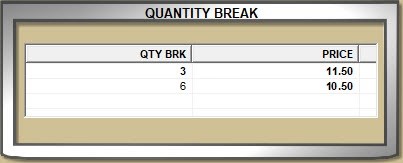
If Quantity Break pricing has been set up, the pop-up will display to select the quantity break pricing to use. Double-click a quantity break to sell the part with that pricing.
If both Sale Date and Quantity Break pricing have been set up for the part, a pop-up will display both.
The windows automatically close when the 'Enter' key or the 'Del' key is pressed at the 'SELL' field.
The 'Use Sourced Part Cost and GP% To Calculate Sell Price' setting affects the GP % and sell price of parts for accounts at Point-of-Sale.
Part pricing is normally tracked with 2 decimal places, however by 'PRICE DECIMALS' setup, the prices will display as 2, 3, or 4 decimal places for parts entered on the sell line.
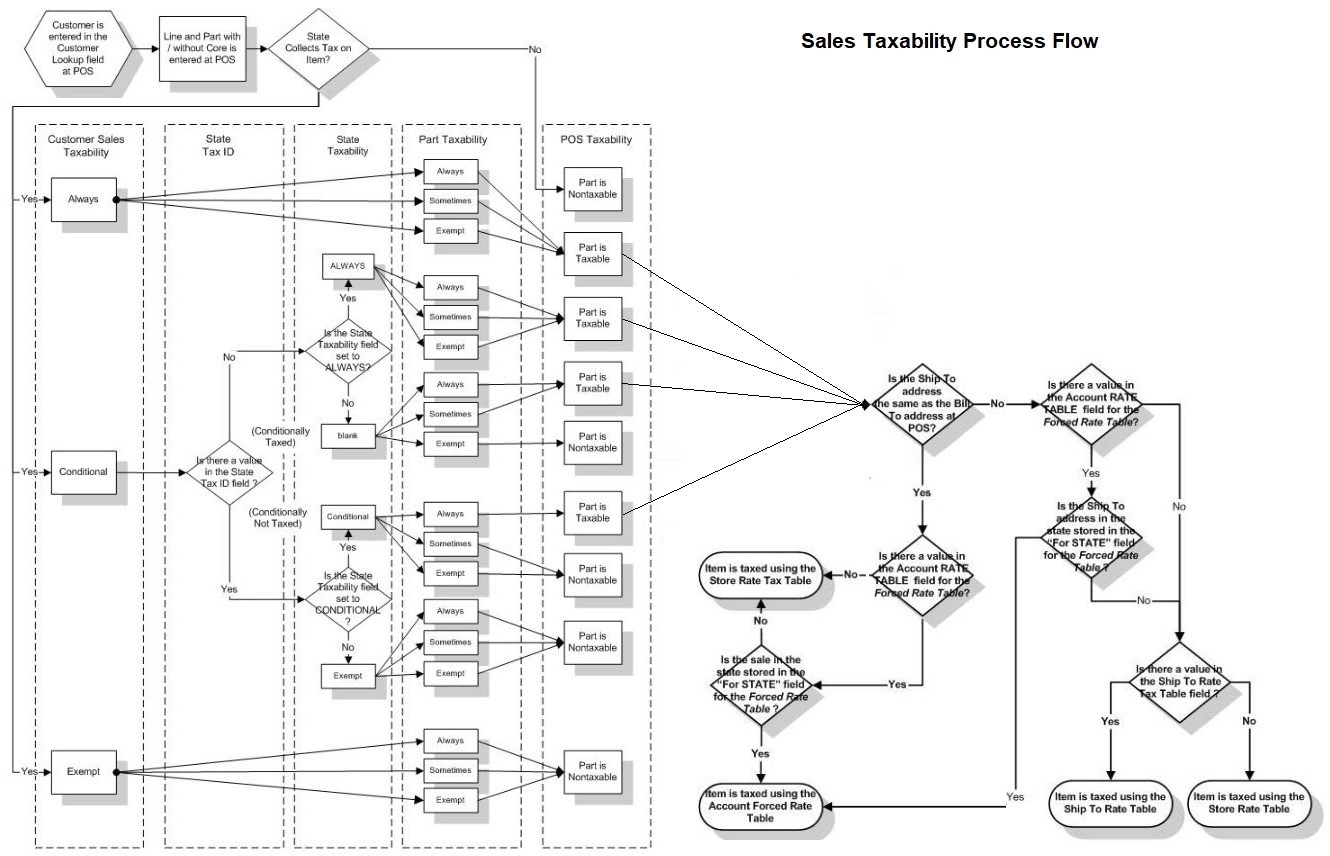
The 'STORE RATE TAX TABLE' setting identifies the tax rates used for the current store.
The 'P' for part taxability and/or the 'C' for Core taxability can be changed on the 'PRICE EDIT' window if needed.
With the part still on the sell line, if the price needs to be entered or changed, click the 'EDIT' button or press the 'F5' key to open the 'PRICE EDIT' window.

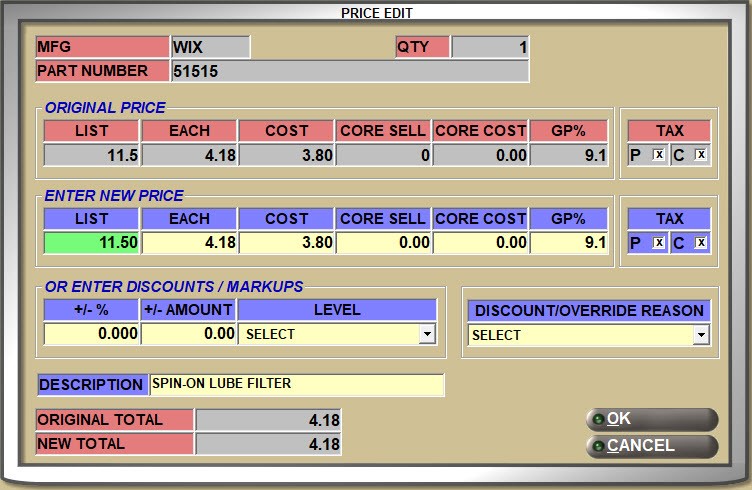
When a part is edited, also called a price "overstrike", 'OS' displays in red to the right of the 'EDIT' button to indicate a price was changed.

A rebate is a percent refunded to the store by the manufacturer if sales are at or below a certain profit margin. Therefore, the savings are passed on to qualified customers by providing an additional reduction in the cost of an item sold. Editing the sell price or GP% can have an adverse effect on the rebate eligibility.
With a part on the 'SELL' line, press the 'Ctrl' + 'D' keys or click the 'PRICE LOOKUP' button to open the 'Item Plan Price' window showing the pricing setups used to calculate the part's pricing.
When the 'Use Supplier Cost for Sourced Part Cost' and the 'Use Sourced Part Cost and GP% To Calculate Sell Price' settings are checked, and the 'Keep GP% For Sourced Parts' setting is also checked, the text in the pop-up reads as follows: "Sourced part pricing was applied to this item. The price was marked up from the sourced cost."
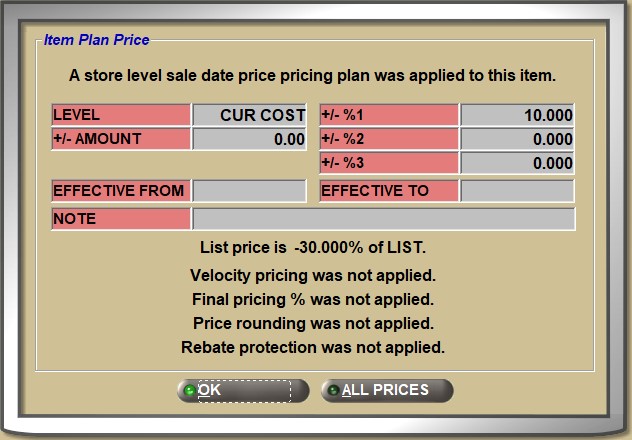
The PRICE PLAN SETUP screen pricing level-specific setup displays at the top of the window. Using the example "A store level sale date pricing plan was applied to this item" advises that a 'SALE DATE' setup from the 'STORE' level tab was used as the basis of the price calculation for the part.
Several setups from the PRICE PLAN SETUP screen display for information:
- 'LEVEL'
- '+/- AMOUNT'
- '+/- %1', '+/- %2', '+/- %3'
- 'EFFECTIVE FROM' / 'EFFECTIVE TO'
- 'NOTE'
- List Price Calculation
If any additional pricing setups are applied to the pricing calculation, the method is displayed.
- Velocity Pricing
- Final Pricing %
- Price Rounding
- Rebate Protection
If a promotion has been applied to the part, when recalled to the 'SELL' line, instead of displaying 'Item Plan Price' the 'Ctrl' + 'D' pop-up will display:
- 'Item Plan Price - Before Promotion' at the top of the window, and the top half of the pop-up will display the pricing plan information before the promotion was applied.
- The bottom half does not include any promotion information.
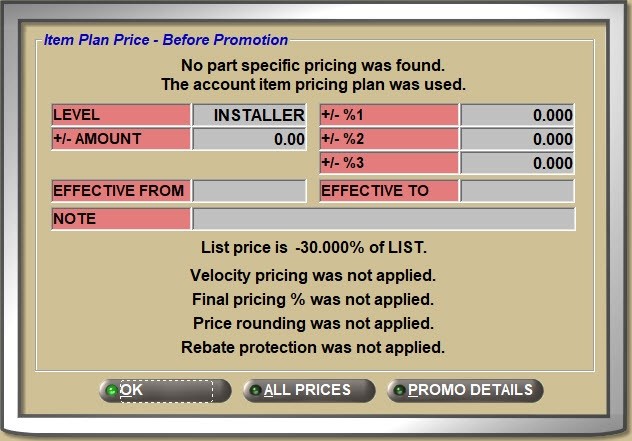
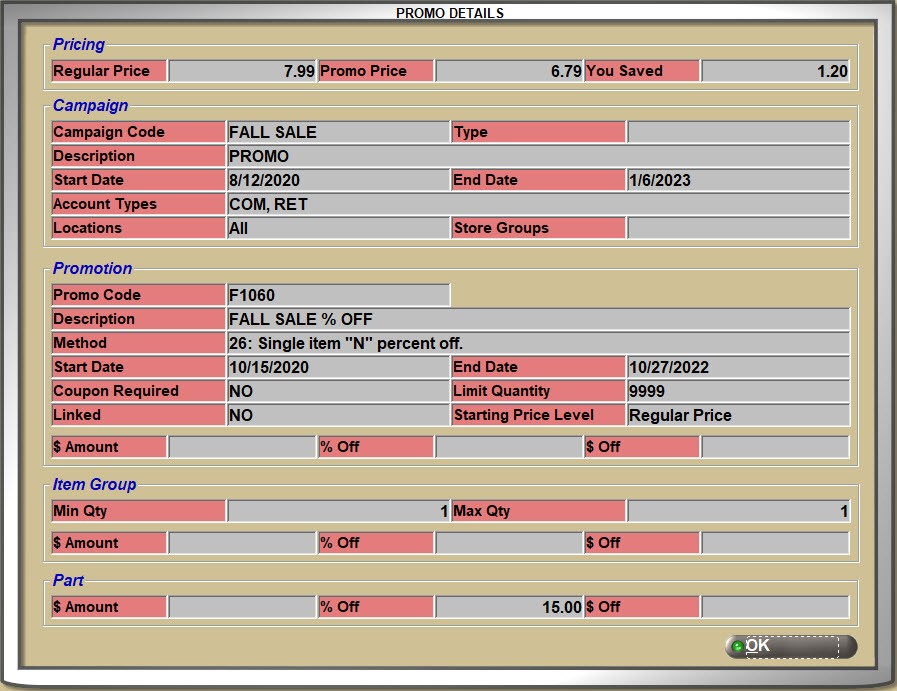
Click the 'PROMO DETAILS' button to display the 'PROMO DETAILS' window with all pricing details for the promotion. The window can also be opened from the right-click menu.
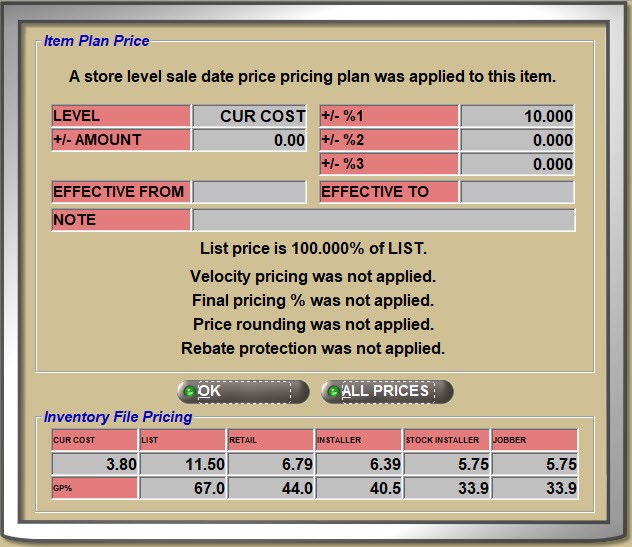
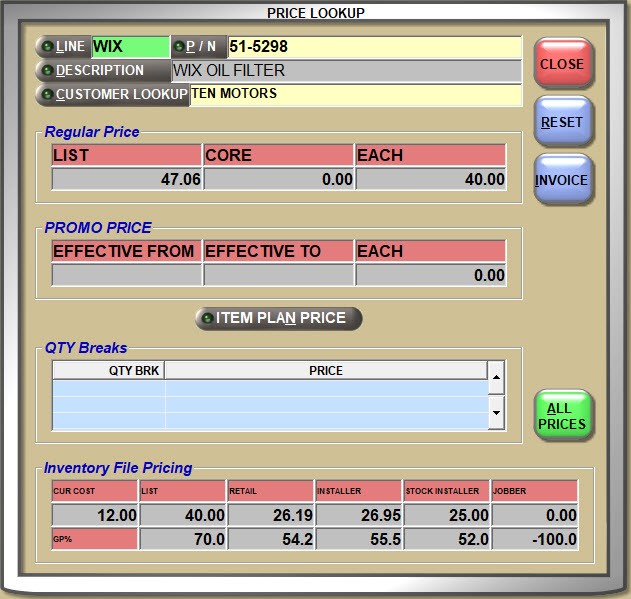
Click the 'ALL PRICES' button whether or not the part is in a promotion to see the base part table prices in the 'Inventory File Pricing' section at the bottom of the window. Re-click the 'ALL PRICES' button to close the section or the 'OK' button to close the window.
Without a part on the 'SELL' line, pricing can be found for a part by clicking the 'PRICE LOOKUP' button.
The 'PRICE LOOKUP' window opens to enter a line and part number. Press the 'Enter' key to display the part pricing for the customer in focus.
Select another customer from the 'CUSTOMER LOOKUP' field or another 'LINE', 'PART' or part by 'DESCRIPTION' without closing the pop-up.
The 'Regular Price' displays as well as the 'PROMO PRICE' if the part is on a promotion.
Any 'QTY Breaks' also display.
Click the 'ITEM PLAN PRICE' button to display the 'Ctrl' + 'D' pricing information, or the 'ALL PRICES' button to display the 'Inventory File Pricing' section.
Use the 'CUSTOMER LOOKUP' button to select another customer.
The pricing includes any 'SALE DATE' or 'QUANTITY BREAK' pricing. Click the 'ITEM PLAN PRICE' button to open the 'Item Plan Price' window and the 'ALL PRICES' button to display the base part table prices. For the customer in focus, click the 'INVOICE' button from the pop-up to add the part to the sell line.
Click the 'INVOICE' button to add the displayed part to the sell line on the Invoice Point of Sale screen.
New Pricing Calculations:
Although not recommended, a "hidden" 'FINAL PRICING %' markup or discount can be optionally set up on the PRICE PLAN SETUP screen and applied to sell price per part, without displaying a reason for the pricing change.
If set up, the 'FINAL PRICING %' is calculated after any Velocity Pricing calculation, and before Price Rounding calculation.
Sales promotions are used to drive more sales by attracting more shoppers and are a way to offer discounts, seasonal or otherwise, freebies, incentive bundles, quantity pricing and tender coupons in order to inform, persuade and encourage shopper awareness.
Promotions Training Packet - 1 page
A standard Kit, which contains a pre-defined list of component part numbers can also contain pre-defined catalog Part Types where component part numbers are selected at Point-Of-Sale.
A BOM (“Bill of Materials”) Kit also contains a pre-defined list of component part numbers, however, a BOM part has QOH.
Kits Training Packet - 2 pages
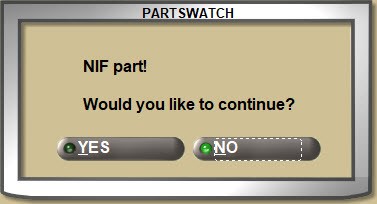
About Not-in-File Parts
If a part entered on the sell line is not carried in the store, it’s called a non-stocked, write-in, not-in-file, or NIF part. Depending on the 'ALLOW NIF PARTS' setting, write-in parts can be sold, not allowed or Point-Of-Sale will prompt each time a NIF part is entered on the sell line asking whether to allow the sale or not.
If the Line Code entered is not found in the store file, or if a Line Code is not entered and whether the part entered is found in the part file or not found, the system uses "NIF" as the NIF Line Code unless one is set up in the 'NIF LINE CODE' setting and if so, that one is used.

Invoicing Grid
8. Parts sold move to the center grid.
About the Invoice Grid
Once a part is entered on the 'SELL' line and the 'Enter' key is pressed at the 'SELL' field, the part moves off the sell line and displays in the body of the invoice. This is the center grid and shows all parts that are being sold on the ticket.
Press the 'Esc' key instead of the 'Enter' key to cancel sale of the part. Either 'Enter' or 'Esc' returns the cursor to the 'LINE', 'MOD', or 'PN/SKU/UPC' field ready to sell another part.
The part rows display in different colors depending on the type of sale or pricing applied. For example, the font will display in:
- Green if promotional pricing or a quantity break is applied.
- Orange if Scan Validation is enabled.
- Black for a general sale.

If multiple items are normally added on a ticket, the grid rows will be numbered in the 'ITEM' column if the 'SHOW ITEM COLUMN' setting is enabled. However, all rows are numbered regardless whether it contains a sales item, a note, a lost sale etc. Rows used by the program may not display.

The invoice grid displays multiple columns with information about the parts sold:
- 'LINE' and 'PART NUMBER'
- 'ZONE/BIN' location if the 'ZONE/BIN ON Invoice Point of Sale screen' setting is enabled
- 'INFO' (information) and displays:
- Q - Quantity Break pricing
- P - Promotional pricing
- F - Fees were applied
- W - Warranty applied
- 'DESCRIPTION' (part 'DESCRIPTION 1')
- 'MOD' (modifier)
- 'QTY' (quantity sold), 'LOST' (lost sale quantity), and 'BKO' (customer backorder quantity)
- 'LIST', 'CORE', 'EACH', and 'TOTAL' customer pricing
- 'SKU/UPC' - 'SKU', 'UPC', or 'PRODUCT'
- 'DISCOUNT' - calculated from the 'LINE ITEM PRICING %' setting. Does not include core.
- 'SOURCE ID' - vendor or sister store the part was sourced from
- 'RESTOCK' (restocking fee), 'DELIVERY' (delivery surcharge)
- 'SOURCED S&H' (sourced shipping and handling amount)
- 'WRITER' seller tracked for the sale or return
- 'SOURCING PO #' (purchase order number for the order created from sourcing)
- 'CO' (PO confirmation for sourced items. Displays 'P' for Pending and 'Y' for Finish)
- 'PROMO' Promo Code from Promotions Setup
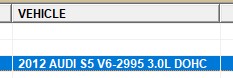
- 'VEHICLE' vehicle description for parts sold from a Catalog lookup
- 'SS' Sister Store where the item was sold from.
When a part has a "Cover-to-Cover" webpage available to display from the Epicor catalog, the link will display underneath the 'DESCRIPTION' field (as the part is moved to the sell line). Click the link to display the Cover-to-Cover webpage.
If a part link is set up on the PART ATTRIBUTES ENTRY screen in the 'Part Link URL' field, the clickable URL will display on the Part Entry screen.
There are three ways to delete a part from an open sales order:
- Highlight a row in the grid and press the 'Del' (delete) key.
- Right-click a row in the grid and select 'VOID ITEM'
- Double-click a row to move it back to the 'SELL' line and select the 'M' MV MANUAL VOID modifier.
Answer 'YES' to delete the part from the sales order.
Once a sales order is processed as an invoice, parts cannot be deleted.
Double-click a part row to bring it back to the 'SELL' line in order to change the quantity sold or the pricing. When done, press the 'Enter' key to return the edited part to the grid.
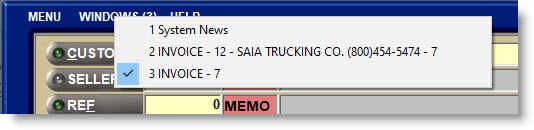
More than one session of the Invoice Point of Sale screen can be opened at the same time if needed. Press the 'F7' key to open a new session and move between the invoices using the 'F11' window. The customer number shows next to the Invoice Point of Sale screen to make it easy to select the right one to re-open.
Below the invoice grid, the 'CREATE DATE' displays the date the ticket was started.

The status shows the current state of the ticket or invoice. For example:
- 'NEW'
- 'RESERVED QUOTE'
- 'PICK'
- 'PACK'
- 'DEPOSIT'
Right-click a part in the invoice body to display a menu with additional information or functionality depending on the part. If a screen is selected, for example 'VIEW IN LISA', closing the screen will return to the Invoice Point of Sale screen with the same ticket in focus.
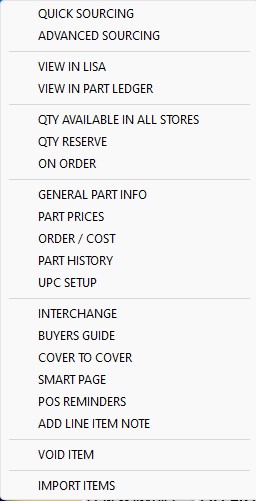
Depending on the part, more or fewer menu selections may be available:
- 'QUICK SOURCING' - Opens the 'INSUFFICIENT QUANTITY - SOURCING' (quick sourcing) screen.
- 'ADVANCED SOURCING' - Opens the ADVANCED SOURCING screen.
- 'VIEW IN LISA' - Opens the LISA TRANSACTIONS REPORT screen with the customer and part in focus. Click the 'BACK' button to return to the invoice.
- 'VIEW IN PART LEDGER' - Opens the PART LEDGER REPORT screen with the part in focus. 'CLOSE' returns to the invoice.
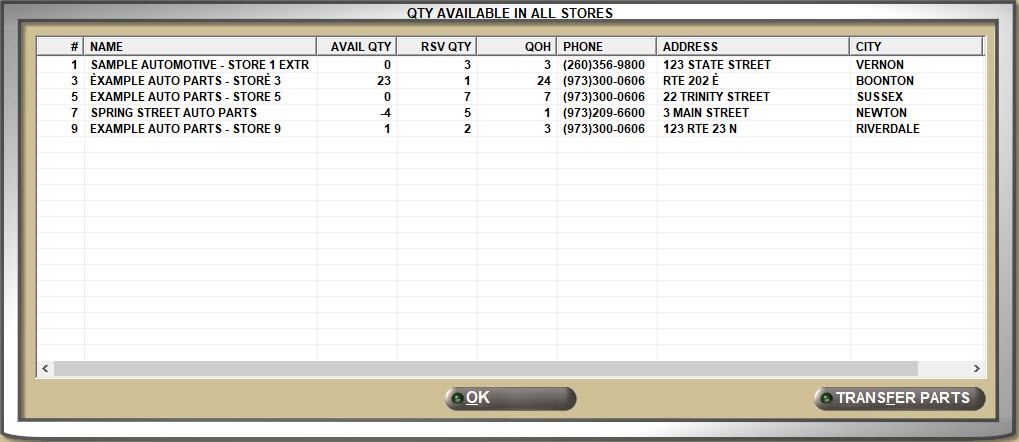
- 'QTY AVAILABLE IN ALL STORES' - For multi-stores, opens a pop-up with the quantity available in each store. Click the 'TRANSFER PARTS' button to transfer the part from or to another store.
- 'QTY RESERVE' - Same as clicking on the 'QTY RESERVE' button on the screen.
- 'ON ORDER' - Same as clicking the 'ON ORD/INBOUND' button on the screen.
- 'GENERAL PART INFO' - Opens the Part Entry screen with the part in focus. 'CLOSE' returns to the invoice.
- 'PART PRICE ENTRY' - Opens the PART PRICE ENTRY screen with the part in focus. 'CLOSE' returns to the invoice.
- 'ORDER/COST' - Opens the ORDER - COST screen with the part in focus. 'CLOSE' returns to the invoice.
- 'PART HISTORY' - Opens the PART HISTORY screen with the part in focus. 'CLOSE' returns to the invoice.
- 'UPC SETUP' - Opens the UPC Setup screen with the part in focus. 'CLOSE' returns to the invoice.
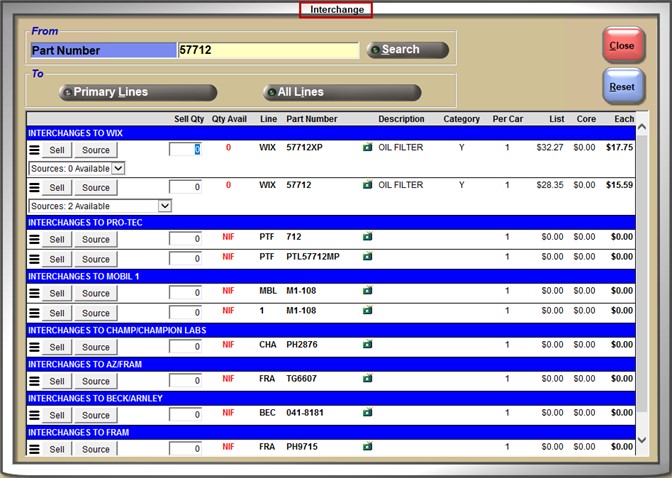
- 'INTERCHANGE' - Displays the 'Interchange' pop-up containing parts from the same line or other lines that could be used instead of the part selected on the invoice. See examples below for the ACES Catalog and the Epicor Catalog.

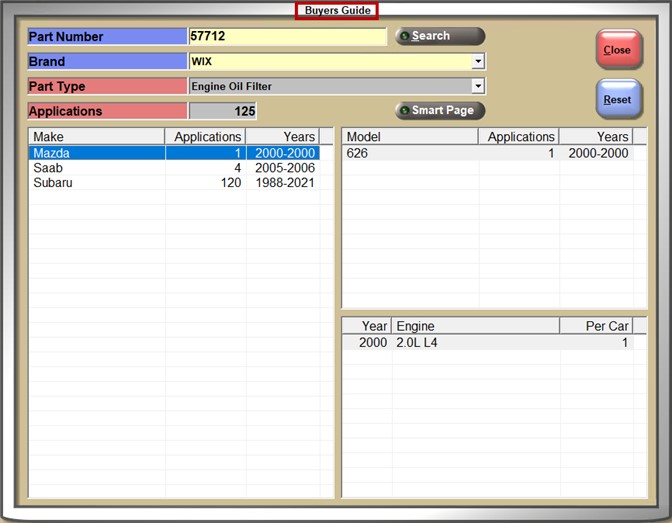
- 'BUYER'S GUIDE' - Displays the 'Buyers Guide' pop-up containing the 'Make', 'Application', and 'Years' corresponding with the part selected on the invoice. See examples below for the ACES Catalog and the Epicor Catalog.

- 'COVER TO COVER' - Cilck to open the Epicor Cover-to-Cover webpage.
- 'SMART PAGE' - Same as clicking the 'Smart Page' icon on the screen.
- 'POS REMINDERS' - Opens the 'POS REMINDERS' pop-up.
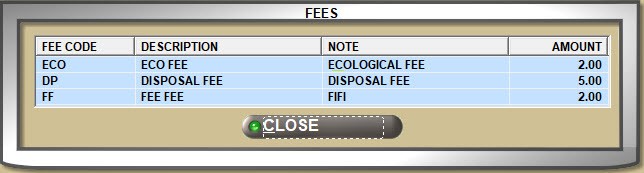
- 'SHOW FEES' - Opens a pop-up with 'FEES' that have been applied to the part.
- 'ADD LINE ITEM NOTE' - Same as entering an asterisk (*) in the 'LINE' field on the 'SELL' line.
- 'VOID ITEM' - Deletes the selected part from the invoicing grid.
- 'IMPORT ITEMS' - Provides the ability to import parts into an existing sales order from a Microsoft Excel or CSV format file.
If the 'ALLOW SPLITTING INVOICE LINE ITEMS' setting is enabled, the 'SPLIT' button on the Invoice Point of Sale screen can be used to move parts from one sales order to another.
This can be useful when a sales order has “sourced” parts that must be acquired and parts in stock for immediate sale. Instead of deleting the stocked parts and creating another invoice, moving the stocked parts to another order offers a single step with the same results.
Click the 'SPLIT' button and a window opens with all eligible parts. Parts on a sourced purchase order are not eligible to be moved to another sales order and are not listed in the pop-up.

Check one or more part rows and click 'New Invoice' to create a new invoice with the selected parts moved off the original sales order and on to a new sales order or 'Cancel' to abort the move.
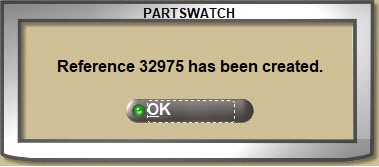
A prompt opens with the new reference number. Click 'OK' and the process is done. The second sales order is available from the 'F2 WINDOW'.
Click 'OK' and the screen refreshes with the new sales order displayed. Use the 'F11' 'WINDOWS' menu to move between the two invoices.

The 'SPLIT' button is not available for return or transfer sales orders, for closed consignments, or when the application is in Mode 2.
A part will display in the 'Eligible Split Items' window if the item is:
- A Lost Sale and the 'LOST SALES ON Invoice Point of Sale screen' setting is enabled.
- A KIT or BOM (Bill of Materials) providing none of the components have been sourced.
Note: KIT and BOM components do not display in the pop-up.
- A defective exchange, core return, or core exchange as long as the part is not sourced.
Note: Both the part and the return item must remain together to be eligible, and must both be checked or both be unchecked. If the sale or return item of a defective exchange, core return, or core exchange is checked and unchecked, the related item will be checked or unchecked automatically.
- An invoice not created by an EDI interface.
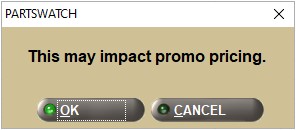
If any of the selected items have Promotional or Quantity Break pricing, when the 'New Invoice' button is clicked, a pop-up opens warning of the impact to promo pricing.
The invoice 'CREATE DATE' is the date and time of the split, not the date and time of the original reference.
All summarized totals are recalculated on the original and new references including recalculating the Invoice Discount using the Overall Discount % from the original invoice reference.
All line item details (line, parts, tax, returns, etc.) for the checked items are moved from the original reference to the new reference.
If a deposit was taken, it will remain on the original invoice reference and the new invoice reference will have a zero deposit amount.
After the split:
- If a 'DEPOSIT' amount is less than the remaining original invoice total, that amount is applied to the original invoice.
- If the 'DEPOSIT' amount is greater than the remaining original invoice total, the difference is refunded.
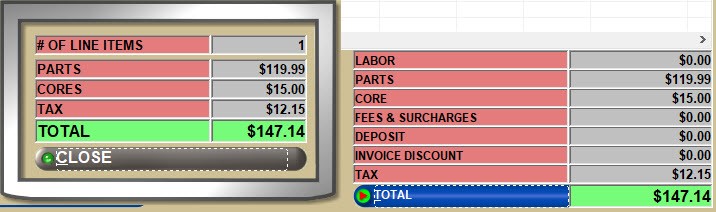
TOTAL
As each part is added to the sales order, the prices are totaled by type in the lower-right of the screen and summed in the 'TOTAL' field highlighted in green at the bottom.
Invoice Processing
9. Processing a sales order.
About Invoice Processing
Sales orders can be edited right up until they are finalized and an invoice number is assigned.
If an 'OVERALL PRICING %' is set up on the PRICE PLAN SETUP screen for the customer, it will display in the 'OVERALL DISCOUNT' field for each sales order created by the customer.
- Depending on the 'INVOICE DENY OVERALL DISC' User Security Proc, a discount or markup can be added to a sales order or an existing one can be edited by entering a discount with a minus or a markup as a positive number in the 'OVERALL DISCOUNT' field.
- The 'OVERALL DISCOUNT' is applied to the invoice subtotal before tax is calculated and does not apply to parts with the 'NET' flag enabled, or to 'CORE', 'FREIGHT', 'LABOR' and/or, 'TAX' if tracked as 'NET'. For example, 'NET' parts may already have discounted pricing and will adversely affect the GP % if also included in an overall discount.
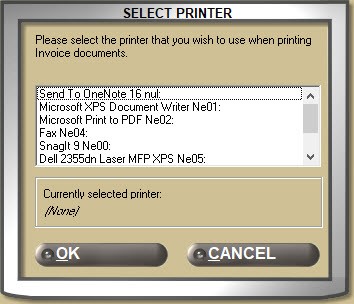
When the 'DEFAULT PRINTER' button displays, the document in focus is sent to the default printer specified in the 'PRINTER ASSIGNMENT' window, Click the button and it changes to 'SELECT PRINTER', and at print time, a pop-up opens listing available printers. Double-click or highlight a printer and click ‘OK’ or press the 'Enter' key to select it.
Depending on the 'POS BUTTONS' set up, sales orders can be printed or saved for additional work by clicking the applicable button in the lower-left of the screen.
- 'QUOTE' - Normally printed as an estimate. Depending on the 'UNRESERVED QUOTES' setting, stock is either reserved or not reserved when printed. Quotes can be optionally reopened, edited, and printed as an invoice.
Quick Quote - 4 minutes
If the 'QUICK QUOTE' setting is enabled, quotes can be created without checking the available quantity or opening the 'INSUFFICIENT QUANTITY - SOURCING' window, or each quote can prompt to check stock before printing. Either way, when printed as an invoice, the system will still prompt to source any items with insufficient quantity.
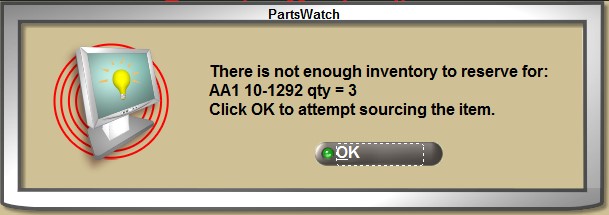
If the 'RESERVE', 'INVOICE/SLIP', or 'ON ACCT/PAY NOW' button is clicked for a ticket started in Quick Quote mode, a pop-up will display if there are items with insufficient stock. Click 'OK' to open the SOURCING screen.
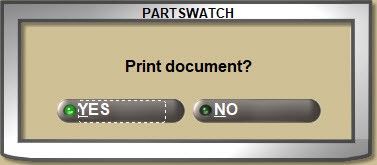
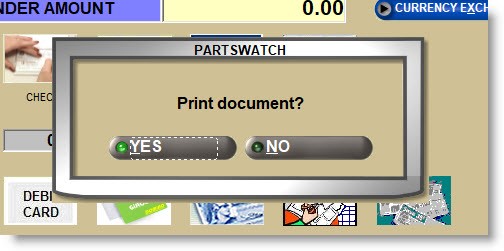
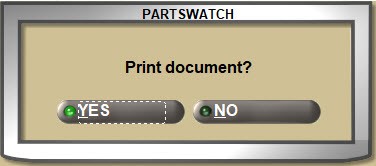
Whether or not quotes print is determined by a 'Print Quotes' drop-down on the Store Invoice Options screen, 'Extended' tab:
- If 'Always' is selected, print the Quote per existing functionality.
- If 'Never' is selected, do not print the Quote.
- If 'Prompt' is selected, display 'Print document' pop-up and allow user to select 'Yes' or 'No'. If the user selects 'Yes', print the Quote, if the user selects 'No', close the pop-up without printing, per existing functionality.
- 'HOLD' - Used in place of the 'WIP' button to save a sales order without finalizing it so that it can be reopened to finish at a later time. If the Invoice Point of Sale screen is closed with a part in the invoice body, the ticket will automatically be put on Hold. Stock is reserved and the ticket does not print.
- 'PICK' - Used to output a list of the parts to gather to fullfil a sales order. Stock is reserved and the ticket can be reopened, edited, and printed as an invoice. The 'PRINT PICKS' control determines whether the pick ticket prints or not, or whether to prompt to print or not each time the 'PICK' button is clicked.
- 'PACK' - Used to print the list of parts included in a shipment. Stock is reserved and the ticket can be reopened, edited, and printed as an invoice. The 'PRINT PACKS' control determines whether the pack slip prints or not, or whether to prompt to print or not each time the 'PACK' button is clicked.
- 'DEPOSIT' - Used to take a partial payment on a cash invoice that is available for retail customers only and is not available to commercial customers or when sourced items are on the sales order.
The 'PRINT ZERO DOLLAR DEPOSIT' setting determines whether a sales order prints, doesn't print, or if a prompt opens to print or not print the ticket when tender is opened from the 'DEPOSIT' button, but an amount is not paid.
- 'FINISH' - Used to create and transmit sourced purchase orders created at Point-of-Sale before printing the invoice. Replaces the 'DEPOSIT' button when the sourced items are on a sales order.
- 'RESERVE' - Applicable only when the 'UNRESERVED QUOTES' setting is enabled. Used to reduce the quantity on hand by the sell quantity for each item on the sales order if stock has not already been reserved. When clicked, items with insufficient quantity are changed to a buyout modifier and a pop-up displays stating that there are items that need to be sourced. Click ‘OK’ to open the ADVANCED SOURCING screen.
- The 'PRINT RESERVED SALES ORDERS' setting determines whether a sales order prints, doesn't print, or a prompt opens to print or not print the ticket when the 'RESERVE' button is clicked.
- Transfer Invoices Only: Sourcing is not available for transfer accounts. When the 'RESERVE' button is clicked, a pop-up displays to allow the sell quantity to be adjusted. Click 'OK' and the first item with insufficient quantity is loaded into the sell line in order to adjust the sell quantity.
Note: If 'SAFETY STOCK' is enabled, the amount available to sell is reduced by the 'MIN' (Safety Stock) amount.
- 'WIP' - Used in place of a 'HOLD' button to save and print a sales order without finalizing it so that it can be reopened to finish at a later time. Unidentified retail customers must be identified.
Stock is reserved and the ticket prints or not depending on the setup:
- 'NO SALE' - Used to open the drawer if a cash drawer is set up in hardware and the 'INVOICE NO SALE BUTTON' security proc permissions allow.
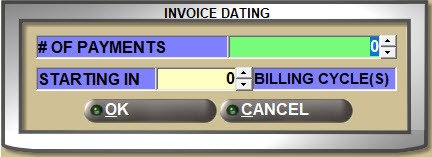
- 'DATING' - Used to finalize a "dated" invoice so that an invoice can be paid across a number of payments. The 'ALLOW DATING' setting must be enabled and when the button is clicked for a customer with accounts receivable payment terms, a window opens to enter the number of payments and when the 1st payment is due.
- 'ROA' - Opens the 'RECEIVED ON ACCOUNT (ROA)' window to receive payments over the counter through the ROA Tender screen. ROA payments are updated to the cash drawer and available to apply to invoices on the POST ENTRIES screen.
- 'PROCESS' - Used to record a Lost Sale without printing the ticket. However, if the ticket is printed, then the 'PROCESS' button isn't needed. If the button is clicked after adding a Lost Sale to a document that will be printed, it will not add it again.
- 'CANCEL ORDER/VOID' - Used to cancel a sales order. Finalized invoices cannot be canceled. Depending on the 'PRINT VOIDS' setting, voided tickets will either print or not print, or only print if sourced items are on the ticket. If the 'CANCEL ORDER' button is clicked and sourced items are on the sales order, the system prompts to make sure the order should be canceled.

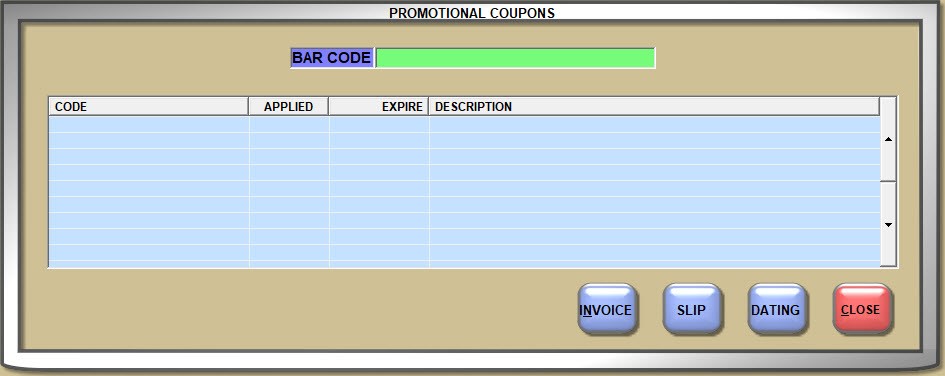
- 'COUPON' - Used to add a promotional coupon. Prints the sales order on an INVOICE form, a SLIP receipt, or as a DATING invoice.
- 'COD' - Used to open the Tender screen to finalize a sales order as a COD (Cash on Delivery) ticket. Only displays when the 'ENABLE COD' setting is enabled and the customer's 'COD' flag is checked.
- 'EDIT TENDER' - Used to change the form of payment on a finalized invoice and is dependent on the 'ALLOW EDIT TENDER ON NON-COD' setting. If enabled and used for COD, for example, if a ticket is finalized as cash, but when the parts are delivered, the customer presents a check, the 'EDIT TENDER' button can be used to change the form of payment. The INVOICE JOURNAL REPORT tracks both the original and the edited invoice.
- 'CONFIRM' - Used to reserve inventory and queue an order confirmation email. If the customer in focus has an email address set up on the Account Entry screen, the button is enabled, and if clicked with at least one item on the invoice body, the system will:
- Reserve the inventory,
- Queue the order confirmation email,
- And reset the screen for a new sales order.
Sales orders can be printed on a laser printer or a slip printer, and once printed it goes from being a sales order to being a finalized invoice with an assigned an invoice number. At that point, it can no longer be edited.
Invoice Numbers used per store are set up in the 'MIN INVOICE' and 'MAX INVOICE' fields per store and the 'NEXT INVOICE' field used displays the next number that will be used when a sales order is finalized.
If the 'TRACK DAY FILL' control is enabled, each time a part is sold or returned at Point-of-Sale, the quantity sold or returned is tracked per part and used by Purchasing when creating a REPLENISHMENT purchase order.
About Finalizing Invoices
10. Once Finalized, sales orders are tracked as invoices.
Depending on the setup, when a sales order is ready to be finalized, click one of the two invoice print buttons below the invoice grid.
If the 'PAYMENTS ON CHARGE ACCT' setting is enabled, when the 'INVOICE' or 'SLIP' button is clicked for main accounts with payment terms, a prompt opens to decide whether to put the invoice 'ON ACCOUNT' or to 'PAY NOW'.
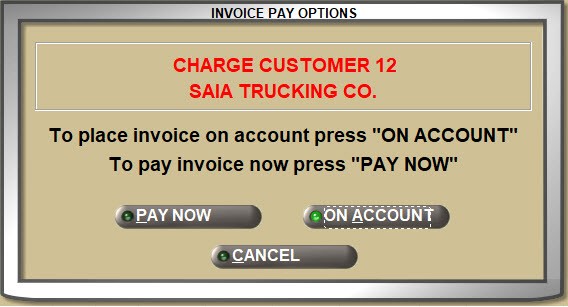
If 'ON ACCOUNT' is clicked, the prompt closes, the customers A/R is updated with the invoice, and the cursor returns to the customer lookup field to start the next invoice.
If 'PAY NOW' is clicked, the 'Invoice Tender' window opens to cash out the invoice.
If the 'PAYMENTS ON CHARGE ACCT' setting is disabled, then when the 'INVOICE' or 'SLIP' button is clicked for main accounts with payment terms, the transaction is automatically put 'ON ACCOUNT' without asking.
If either the 'INVOICE' or 'SLIP' button is clicked for cash customers, the 'Invoice Tender' window opens to receive payment.
Regardless which buttons are used, the invoice prints on the form selected on the FORMS SETUP screen per document type.
When a sales order is printed as an invoice, the next consecutive number is assigned.
The transaction is tracked for Accounts Receivable posting and reporting for accounts with payment terms and Cash Drawer tracking and reporting for cash customers.
The 'INVOICE TENDER' window opens for customer’s paying cash.
Fleet Freedom will extract all deliveries for that store, optimize the route, and send the route to the driver for delivery.
About Invoice Tender
Unless the 'ASK CUST ID ON TENDER' setting is enabled, the system prompts to identify the customer before opening the 'Invoice Tender' window for unidentified cash customers and opens the 'FIND CUSTOMER' window to locate the customer. To continue, either:
-
Find an identified customer.
-
Click the 'CUSTOMER DECLINE' button on the 'FIND CUSTOMER' window if the customer does not want to give their name or phone number.

If the 'ASK CUST ID ON TENDER' setting is disabled, then the 'Invoice Tender' window will open whether the customer is identified or not.
Depending on the invoice buttons used, when the 'INVOICE', 'SLIP', or 'PAY NOW' button is clicked, the 'Invoice Tender' window opens to pay the invoice.
Enter the amount to be paid in the 'ENTER TENDER AMOUNT' field and depending on the 'AUTO FILL AMOUNT' set up for the tender type:
- Enabled: Click the icon to pay the full amount in that tender type.
- Disabled: Click an icon to pay that amount by that tender type.
The system will prompt with the amount being paid when a payment icon is clicked.
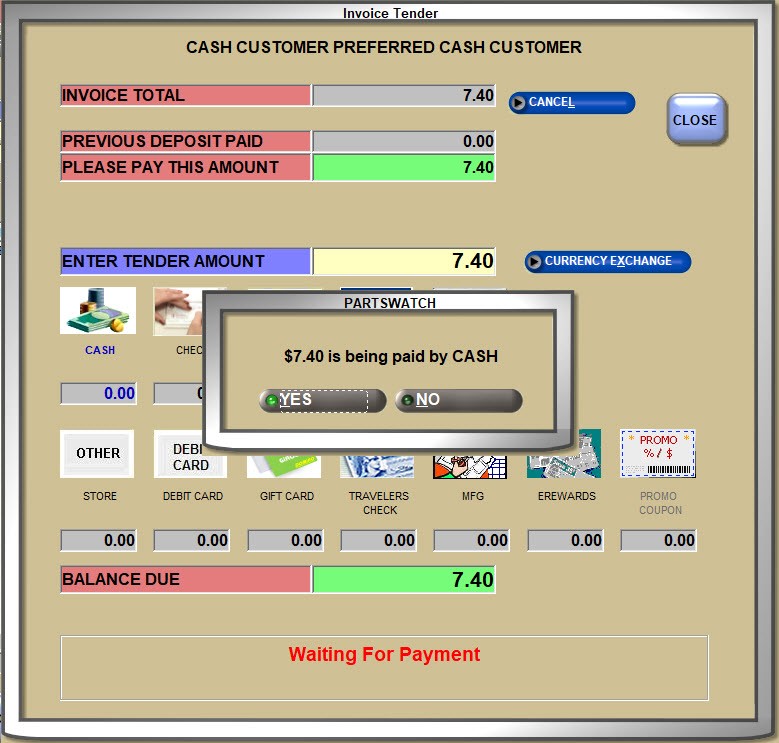
Answer 'YES' and when the balance is satisfied, the system will prompt that the process is complete. Answer 'OK' and the invoice will print.
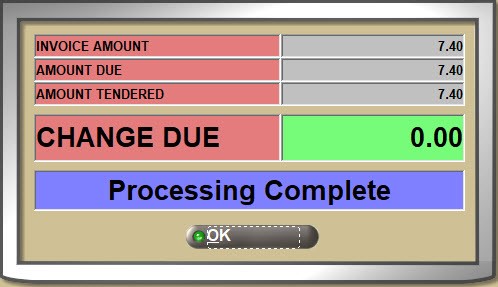
Click the 'CANCEL' button on the 'Invoice Tender' window to cancel a payment amount if one has been made or to cancel the tender process if a payment amount hasn’t been made.
Click the 'CLOSE' button to cancel the tender process with or without a payment having been made. Either way, the merchandise on the ticket is no longer reserved and the items stay on the sales order ready for more transactions, or for finalizing or deleting the ticket.
Tender coupons are considered tender and are applied after taxes. Enter the coupon amount in the 'ENTER TENDER AMOUNT' field and click the appropriate 'COUPON' icon or click the coupon icon and enter the tender amount. If the 'BAR CODE REQUIRED' field is checked on the TENDER SETUP screen, scan or enter the bar code and click 'TENDER'.
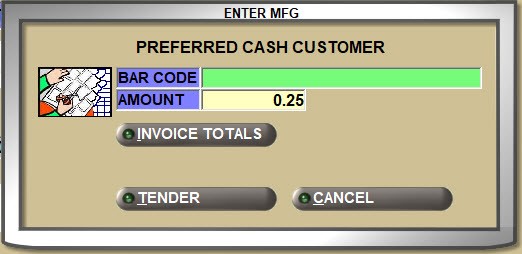
If the 'DEPOSIT' button was clicked instead of an invoice button, partial or full payment can be made and the 'DONE DEPOSIT' button can be clicked when done.
Returning Parts
11. Open the sale invoice or select a return modifier.
About Returns
A snapshot is made of every finalized invoice and saved in the INVOICE IMAGE file.
Depending on the 'REQUIRE CUST ID ON RETURNS' setting, if the sale was made to an unidentified retail customer:
- 'ALWAYS' - The return is allowed.
- 'NEVER' - The customer must be identified in order to continue with the return.
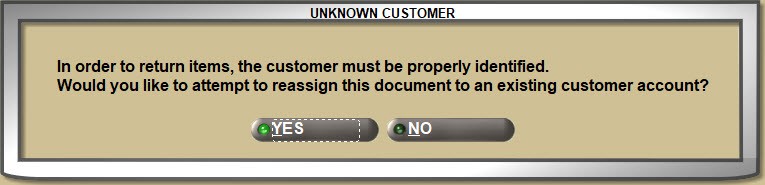
- 'PROMPT' - A reminder opens to attempt to identify the customer but the return can continue to the unidentified customer.

Depending on the 'ALLOW SALES AND RETURNS ON THE SAME INVOICE' setting per customer, either sales and returns can be added to the same invoice or sales must be on one ticket and returns on another.
When a customer returns with the product for a refund and has a copy of the invoice, with the customer in focus, click the 'INVOICE IMAGE' button and double-click the invoice to display it in "return mode".
Click the 'INVOICE IMAGE' button to find and open a finalized invoice for returns, display, reprinting, emailing, and/or faxing.
If a customer is in focus, the window opens with that customer selected. Invoices can be found by invoice type or for those created in MODE 2, or for Internet Sales.


Depending on the 'NEW RETURNS VALID DAYS'/'DEFECT RETURNS VALID DAYS'/'CORE RETURN VALID DAYS' settings, parts can only be returned for the defined length of time. If a part is returned outside the number of days, a prompt opens and the return is not allowed.
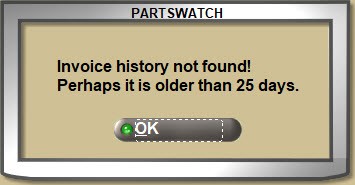
Click the 'BEGIN RETURNS' button and the 'SELECT MODIFIER' window opens to select the modifier that best describes the return.
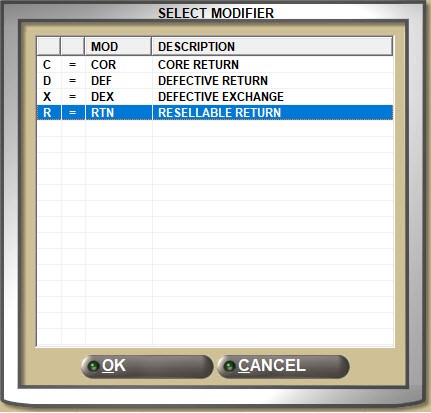
Double-click one or more parts in the grid to bring it to the sell line, and if necessary, edit the quantity returned.
The return quantity in the 'SELL' field defaults to the value set up in the 'DEFAULT RETURN QTY' setting.
Press the 'Enter' key to return the part to the grid.
Click 'DONE RETURNS' when finished.
Returns Without an Invoice
If a return modifier is entered or selected without first finding the sale in INVOICE IMAGE, a pop-up opens to determine how to continue.
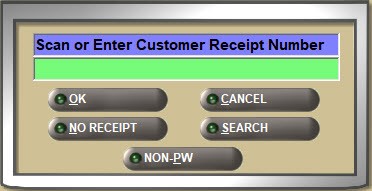
Enter the invoice number in the 'Scan or Enter Customer Receipt Number' field if it is known and click the 'OK' button.
The system performs a "credit check" through all customer transactions stored in the LISA TRANSACTIONS file to see if it can find the sale.
- If the sale is found, the return will continue against that sale. If not, the system will prompt that the sale is not found and asks if the return should continue. Answer 'YES' to continue.
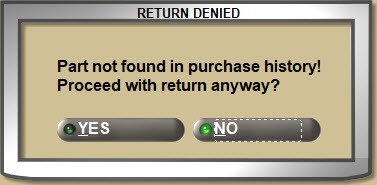
- If the return is started for an unidentified retail customer and the invoice is found for another customer, the system will automatically reassign the ticket to the customer that made the purchase.
Click the ‘SEARCH’ button to open the 'INVOICE IMAGE' window to find an invoice.
If a valid return was sold from a legacy system, enter that invoice number in the 'Scan or Enter Customer Receipt Number' field and click the ‘NON-PW’ button to continue. Contact PartsWatch Support if the button is needed but not available, or to hide the button when it is no longer needed.
Without entering a receipt number, click the 'NO RECEIPT' button. The system still does a LISA "credit check" of the purchase history and if a sale is found and the sell price matches the return, the return continues. If not, a prompt opens asking whether or not to continue.
If the part is entered without a receipt and the system finds one or more sales, but none has the same sell price as the part being returned, it will list each sale. The store 'RETURNS SEARCH ORDER' setting will present them in the oldest to newest (ascending) or the newest to oldest (descending) order to help with selection.
Sourced parts that are resalable and are returned at Point-of-Sale can either be added to the shelf, put on a return manifest to the vendor, or decided where to be put at the time of the return depending on the 'SOURCED RETURN DESTINATION' setting.
If the 'RETURN PRODUCT MESSAGE AT POS' setting is enabled, a pop-up displays. (If the 'RETURN PRODUCT MESSAGE AT POS' setting is unchecked, this pop-up does not display.)
Note: It is not recommended to enable the 'RETURN PRODUCT MESSAGE AT POS' if the 'SOURCED RETURN DESTINATION' is set to 'PROMPT' as the 'RETURN TO VENDOR' field is redundant.
If the part being returned is on a purchase order that has not yet been received into stock, the system will prompt to see if the vendor doesn’t have the part or if the customer no longer wants it.
- If the vendor does not have it, stock is not affected by the return. The item does not affect the Quantity Available nor does it go onto a manifest. This choice indicates the item was never picked up, and the return is being done only to credit the customer for an item the store and customer never received.
- If the customer does not want it, then stock is increased by the return.

If Restocking Fees are set up and the 'SOURCED RETURN APPLY RESTOCKING FEE' setting is enabled, then restocking fees are charged when returning sourced parts. For example, restocking fees might be applied to parts that were sourced from outside vendors but not company-owned warehouses or sister sales.
Depending on the 'AUTO-SELECT TRANSACTION IF PRICE MATCH FOUND' setting, if eligible transactions are found from the LISA "credit check" for the part returned, all transactions will display or the one with the current sell price will be automatically selected for the return, but if multiple sales are found with the current price, all will display for selection.
Multi-Store/Sister Store Return
If the item was sourced from a sister store, the system will prompt whether to add the part to the shelf or to return it on a manifest.
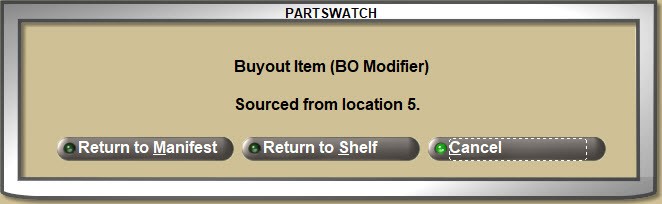
If 'RESTOCKING FEES' are charged, then restocking fees will be applied to items returned at POS.
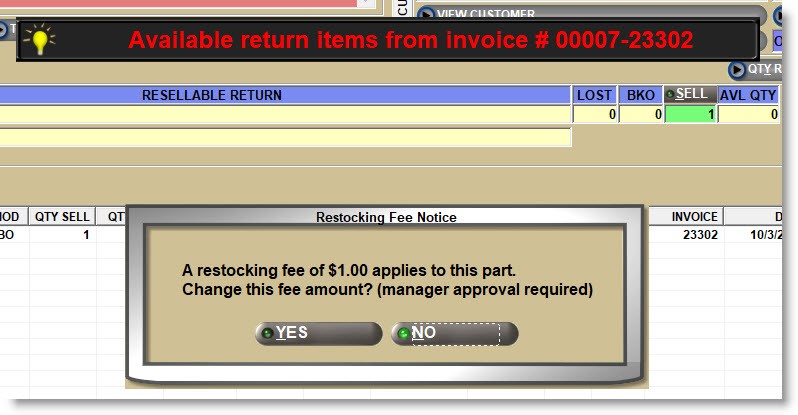
If 'YES' a prompt will open to enter the new restocking fee.

If delivery surcharges are applied to the sale, then the 'REFUND DELIVERY SURCHARGE' setting determines whether or not the amount is refunded on returns.
Depending on the 'CHECK MIN SELL ON RETURNS' setting for new resalable parts and the 'CHECK MIN SELL ON DEFECTS' setting for defective parts, the return quantity can be forced to be a multiple of the 'MIN SELL' (minimum sell quantity) in the part table instead of allowing any quantity to be returned.
And then, once the part is in the invoice body if all returns are done, and the DONE RETURNS button is clicked, the return is added to the invoice.
For deliveries, if a sales order is loaded on the Point-of-Sale screen that is in one of the two following background statuses below, the following pop-up displays:

Click 'Yes' to close the pop-up and reserve the part inventory. The order is removed from the automated print queue and is not processed by the background processor. The picklist must be manually printed.
Click 'No' to close the pop-up and not load the invoice. The order is processed by the background processor on schedule, and the Point-of-Sale screen is reset.
Core can be returned using the 'C' CORE RETURN modifier the same way a part is returned and can also be returned at the time of the original sale using the 'E' CORE EXCHANGE modifier.
If the core is too badly damaged to accept back or if a customer wants to buy it, the 'O' CORE SELL ONLY modifier can be used to sell the core.
If there is a customer who always returns core and does not want the core billing on the part sale invoice, 'DEFERRED CORE BILLING' can be set up for these accounts. Then, two invoices print, one for the part and one for the core. However, the customer is only responsible to pay for any core not returned after a pre-determined time.
Since catalog does not allow selection of a modifier, if a core part is sold, the system prompts for a core exchange if the 'CATALOG CORE EXCHANGE PROMPT' setting is enabled.
Bulk core can be returned from the BULK CORE RETURNS screen. Per account, check each core being returned, click 'ADD TO INVOICE' and the Invoice Point of Sale screen opens to complete the return ticket.
When defective parts are returned, they are automatically added to a warranty manifest to return to the vendor unless they’re marked as DO NOT MANIFEST in the part file. Depending on the 'RETURN PRODUCT MESSAGE AT POS' setting, if enabled, a pop-up will open when a defective part is returned stating whether the part will be added to a manifest or will not be added, so it can be destroyed instead.

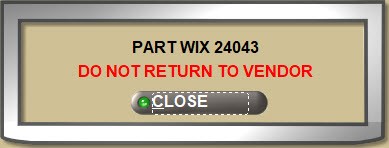
Defective parts can be returned using the 'D' DEFECTIVE RETURN modifier or exchanged for the new part at the time of the return using the 'X' DEFECTIVE EXCHANGE modifier.
If a WARRANTY is set up for tires or batteries, then returning a defective warrantied part opens a window with the calculated return amount displayed. The information can be edited and clicking 'OK' opens the CATALOG screen to replace the part.

Tendering an invoice with a credit balance works the same as a sales invoice. Enter the amount to be returned without entering a minus (-) in the 'ENTER TENDER AMOUNT' field and click the form of tender icon. When the full return amount is satisfied, the system will prompt the same way it does for a sale and when 'OK' is clicked on the final prompt, the credit invoice will print.
UNDO Invoices
12. Invoices can be backed out instead of credited.
About UNDO Invoices
If an invoice that was already finalized is incorrect for any reason, the UNDO process can be used to back it out of the updated files instead creating a credit invoice to offset the incorrect transaction. The UNDO button displays or not depending on the INVOICE DENY UNDO BUTTON User Security proc.
Open a finalized invoice from INVOICE IMAGE and if enabled, click the 'UNDO' button and a prompt will open to continue.
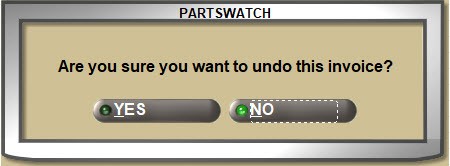
Answer 'YES' to continue when the system prompts to make sure. If the 'POS ID' is enabled, the 'COUNTERMAN IDENTIFICATION' pop-up will open, then the UNDO reference will be created.
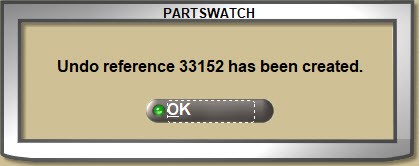
Click 'OK' at the reference pop-up and a banner will display stating to print the invoice to continue.

The UNDO must be done before the End-of-Day is run unless the 'ALLOW UNDO AFTER EOD' setting is enabled.
The original invoice can be reopened from INVOICE IMAGE but cannot be edited.
Both the UNDO and the undone tickets are tracked in the INVOICE JOURNAL for accountability.


There are a number of reasons why an invoice cannot be "undone".
If the 'UNDO' button is not available, the following conditions list the reasons a finalized invoice cannot be backed out of the updated files:
1. The invoice process has already been "undone" using the 'UNDO' process.
2. The current 'ACCOUNT CONTROL', 'ACCOUNT TYPE', and/or 'PAY TYPE' setting is different from the setting at the time the original invoice was created.
3. The invoice was created for a transfer account.
4. The invoice is a dated billing invoice.
5. The invoice contains a deferred core billing transaction.
6. The invoice contains gift card sales.
7. The invoice contains refunds forced on a gift or merchandise card.
8. The invoice is for a customer that has been deleted.
9. The invoice is for a linked account that is no longer linked to the same master account.
10. The current VQ (Variable Qty) value for any of the parts on the invoice is different than the VQ value in the part table at the time the original invoice was created.
11. The invoice contains a sourced item.
12. The invoice contains a return item that was validated against a previous sale.
13. The invoice contains a sale item that was return validated on another invoice. For example, Invoice 1 contains the sale item. Invoice 2 contains the item returned from Invoice 1. Cannot UNDO Invoice 1 based on condition # 12. Cannot undo Invoice 2 based on condition #13.
14. The invoice contains an item that was added to a manifest.
15. The invoice was created prior to the last End-of-Month (EOM). The invoice must be created in the current period. Any invoice that has been "aged" in an end-of-period close cannot be undone.
16. The End-of-Day has been performed and the 'ALLOW UNDO AFTER EOD' setting is disabled.
17. The invoice was created prior to the last End-of-Week (EOW) close and the account is set up for weekly aging.
18. The invoice was created in a different store.
19. A deposit was taken before the invoice was finalized.
20. The invoice has a value in the 'eOrder #' field.
21. For invoices charged on account, the invoice transaction:
- Cannot be found.
- Is an open item debit invoice that has been paid (partial or full).
- Is an open item credit invoice that has been applied (partial or full).
The 'UNDO' button is available for tendered invoices including:
1. Regular and/or COD transactions including those paid by credit cards.
2. Coupons tendered.
Note: Coupons are not returned to the customer, nor is cash returned for the amount of the coupon originally tendered.
3. The invoice is an UNPAID COD.
4. The invoice (COD and non-COD) is paid with multiple forms of tender.
Reporting
13. Sales and returns can be checked while invoicing.
About Reporting
Click the 'LISA' button to open the LISA TRANSACTIONS REPORT screen in order to check on parts sold and returned. If a customer is in focus, the report screen opens with that customer selected. Closing the report screen returns to the Invoice Point of Sale screen without refreshing the screen.
PART LEDGER
Click the 'PART LEDGER' button to open the PART LEDGER REPORT screen to check on parts sold and returned. If a customer is in focus, the report screen opens with that customer selected. Closing the report screen returns to the Invoice Point of Sale screen without refreshing the screen.