Order/Cost
The ORDER - COST screen is used to add and maintain all inventoried part numbers by manufacturer Line Code that are used by the Invoicing, Purchasing, and Reporting modules.
Menu Path: Inventory, Part Entry, Order / Cost, ORDER - COST screen
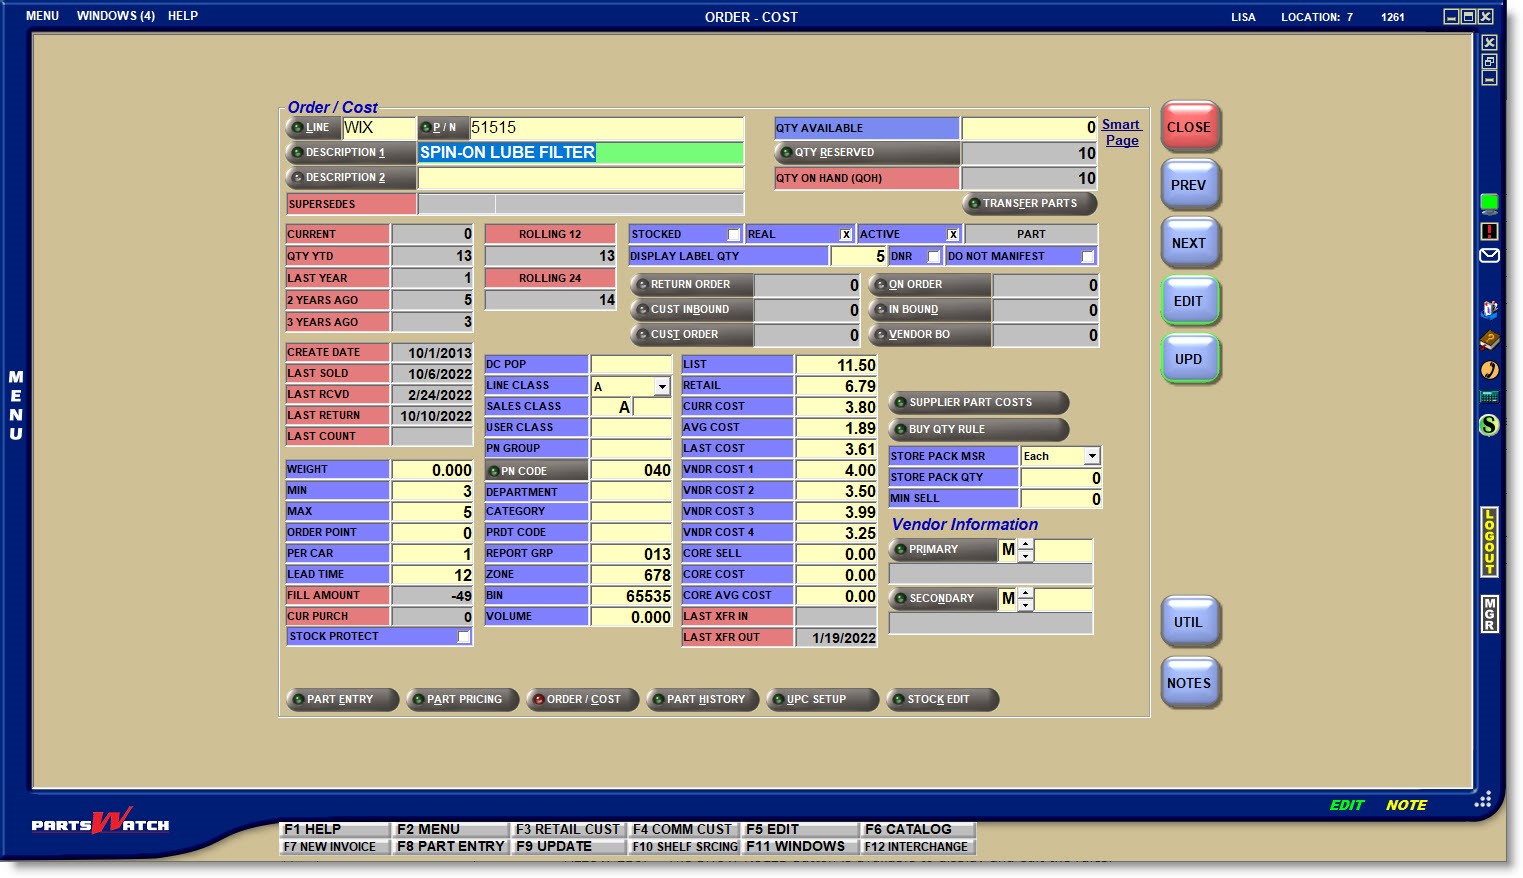
Like most PartsWatch maintenance screens, the 'EDIT' and 'UPD' (update) buttons must be used when changes are made. 'EDIT' must be "off" when entering a part number and "on" when changing the part settings. 'UPD' must be clicked to save the changes.
Therefore, to edit parts using the ‘F’ hot keys:
- (EDIT off) Enter a part number and press 'F5' (EDIT on)
- Make changes and press 'F9' (changes saved)
- Press 'F5' (EDIT off) and find another part
- Press 'F5' (EDIT on) and make changes
- Press 'F9' (changes saved)
If changes are not saved, pressing the 'F5' key, clicking the 'EDIT' button, or closing the screen, a prompt opens to save the changes.

Enter 1-3 alphanumeric characters that represent a valid Line Code in PartsWatch.
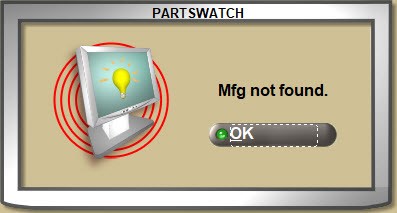
- If the value entered is not a valid Line Code, pressing the 'Enter' key moves the cursor to the 'P/N' field, however, without a part number, the system opens a pop-up stating that the line code is not found.
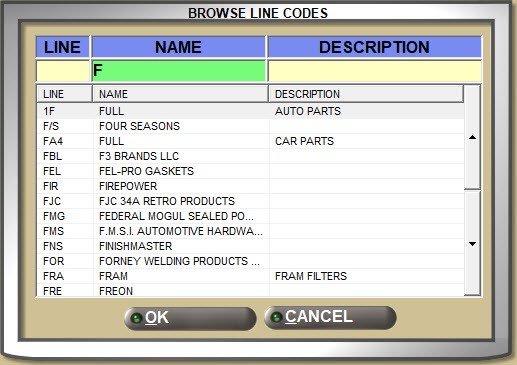
- Click the 'LINE' button to open the 'BROWSE LINE CODES' pop-up to search for a Line Code. Type-ahead functionality can be used to find a Line Code by 'LINE' code, line 'NAME', or 'DESCRIPTION'.
With a 'LINE' displayed:
- Press the 'Enter' key at the 'P/N' field and the first part number from the part table in the Line Code 'SORT CODE' order displays with the part field attributes.
- Enter a valid Part Number in the 'P/N' field and press the 'Enter' key to display the part field attributes for that part.
- The system checks for "stripped" part numbers where letters (A through Z) and numbers (0 through 9) are valid and all other characters are ignored for a part number search.
- If the part number is not found, the system prompts to add it.
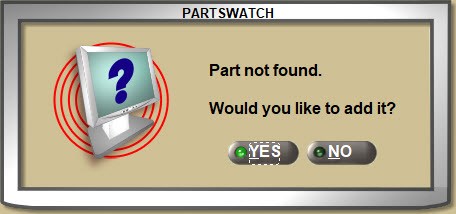
Answer 'Yes' and the part is added.
Answer 'No' and the 'P/N' field clears.
Without a 'LINE' displayed:
- Enter a Part Number and if a single match is found, it will display.
- If more than a single match is found, the Available Matches window opens with all Line Codes that contain the entered part number. Select the correct one to display that Line and Part Number.
- If a match is not found, the cursor remains in the 'P/N' field waiting for valid input.
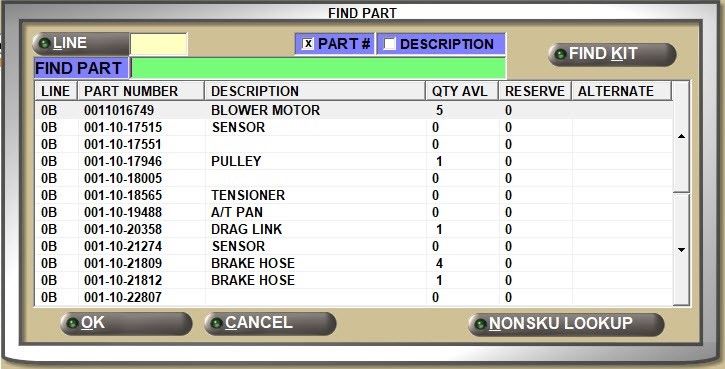
Click the 'P/N' button to open the 'FIND PART' window to search for a Part Number with or without a Line Code entered in the 'LINE' field.
Enter up to 255 alphanumeric and special characters that describe the part in focus.
Click the 'DESCRIPTION 1' button to open the 'FIND PART' window to search for parts by description. Focus is on the 'FIND DESC' field in the pop-up.

Enter up to 255 alphanumeric and special characters that describe the part in focus with an additional description that, depending on the process, can be used with or instead of 'DESCRIPTION 1'.
The 'DESCRIPTION 2' button is not enabled for a search, and instead, click the 'DESCRIPTION 1' button to locate a part from the 'FIND PART' window by description.
Stock Quantities
Displays the number of units that are on the shelf and available for sales for the part. The field is updated by Point-of-Sale and Purchasing, as well as manually editable.
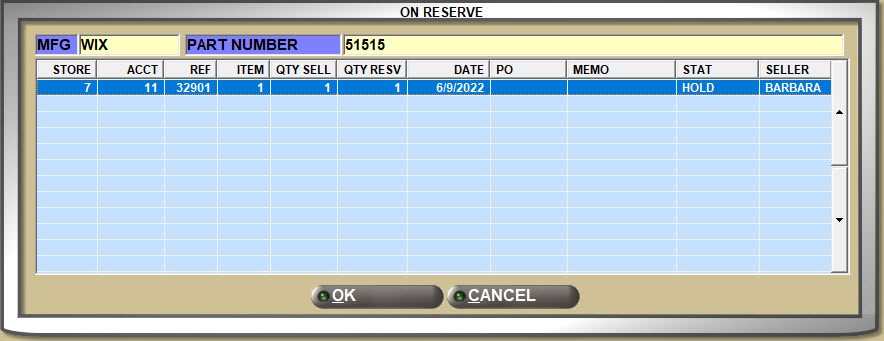
Displays the number of units that are "on reserve" on open sales orders for the part, for information only.
If the quantity is on reserve, click the 'QTY RESERVED' button to open the 'ON RESERVE' window with the accounts and sales order reference numbers that the part in focus is on.
Displays the total number of parts currently in stock whether on the shelf or on an open sales order. ('QTY AVAILABLE' + 'QTY RESERVED')
Click the 'Smart Page' link to open a browser with the manufacturer part information.
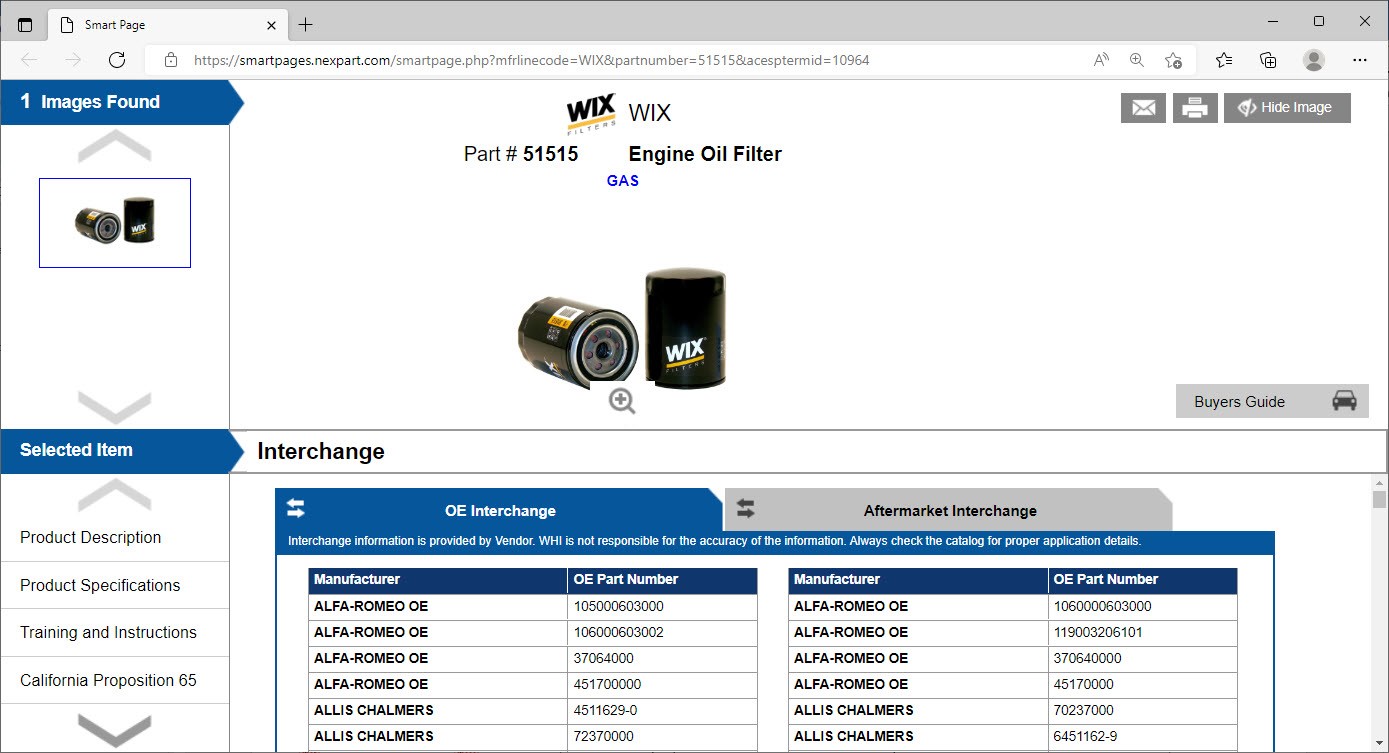
If a link is not found, a pop-up opens stating the page is not found.

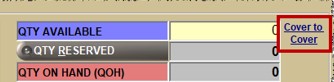
Additionally, if using the Epicor catalog, and Cover to Cover information is available for the entered 'LINE' and 'P/N', the Cover to Cover link displays instead of Smart Page.
Displays the Line Code and Part Number of the (original) part being replaced if the part in focus supersedes a part. The field is blank if a part is not being superseded by the part in focus.
Part Histories
If the part in focus is superseded or supersedes another part and the sales histories are linked, a button displays to "unlink" the part histories. Click the button and the part histories display for the part in focus only. The button changes to 'VIEW LINKED HISTORIES'. Click the button and the part histories again display for both the superseded and supersede parts.
Displays the part histories for the current month.
Displays the part histories for the current year-to-date.
Displays the part histories for the previous calendar or fiscal year.
Displays the part histories for two years before the current calendar or fiscal year.
Displays the part histories for three years before the current calendar or fiscal year.
Displays the part histories for the past 12 months. This value will always display the past 12 months regardless of what the current month is.
Displays the part histories for the past 24 months. This value will always display the past 24 months regardless of what the current month is.
"Stocked parts are inventoried, ordered, and kept on the shelf.
"Real" parts are actual, physical parts as opposed to "parts" used for other things, such as coupons.
"Active" parts can be defined however needed. For example, "active" parts might have a min/max and stock quantity while "inactive" parts do not.
Multi-store only. Click the button to open the 'TRANSFER PARTS' window that is used to "transfer" quantities of the part in focus to/from other locations.

Typically, the Inventory Redistribution function is used before creating a purchase order in order to transfer merchandise between company stores rather than ordering merchandise that may not be required. (e.g. one store's overstock can fulfill another store's understock.)
However, in some instances, quantities of a single part need to be transferred between the stores.
The ability to easily "transfer" merchandise between company stores is available from the PURCHASE ORDER DETAIL screen while reviewing an order, as well as from the 'QTY AVAILABLE FROM ALL STORES' pop-up, the part entry ORDER - COST screen, and the STOCKING LEVEL EDIT screen.
![]()
The 'TRANSFER PARTS POPUP' User Security proc controls access to the 'TRANSFER PARTS' pop-up.
The system's 'STOCKING LEVEL' control determines the stocking level displayed on the 'TRANSFER PARTS' pop-up:
- 'MIN'
- 'MAX'
- 'MIN / MAX'
- 'ORDER POINT'
- 'MIN / ORDER POINT'
Note: The 'STOCKING LEVEL' control is found on both the SYSTEM PURCHASING SETUP screen and the SYSTEM GENERAL SETUP screen and changing the value of one changes both.
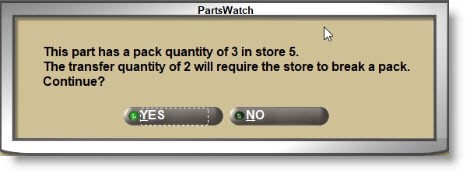
The system 'PROMPT TO BREAK XFER PACKS' control determines whether or not a pop-up opens when the 'XFER QTY' (transfer quantity) is a multiple of the part number's 'PACK QTY' value for the 'FROM' location.
The 'LINE', 'PART NUMBER', and 'DESC' (description 1) display for the part in focus.
'LOCATION FROM'
Enter the store number that receives the purchase order and that the parts are transferred out of. Click the button and the 'CURRENT' store will be selected. Click the button again to open the 'BROWSE LOCATIONS' pop-up to select a store.
'LOCATION TO'
Enter the store number that sends the purchase order and that the parts are received into. Click the button to open the 'BROWSE LOCATIONS' pop-up to select a store.
'XFER QTY'
Enter the number of units that will be transferred.
'REDUCE ORD QTY BY XFER QTY'
The field is available and is used to determine whether or not to reduce the quantity ordered by the transfer quantities:
- If the order is a single store order, multi-store consolidated order, or non-editable multi-store distributed order, then the 'TRANSFER PARTS' pop-up is opened directly from the PO DETAIL screen and the 'REDUCE ORD QTY BY XFER QTY' checkbox is not available.
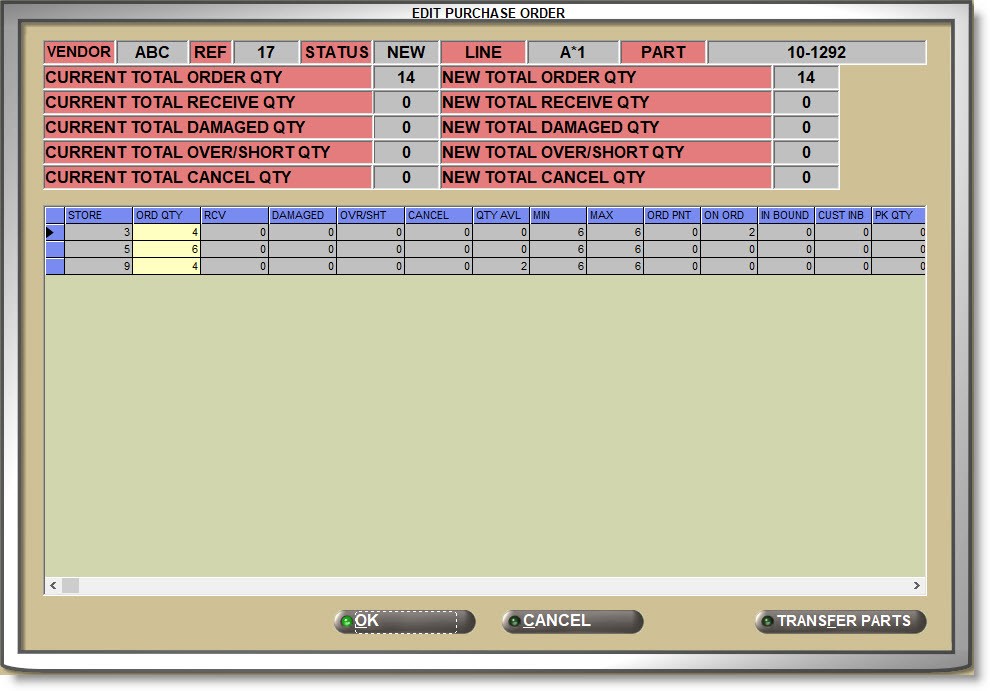
- If the order is an editable multi-store distributed order, the multi-store 'EDIT PURCHASE ORDER' pop-up opens first, followed by the 'TRANSFER PARTS' pop-up with the 'REDUCE ORD QTY BY XFER QTY' checkbox available and checked by default.
If the 'REDUCE ORD QTY BY XFER QTY' is checked, clicking the 'XFER' button and closing the pop-up leaves the multi-store 'EDIT PURCHASE ORDER' pop-up open with any order quantities in 'LOCATION TO' stores reduced by the transfer quantities. Click 'OK' to commit the changes to the order.
If the 'REDUCE ORD QTY BY XFER QTY' is unchecked, there are no changes to the 'ORD QTY'.
![]()
Display Grid
All stores in the company display numerically by lowest to highest store number.
The grid columns display the 'LOC' (location number), 'CITY' (store city location), 'OVRSTK' (quantity overstocked), 'QTY AVL' (quantity available), stocking level (from the 'STOCKING LEVEL' setting, 'ON ORD' (on order quantity), 'INB QTY' (in bound quantity), 'PER CAR', 'CURRENT' (current month’s sales), 'YTD' (year-to-date sales), 'LYTD' (last year-to-date sales), 'CLASS' (sales class) and the last 12 history periods, beginning with the last updated history period (for example, if the current month is June, then the first history period displayed will be May, then April, March, etc.)
The calculations:
The 'OVRSTK' calculation is based on the 'STOCKING LEVEL' setting and displays in a black font when negative and in red when positive. When set to:
- MAX: OVRSTK = (AVL QTY – MAX)
- MIN: OVRSTK = (AVL QTY – MIN)
- MIN/MAX: OVRSTK = (AVL QTY – MAX)
- ORDER POINT: OVRSTK = (AVL QTY – OP)
- MIN/ORDER POINT: OVRSTK = (AVL QTY – OP)
A horizontal scroll bar displays additional columns off-screen.
The 'XFER' button is available once the 'LOCATION TO' / 'LOCATION FROM' fields are filled, and an 'XFER QTY' greater than '0' are entered, and when clicked:
- A purchase order is created in the 'LOCATION TO' store with the 'LOCATION FROM' store as the Vendor and the part 'ORD QTY' equal to the 'XFER QTY'.
- The purchase order is immediately and automatically finalized and then transmitted to the 'FROM LOCATION' store.
- A popup opens with the PO number.
![]()
Click 'OK':
- The 'LOCATION FROM' store’s 'OVRSTK' and 'QTY AVL' are reduced by the 'XFER QTY'.
- Note: Once the Purchase Order is transmitted, the ability to edit the 'ORD QTY' (or any other field) is based on the Supplier setting 'ALLOW EDIT AFTER TRANSMIT' on the SUPPLIER ORDER SPECIFICS screen.
- A sales order is created in the 'LOCATION FROM' store for the 'PROCESS RCVD ORDER' transfer account setting.
The Line Type field does not have a label. Instead, the field displays 'PARTS', 'FREIGHT', 'LABOR', or 'GIFT CARDS' depending on the Line Code 'TYPE' set up.
Enter the default number of shelf labels that will print for this part. The default can be changed at the time the labels are printed.
A value greater than '0' must be selected in order to use this default when printing labels.
Shelf price labels are normally printed when a price change has occurred.
Purchasing Setups
Determines whether or not the part in focus should be considered during purchase order selection.
- Checked: The part will not be considered for reorder during purchase order creation.
- Unchecked: The part is considered for reorder during purchase order creation.
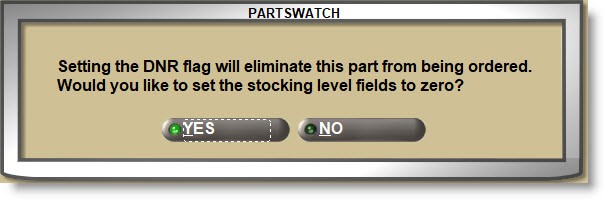
Note: If a stocking level ('MIN'/'MAX'/'ORDER POINT') field is greater than '0', checking the 'DNR' flag and clicking the 'UPD' button opens a prompt asking if the stocking level fields should be set to '0'.
Answer 'YES' and the 'MIN'/'MAX'/'ORDER POINT' fields are set to '0'.
Answer 'NO' and the stocking level field values do not change.
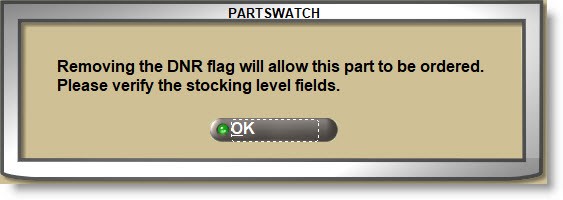
Regardless of the value of the stocking level ('MIN'/'MAX'/'ORDER POINT') fields, unchecking the 'DNR' flag opens a prompt with a reminder to make sure the stocking levels are correct so that the part will be considered for reorder.
If the 'DNR' flag is unchecked and the value in the stocking level ('MIN'/'MAX'/'ORDER POINT') fields is cleared to '0', the system prompts to ask if the 'DNR' flag should be checked so that the part will not be reordered.
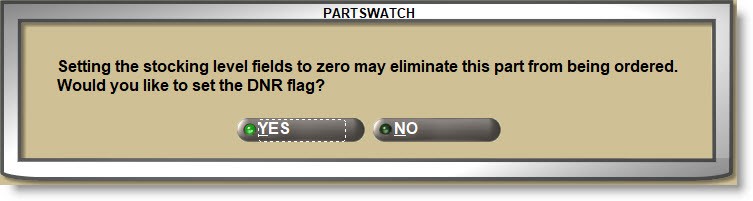
Answer 'YES' and the 'DNR' flag is automatically checked.
Answer 'NO' and the 'DNR' flag remains unchecked.
If the 'DNR' flag is checked and the value of the stocking level ('MIN'/'MAX'/'ORDER POINT') fields is edited to a value greater than ‘0’, the system prompts to uncheck the 'DNR' flag so that the part will be considered for reorder.
Answer 'YES' and the 'DNR' flag is automatically unchecked.
Answer 'NO' and the 'DNR' flag remains checked.

Determines whether or not a part returned at Point-of-Sale is automatically added to a manifest to be returned to the vendor.
- Checked: The part will not be added to a return manifest.
- Unchecked: The part will be added to a return manifest.
Used to "allocate" stock on Return Orders so that, if a subsequent Return Order is created before the first order is transferred out of stock, the parts will not come up again on regular overstock returns.
Return order quantities are calculated by evaluating the stocking level ('MIN', 'MAX' or 'ORDER POINT', depending on which of these methods was selected when creating the return order) and comparing to the 'QTY AVAILABLE'. Any 'QTY AVAILABLE' greater than the stocking level is considered “overstock”. If a pack quantity is established for the part, the result is then rounded down to the nearest pack to determine the final return quantity.
The 'RETURN ORDER' quantity field is incremented when a return order is finalized, and if a finalized return order quantity for the part in focus is edited, the 'RETURN ORDER' field quantity is increased or decreased accordingly.
If a finalized return order is deleted, the 'RETURN ORDER' quantity is decreased by the return order quantity from the purchase order.
When creating a return order, the 'RETURN ORDER' quantity reduces the order quantity calculated for that return order before the return order quantity is rounded down to pack quantity.
Click the 'RETURN ORDER' button to display a window with all POs regardless of 'STATUS'. The list includes non-finalized POs, even though the 'RETURN ORDER' button is not active unless at least one Return Order has been finalized.

The 'AUTO FINALIZE TIMED ORDER QUEUE RETURN ORDERS' is used to determine whether or not return orders are finalized when created and allocated to the 'RETURN ORDER' field.
- Checked: Return Orders created through the TIMED ORDER QUEUE are finalized and allocated to the 'RETURN ORDER' quantity field.
- Unchecked: Return Orders are not finalized when created through the TIMED ORDER QUEUE, and are not allocated to the 'RETURN ORDER' quantity field until the return order is manually finalized.
The 'IGNORE RETURN ORDER VALUES' purchase order create option determines whether or not the return order ignores the 'RETURN ORDER' quantity field or not.
- Checked: The current return order ignores the 'RETURN ORDER' quantity field. Note that this could result in the current return order showing the same parts that are on existing return orders.
- Unchecked: The current return order will take into consideration the 'RETURN ORDER' quantity field. The return order quantity for the current return order will be reduced by the already-existing return order quantity.
Displays the total quantity of the part in focus on customer sourced orders that is currently inbound on ASNs for information only.
Click the 'CUST INBOUND' button to open the 'ON ORDER / BACKORDER / INBOUND' pop-up displaying customer sourced order information that is inbound on ASNs.
Displays the total quantity of the part in focus that is currently on open customer sourced Purchase Orders for information only.
Click the 'CUST ORDER' button to open the 'ON ORDER / BACKORDER / INBOUND' pop-up displaying customer sourced order information per PO.
Displays the total quantity of the part in focus that is currently on open stocked Purchase Orders for information only.
Click the 'ON ORDER' button to open the 'ON ORDER / BACKORDER / INBOUND' pop-up displaying stocked order information per PO.
Displays the quantity of the part in focus that is currently inbound on an ASN for stocked parts and is for information only.
Click the 'ON ORDER' button to open the 'ON ORDER / BACKORDER / INBOUND' pop-up displaying 'IN BOUND' information.
The 'VENDOR BO' (backorder) field displays the quantity on back order vendor purchase orders for information only.
Click the VENDOR BO button to open the 'ON ORDER / BACKORDER / INBOUND' pop-up displaying stocked order information per PO.
'ON ORDER / BACKORDER / INBOUND' Pop-up
If 'CUST ORDER', 'ON ORDER', or 'VENDOR BO' is clicked, the 'ON ORDER / BACK ORDER / INBOUND' pop-up opens with the following information per order:
- 'PO NUMBER'
- 'VNDR' (vendor)
- 'QTY' (quantity ordered)
- 'PO CREATE' (date)
- 'DUE' (date)
- 'STATUS' of the order
Statuses are:
- 'NEW' – Purchase order is created but not finalized or processed in any manner.
- 'ORD' – (Ordered) – Order was transmitted.
- 'ASN' – Advanced Shipping Notification was received.
- 'OBK' – (Back Order) – Order was partially received. A 2-digit number indicates the number of times the order was received.
- 'FIN' – (Finalized) – Purchase order is finalized. When a PO is finalized, the on order value in the part file is updated and any items whose order quantity was zero are removed from the order.
- 'WIP' – (Work-In-Progress) – Purchase order is created and some editing was done.
- 'INVOICE' number
- 'ACCOUNT' number
- 'NOTE' (vendor note)
- 'MY QTY' (Multi-Store Distributed PO quantity ordered for the current store)
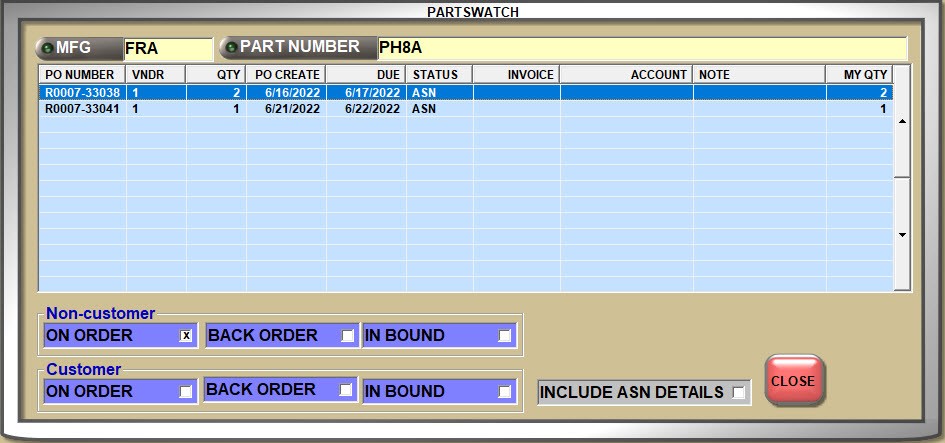
The 'INCLUDE ASN DETAILS' flag is not available.
With the window open, click 'Non-customer'/'Customer' flags to display applicable information.
If 'IN BOUND' or 'CUST INBOUND' is clicked, the 'ON ORDER / BACK ORDER / INBOUND' pop-up displays with the following information per order:
- 'PO NUMBER'
- 'ASN NUMBER'
- 'ASN CREATE' (date)
- 'VNDR' (vendor)
- 'QTY' (quantity ordered)
- 'PO CREATE' (date)
- 'DUE' (date)
- 'STATUS' of the order
Statuses are:
- 'NEW' – Purchase order is created but not finalized or processed in any manner.
- 'ORD' – (Ordered) – Order was transmitted.
- 'ASN' – Advanced Shipping Notification was received.
- 'OBK' – (Back Order) – Order was partially received. A 2-digit number indicates the number of times the order was received.
- 'FIN' – (Finalized) – Purchase order is finalized. When a PO is finalized, the on order value in the part file is updated and any items whose order quantity was zero are removed from the order.
- 'WIP' – (Work In Progress) – Purchase order is created and some editing was done.
- 'INVOICE' number
- 'ACCOUNT' number
- 'NOTE' (vendor note)
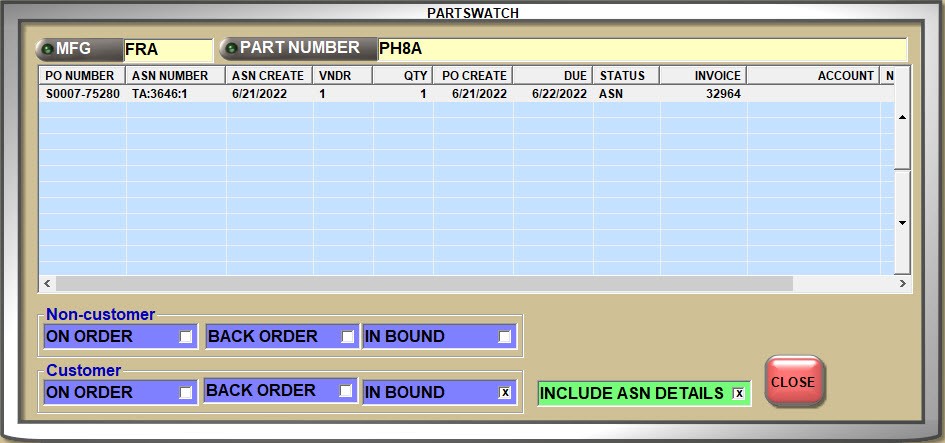
'INCLUDE ASN DETAILS'
If 'INBOUND' is checked, the 'INCLUDE ASN DETAILS' field is enabled to display ASN information.
- Checked: The grid columns change to display ASN information.
- Unchecked: The grid does not display ASN information.
Enter the weight of the part in focus that is used by the Order Create process. If a value is entered in the ‘Min Weight Threshold’ setting under the Options tab in the ORDER CREATE screen, the system will use the value of this field to determine the total weight of the order.
The 'MINIMUM WEIGHT' field on the PURCHASE ORDER DETAIL screen displays the 'Min Weight Threshold' as entered at the time of order creation and if the total order weight is under the threshold, will display the 'MINIMUM WEIGHT' field in a bright orange. This allows the order quantities to be edited up to the threshold if needed.
Allows entry of up to 6 digits with 3 decimal positions ('999999.999').

If the 'TRACK DAY FILL' control is enabled, each time the part is sold at Point-of-Sale, the system tracks the sell quantity to the 'FILL AMOUNT' field. When a Replenishment Order is created, the quantity is cleared and any new sales are then recorded for the next order.
The Replenishment Order method is unique in that the calculated order quantity is not reduced by other orders that are in an 'On Order' status, or by current stock quantities.
Stocking Levels
Enter the minimum number of units for a part to keep stocked on the shelf at any time and used for purchase order creation.
Enter the maximum number of units for a part to keep stocked on the shelf at any time and used for purchase order creation.
Enter the number of units used as the '"order point" for purchase order creation. Can be used with or instead of the 'MIN' and 'MAX' stocking levels.
Enter the quantity that the part is sold in. For example, 4 spark plugs on a 4-cylinder car. If the 'POS DEFAULT SELL QTY' setting is set to 'PER CAR' then the value of this field will display in the 'SELL' field at Point-of-Sale.
A "lead time" is the period between the time parts are ordered and the time it takes a supplier to satisfy the order. Each time a purchase order is received, the system calculates the lead time for the order and saves it in the 'LEAD TIME' field.
When the part's 'LEAD TIME' is zero, then the part is set with the calculated lead time of the current purchase order recieved. Optionally, enter a number from '1' to '999' that represents the number of days between the time a purchase order is finalized and the time the order is received as the starting number used by purchasing when calculating the lead time.
CUR PURCH (current purchased)
Displays the total quantity of the part in focus that was purchased during the current period for information only.
STOCK PROTECT
Determines whether or not 'MIN', 'MAX' and/or 'ORDER POINT' can be updated when running the 'SET MIN MAX ORDER POINT' utility.
Checked: The 'UPDATE' button is available and changes will affect the part table attributes if clicked.
Unchecked: The 'UPDATE' button is not available. The results can be printed or previewed as report only.
Part Filters
Part filters can be optionally used to "group" parts together in a Line or across Lines for purchasing and reporting.
When setting up part filters, first determine how they will be used:
The parts considered for purchase order creation can be filtered by:
- Order Type
- PN Group
- Department
- PN Code
- Category
- Sales Class
Depending on the report, part filters are available to filter report output. For example, all eleven filters are available for the INVENTORY INFO, INVENTORY COUNT, and INVENTORY COST REPORTS.
- Distribution Center (DC) Popularity (POP) Code.
- Up to 5 alphanumeric and special characters.
- Used for inventory reporting.
- Manufacturers Line Class Code.
- 1 alpha or numeric character.
- Only the LINE CLASS Codes set up per line code are available for selection.
- Sales Popularity Code.
- Used to rank and track the popularity of the parts.
- 1 alpha or numeric character in each of the 2 field positions.
- User-defined.
- 1 alphanumeric or special character.
- Part Number Group Code.
- Up to 10 alphanumeric, user-defined characters.
- Part Number Code.
- Up to 3 alphanumeric characters.
- Only the 'P/N CODES' set up per line code are available for selection.
- P/N Codes are used as "sublines" to categorize parts into groups. For example, oil filters can be grouped by conventional, light-duty, heavy-duty, racing, etc.
P/N CODE SETUP
P/N Codes must be set up on the P/N CODE SETUP screen in order to be available to the 'P/N CODE' part filter.
Click here to learn more about setting up P/N CODES.
- Areas or types that parts might be categorized as.
- Can be used in conjunction with 'CATEGORY' to identify specific part types or areas of use. For example, a Department might be ‘HWD’ for hardware.
- Up to 3 alphanumeric and special characters.
- Divisions that parts might be divided into.
- Can be used in conjunction with 'DEPARTMENT' to identify specific types of parts within the areas. For example, ‘NUT’ for nuts or ‘BLT’ for bolts might be categories within the ‘HWD’ hardware department.
- Up to 3 alphanumeric and special characters.
- Product Code.
- Up to 3 alphanumeric and special characters.
- Report Group code.
- Up to 9 alphanumeric and special characters.
Price Levels
Price level 1 and price level 2 as well as all 7 cost levels (price levels 8 – 14) and core cost and core average cost (price levels 15 -16) display with the field names defined in the FIELD NAME SETUP screen.
If the AUDIT PART COST EDITS control is enabled, edits to the price levels are tracked and can be reported from the PART LEDGER COST EDITS REPORT.
LAST XFR IN (last transfer in)
Multi-Store: Since most companies consider transferring of parts between stores "merchandise transfers" as opposed to "merchandise sales", each time a part is transferred in from a transfer account, the date of transfer is updated to the 'LAST XFER IN' field instead of the 'LAST RCVD' (received) date field.
LAST XFR OUT (last transfer out)
Multi-Store: Since most companies consider transferring of parts between stores "merchandise transfers" as opposed to "merchandise sales", each time a part is transferred to a transfer account, the date of transfer is updated to the 'LAST XFER OUT' field instead of the 'LAST SOLD' date field.
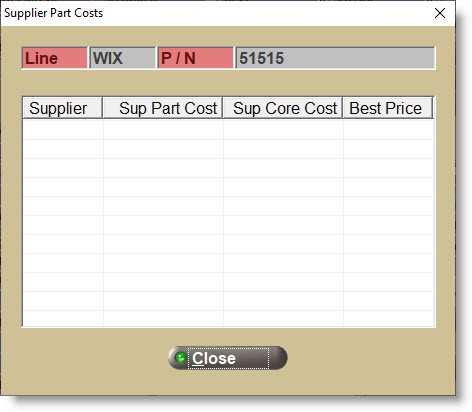
An unlimited number of supplier part costs, per part, can be set up on the SUPPLIER PART COSTS screen and compared for the lowest cost ordering.
Click the 'SUPPLIER PART COSTS' button to open a pop-up displaying the part/core cost and best price across all vendors the current part may be purchased from.
If the 'Best Price' setting is set to 'Yes', then that supplier part cost is used in comparison logic performed during order creation when the option 'Best Price' is selected.
Click the 'BUY QTY RULE' button to open a window used to set up the "rules" needed for vendors that force purchases in pack quantities.
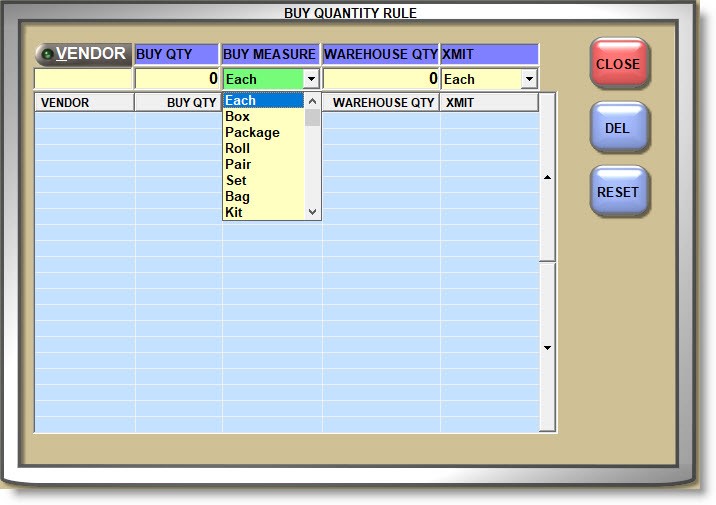
Set up vendor-specific Buy Quantity Rules by selecting a 'VENDOR' or a single "universal" Buy Quantity Rule that applies to all vendors by leaving the 'VENDOR' field blank.
A vendor-specific Buy Quantity Rule overrides a universal Buy Quantity Rule if one exists. If a Buy Quantity Rules is not set up for the specific vendor that the order is being created for, it defaults to the Buy Quantity Rules that are set up for the blank vendor code, if any.
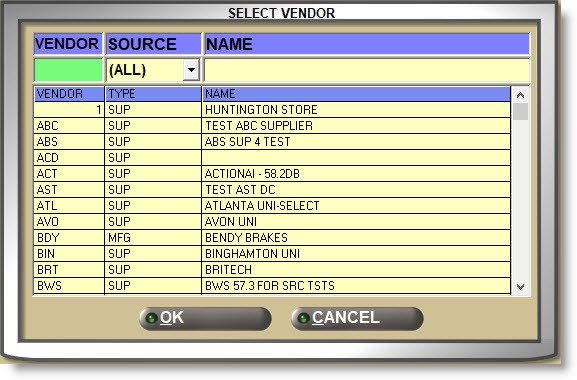
Enter a 'VENDOR', or click the 'VENDOR' button to open the 'SELECT VENDOR' window to search for a Supplier or a Line Code that has the 'USE AS VENDOR' flag checked.
Enter the quantity in the 'BUY QTY' (quantity) field that the store sells the part in and select the container or measure in the 'BUY MEASURE' field that the part in focus is purchased as.
For example, the store may store a quantity of ‘1’ ‘EACH’.
Enter the quantity that must be purchased per pack in the stores 'BUY QTY' (quantity) field.
Select the pack measure that must be purchased in the 'BUY MEASURE' field.
Enter the quantity in the 'WAREHOUSE QTY' (quantity) field that the warehouse sells the part in and select the container or measure in the 'XMIT' field that the part in focus is sold as.
For example, the warehouse may sell a quantity of ‘1’ ‘BOX’ (of 4 units).
A single Buy Quantity Rule can be created per vendor per part.
The ASN process uses the 'WAREHOUSE QTY' in Warehouse XMIT to extrapolate the actual quantity to apply to the In Bound quantity. For example: the store sells an item in inches but must be purchased in feet. The store Buy Qty is set to '3000’ inches in a ‘Roll’. The Warehouse Qty is set to ‘12’ and the XMIT Qty is set to ‘Roll’. The transmitted quantity is ‘250’.
(3000/12 = 250)
If there are no rules set up for the specific vendor or a blank vendor code, "1” for 'BUY QTY' and 'WHSE QTY' and “EA” for 'BUY MSR' and 'XMIT MSR' display.
Click the drop-down and select the pack measure the part is normally stored in. This field is no longer used by Point-of-Sale and can be used for information only.
Enter the number of units sold in a "pack". For example, entering ‘1’ in the 'SELL' field may represent ‘1’ unit or ‘1’ box of ‘4’ units. This field is no longer used by Point-of-Sale and can be used for information only.
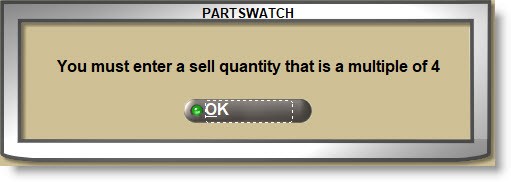
Enter the minimum quantity of the part in focus that must be sold at Point-of-Sale. The system forces the quantity to be sold to the 'MIN SELL' quantity in order to continue with the sale. If a value other than the 'MIN SELL' is entered in the 'SELL' field and the 'Enter' key pressed, the system prompts to enter the correct sell quantity.
Allows entry of 0 – 65535.
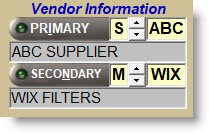
Optionally select a 'PRIMARY' vendor if the part is normally purchased from the same vendor. Select a 'SECONDARY' vendor to order from in the event the part is not available from the primary vendor. Both fields are used as filters during purchase order creation.
The 'DESIGNATION' setting on the ORDER CREATE / PURCHASE ORDER PROFILE field defaults to ‘All Parts’, however, setting the 'DESIGNATION' to 'PRIMARY' filters the parts to only consider those with the setting of 'PRIMARY' for the designated vendor in the order. 'SECONDARY' is used the same way.
The setup consists of four sections:
- Middle: Defaults to ‘M’ (manufacturer). Click the small up/down buttons to change the field to ‘S’ (supplier).
- Left: Click the 'PRIMARY' button and, if an ‘M’ displays in the middle section, the 'BROWSE LINE CODES' pop-up opens to search for/select a Line Code. All Line Codes are available for selection regardless of the 'USE AS VENDOR' setting. If an ‘S’ displays in the middle section, the 'BROWSE SUPPLIERS' pop-up opens to search for/select a Supplier Code.
- Right: Enter a Line Code or Supplier Code. If one is selected from the browser window, the code will display in the field.
- Lower: Displays the selected Line or Supplier name for information only.
Whether the 'EDIT' button is enabled or not, click the 'UTIL' button to open a window with a number of features.
Click the 'NOTES' button to display the 'INVENTORY NOTES' window used to set up a part note for Invoicing and/or Purchasing.