System Purchasing Setup
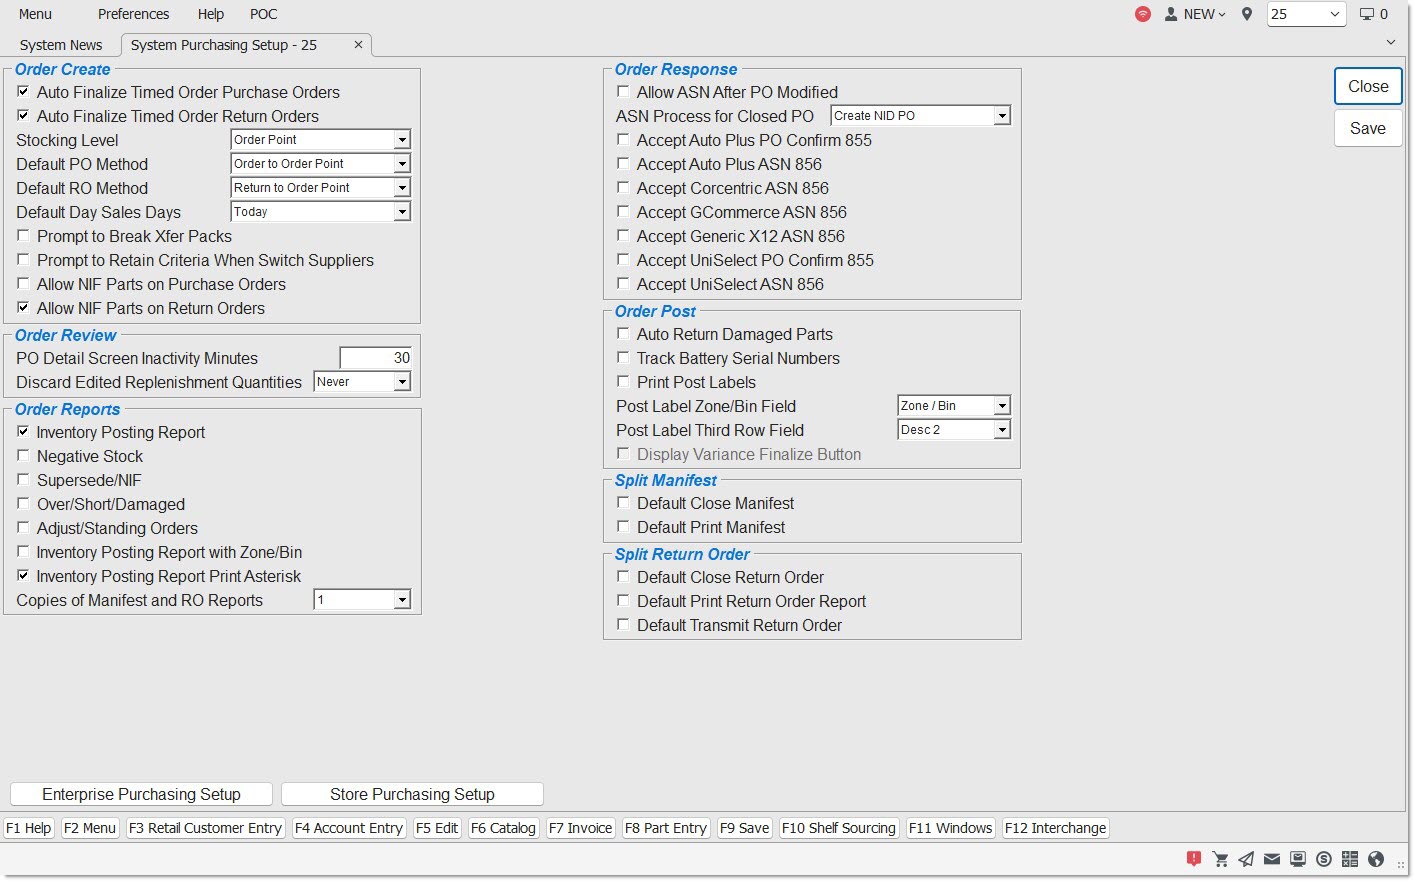
The SYSTEM PURCHASING SETUP screen is used to store purchasing settings that affect all stores on the same database and can be changed by the owner rather than by the support department. The setting is changed for all stores in the database when the setting is changed in the screen.
Menu Path: Controls, System, Purchasing Setup, SYSTEM PURCHASING SETUP screen
System Purchasing Setups
Order Create
Auto Finalize Timed Order Purchase Orders
Determines whether timed purchase orders are automatically finalized or left in a 'WIP' state.
Automatically finalizes all timed purchase orders created with a 'STATUS' of 'FIN' (Final), when checked.
Creates all timed purchase orders with a 'STATUS' of 'NEW', when unchecked.
Note: Orders with a 'STATUS' of 'NEW' cannot be transmitted, even if the Timed Order parameters set in the TIMED ORDERS QUEUE screen indicates the orders should be transmitted.
When orders are not set to automatically finalize and the:
- 'DELAY' field in the TIMED ORDERS QUEUE screen is set to 'NONE', the order transmission fails after order creation. The order must be manually finalized and transmitted. Therefore, 'DELAY' should only be set to 'NONE' when 'AUTO FINALIZE TIMED ORDER QUEUE PURCHASE ORDERS' is checked.
- 'DELAY' field in the TIMED ORDERS QUEUE screen is set to 'DAYS' or 'HOURS', it will not be automatically transmitted, even if it is manually finalized after it is automatically created but before the specified number of 'DAYS' or 'HOURS' has been reached. The order must finalized and transmitted manually.
Auto Finalize Timed Order Return Orders
Caution should be exercised when using the TIMED ORDERS QUEUE screen if orders are not being automatically finalized. The order transmission of a non-finalized timed order with 'DELAY' set to 'NONE' or a number of 'HOURS' or 'DAYS' will fail after order creation. The order must be manually finalized and transmitted. Therefore, it is recommended to set the 'DELAY' to 'MANUAL' when orders are not set to automatically finalize.
Drop-down field that is used to control the stocking level output on the TRANSFER PARTS screen grid.
Options are:
- 'MIN' - Reports the part table 'MIN' value as the stocking level output. The field heading will be "MIN".
- 'MAX' - Reports the 'MAX' value as the stocking level report output. The field heading will be "MAX".
- 'MIN / MAX' - Reports the 'MIN' and 'MAX' values as the stocking levels report output. The column headings will be "MIN and MAX".
- 'ORDER POINT' - Reports the 'ORDER POINT' value as the stocking level report output. The column heading will be "ORD PNT".
- 'MIN / ORDER POINT' - Reports the 'MIN' and 'ORDER POINT' values as the stocking levels report output. The column headings will be "MIN and OP".
Note: The 'STOCKING LEVEL' setting is the same 'STOCKING LEVEL' switch found at the SYSTEM GENERAL SETUP screen under the 'Report Options' section. Changing the 'STOCKING LEVEL' setting at either the SYSTEM PURCHASING SETUP screen or the SYSTEM GENERAL SETUP screen will alter the setting found on each.
Choose an option from the drop-down to determine the default purchase order method for the system.
Options are:
- 'Order to Max'
- 'Order to Min'
- 'Min to Max'
- 'Avg. Min Max'
- 'Order Point'
- 'Forecast PO'
- 'Replenishment PO'
- 'Write-In'
- 'Lowest Cost Profile'
Choose an option from the drop-down to determine the default return order method for the system.
Options are:
- 'Return to Max'
- 'Return to Min'
- 'Return to Order Point'
- 'Write-In'
Choose an option from the drop-down to determines the range of sales days used to determine the order quantity for a new replenishment order method called "Day Sales Order".
Options are:
- 'Yesterday'
- 'Last 2 Days'
- 'Last 3 Days'
- 'Last "N" Days' where "N" = 6 through 30
When checked, if the 'XFER' button at the 'TRANSFER PARTS' pop-up is clicked, the system displays the following pop-up:
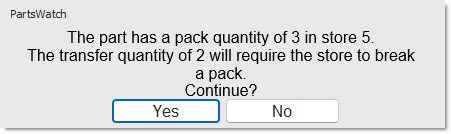
Answer 'YES' at the pop-up to result in the purchase order creation process.
Answer 'NO' to close pop-up and return to the 'TRANSFER PARTS' pop-up.
When unchecked, no verification is prompted.
Prompt to Retain Criteria When Switch Suppliers
When checked, when switching suppliers on the ORDER CREATE screen, and a profile is currently displayed on the screen, the system prompts if the contents of the 'Criteria' tab should be retained (only).
When unchecked, the system does not retain any information from the 'Criteria' tab.
Allow NIF Parts on Purchase Orders
Determines whether or not not-in-file parts are able to be added to Purchase Orders.
- Checked - Not-in-file parts can be added to purchase orders.
- Unchecked - Not-in-file parts cannot be added to purchase orders.
Allow NIF Parts on Return Orders
Determines whether or not not-in-file parts are able to be added to Return Orders.
- Checked - Not-in-file parts can be added to return orders.
- Unchecked - Not-in-file parts cannot be added to return orders.
Order Review
PO Detail Screen Inactivity Minutes
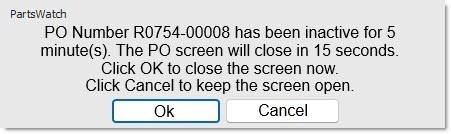
Indicates the number of minutes a PO detail screen can be left inactive before being closed. Enter a value of 1 to 99. The time defaults to 5 minutes.
When the screen remains open too long, a pop-up displays indicating the PO has been inactive and asking whether or not to keep it open. Click 'NO' to close the PO screen and unlock the PO. Click 'YES' to keep the PO open and locked to other users. If neither button is clicked, the PO automatically closes and unlocks after 15 seconds.
Discard Edited Replenishment Qtys
Choose an option from the drop-down that determines whether or not the part record is updated when the order quantity for a part is edited.
Options are:
- 'NEVER' (default) - if the order quantity for a part is edited down, the 'FILL AMOUNT' in the part record is incremented by the difference between the original and revised order quantity.
- 'ALWAYS' - if the order quantity for a part is edited, the 'FILL AMOUNT' does not change on the part record.
- 'PROMPT' - if the order quantity for a part is edited, or if an entire order from the MAIN PURCHASE ORDER SELECTION screen is deleted, the system prompts with a question whether to return the replenishment information back to the 'FILL AMOUNT' on the part record.
Order Reports
Determines the value of the 'INVENTORY POSTING REPORT' flag in the 'PO REPORTS' window and the 'POST PO' window.
Prints the 'PO INVENTORY POSTING REPORT DETAIL' at the time of PO receipt, when checked, unless a manual override is entered at the time not to print it.
Determines the value of the 'NEGATIVE STOCK' flag in the 'PO REPORTS window and the 'POST PO' window.
Prints the 'NEGATIVE STOCK' section of the 'EXCEPTIONS REPORT', when checked, unless it is decided not to print this part of the report manually.
Determines the value of the 'SUPERSEDE/NIF' flag in the 'PO REPORTS' window and the 'POST PO' window.
Prints the 'SUPERSEDE/NIF' section of the 'EXCEPTIONS REPORT', when checked, unless it is decided to not print this part of the report manually.
Determines the value of the 'OVER/SHORT/DAMAGED' flag in the 'PO REPORTS' window and the 'POST PO' window.
Prints the 'OVER/SHORT/DAMAGED' section of the 'EXCEPTIONS REPORT', when checked, unless it is decided to not print this part of the report manually.
Determines the value of the 'ADJUST/STANDING ORDERS' flag in the 'PO REPORTS' window and the 'POST PO' window.
Prints the 'ADJUST/STANDING ORDER' section of the 'EXCEPTIONS REPORT', when checked, unless it is decided to not print this part of the report manually. Only the parts on the PO that have Vendor Order Adjustments or Back Orders (Standing Orders) are reported.
Note: A Vendor Order Adjustment can be a positive or negative adjustment made to the PO via an electronic document sent by Corporate. A negative adjustment could be for items that have been ordered by the store, but will not delivered for some reason. A positive adjustment could be for increases to order quantities due to packs or minimums, or for orders placed by Corporate on behalf of the store, or other reasons.
A Vendor Change Over is a particular type of Vendor Order Adjustment that triggers both a negative and positive Vendor Order Adjustment, reducing the order quantity of the old part and increasing the order quantity of the new part.
Inventory Posting Report With Zone/Bin
When checked, and:
- the menu item PO Post on the MAIN PURCHASE ORDER SELECTION screen is right-clicked,
- or the 'POST' button on the PO DETAIL screen is clicked,
- or the 'POST' button on the 'ASN POST' pop-up is clicked,
Then the alternate PO Receiving Report that contains zone / bin information is printed.
When unchecked, and:
- the menu item 'PO Post' on the MAIN PURCHASE ORDER SELECTION screen is right-clicked,
- or the 'POST' button on the PO DETAIL screen is clicked,
- or the 'POST' button on the 'ASN Post' pop-up is clicked,
Then the regular PO Receiving Report is printed.
Inventory Posting Report Print Asterisk
Checkbox that determines whether or not the asterisk that appears to the right of the 'ORD QTY' column for any part that has a Buy Quantity Rule on the 'PO Report' will print.
- Checked - The asterisk that appears to the right of the 'ORD QTY' column for any part that has a Buy Quantity Rule on the 'PO Report' will print.
- Unchecked - The asterisk that appears to the right of the 'ORD QTY' column for any part that has a Buy Quantity Rule on the 'PO Report' will not print.
Copies of Manifest and RO Reports
Drop-down with the following values:
- '0'
- '1'
- '2'
Determines the number of copies to send to the printer when any of the following are clicked:
- The 'PRINT' or 'CLOSE' / 'TRANSMIT' buttons on the RETURN MANIFEST DETAIL screen.
- The right-click menu option 'Reports', then the 'Return Report' tab, then the 'PRINT' button on the MAIN PURCHASE ORDER SELECTION screen.
- After an order on the MAIN PURCHASE ORDER SELECTION screen is double-clicked, and then 'MENU', REPORTS', the 'Return Reports' tab, and finally 'PRINT' are clicked.
Order Response
Determines whether a PO can be partially or fully posted by ASN quantities for each received ASN whether previously manually or automatically received.
- Checked - When in the PURCHASE ORDER detail screen, the system does not reject ASNs for a PO that have been modified by a user outside of the ASN post process and does not warn that edits of a PO for a vendor that sends ASNs will cause all future ASNs to be rejected.
- Unchecked - When in the PURCHASE ORDER detail screen, the system rejects ASNs for a PO that have been modified by a user outside of the ASN post process and warns that edits of a PO for a vendor that sends ASNs will cause all future ASNs to be rejected.
Drop-down with the following selections:
- 'Reject ASN' - When an ASN arrives and the purchase order that the ASN was to be applied to has already been received or deleted, then the system ignores the ASN and does not create any new purchase orders.
- 'Create NID PO' - When an ASN arrives and the purchase order that the ASN was to be applied to has already been received or deleted, then the system creates a new NID purchase order and applies the ASN to that new purchase order instead of the original purchase order.
- 'Reopen PO' - When an ASN arrives and the purchase order that the ASN was to be applied to has already been received or deleted, the system reopens the closed purchase order and applies the ASN to it.
- 'Reopen PO by ASN' - When an ASN arrives and the purchase order that the ASN was to be applied to has already been received or deleted, the system reopens the closed purchase order and applies the ASN to it. However, unlike the option ‘Reopen PO’, this option only displays the part numbers on the PO that exist on the ASN. Not all part numbers will necessarily be placed on the resurrected PO.
Accept Auto Plus PO Confirm 855
Determines whether or not all incoming Auto Plus PO CONFIRM 855 electronic documents are processed.
- Checked - The application processes all incoming PO CONFIRM 855 electronic documents.
- Unchecked - The application does not process them.
Determines whether or not all incoming Auto Plus EDI ASN 856 electronic documents are processed.
- Checked - The application processes all incoming EDI ASN 856 electronic documents.
- Unchecked - The application does not process them.
Determines whether or not all incoming Corecentric EDI ASN 856 electronic documents are processed.
- Checked - The application processes all incoming EDI ASN 856 electronic documents.
- Unchecked - The application does not process them.
Determines whether or not all incoming GCommerce EDI ASN 856 electronic documents are processed.
- Checked - The application processes all incoming EDI ASN 856 electronic documents.
- Unchecked - The application does not process them.
Determines whether or not all incoming Generic X12 EDI ASN 856 electronic documents are processed.
- Checked - The application processes all incoming EDI ASN 856 electronic documents.
- Unchecked - The application does not process them.
Accept UniSelect PO Confirm 855
Determines whether or not all incoming UniSelect PO CONFIRM 855 electronic documents are processed.
- Checked - The application processes all incoming PO CONFIRM 855 electronic documents.
- Unchecked - The application does not process them.
Determines whether or not all incoming UniSelect EDI ASN 856 electronic documents are processed.
- Checked - The application processes all incoming EDI ASN 856 electronic documents.
- Unchecked - The application does not process them.
Order Post
Determines what happens when parts identified as 'DAMAGED' or 'WARRANTY' during PO Posting.
- Checked - Automatically puts parts identified as 'DAMAGED', on a 'WARRANTY', or 'DNRV WARRANTY' manifest when the 'TRANSFER TO STOCK' button is clicked during PO posting.
- Unchecked - Updates parts identified as 'DAMAGED' during PO posting to the Available Quantity in the part table and does not automatically put on a 'WARRANTY' or 'DNRV WARRANTY' manifest.
Determines whether or not a window displays when parts with the 'SUB TYPE' of 'BATT' are identified as 'DAMAGED' or 'OVERAGE' during PO Posting.
- Checked - Displays a window for user-entry of the battery serial number when parts with the 'SUB TYPE' of 'BATT' are identified as 'DAMAGED' or 'OVERAGE' during PO Post from both the application and RF device.
- Unchecked - No window displays.
Determines whether or not PO Posting labels are printed.
- Checked - The application will prompt the user to confirm printing part labels at PO Posting.
- Unchecked - The application will not print part labels at PO Posting.
Drop-down that determines what prints on the part label.
Selections are:
- 'ZONE / BIN' (Default)
- 'PN GROUP'
- 'PART NOTE'
Drop-down that determines what prints in the third row of the part label.
Selections are:
- 'DESCRIPTION 2' (Default)
- 'SUPPLIER CODE'
Display Variance Finalize Button
Checkbox that determines whether or not the 'Finalize' button is available on the ORDER RECEIPT VARIANCES screen.
- Checked (default) - Displays and enables the 'Finalize' button on the ORDER RECEIPT VARIANCES screen.
- Unchecked - Displays and disables the 'Finalize' button on the ORDER RECEIPT VARIANCES screen.
Split Manifest
Checkbox that determines the close settings for return orders:
- Checked - The 'Close' checkbox is checked on the 'Split Parts from Manifest' pop-up.
- Unchecked (default) - The 'Close' checkbox is unchecked on the 'Split Parts from Manifest' pop-up.
Checkbox that determines the print settings in the wireless RF Gun Add-on:
- Checked - The 'Print' control on the wireless RF gun on the Close Manifest screen is automatically checked to print.
- Unchecked (default) - The 'Print' control on the wireless RF gun on the Close Manifest screen is automatically unchecked to deny the print.
Split Return Order
Checkbox that determines the close settings for return orders:
- Checked - The 'Close' checkbox is checked on the 'Split Parts from Order' pop-up.
- Unchecked (default) - The 'Close' checkbox is unchecked on the 'Split Parts from Order' pop-up.
Checkbox that determines the print settings in the wireless RF Gun Add-on:
- Checked - The 'Print' control on the wireless RF gun on the 'Close Return Order' screen is automatically checked to print.
- Unchecked (default) - The 'Print' control on the wireless RF gun on the 'Close Return Order' screen is automatically unchecked to deny the print.
Checkbox that determines the transmit settings in the wireless RF Gun Add-on:
- Checked - The 'Transmit' control on the wireless RF gun on the 'Close Return Order' screen is automatically checked to print.
- Unchecked (default) - The 'Transmit' control on the wireless RF gun on the 'Close Return Order' screen is automatically unchecked to deny the print.
Click the 'Store Purchasing Setup' button to navigate to the STORE PURCHASING SETUP screen.