Post Entries
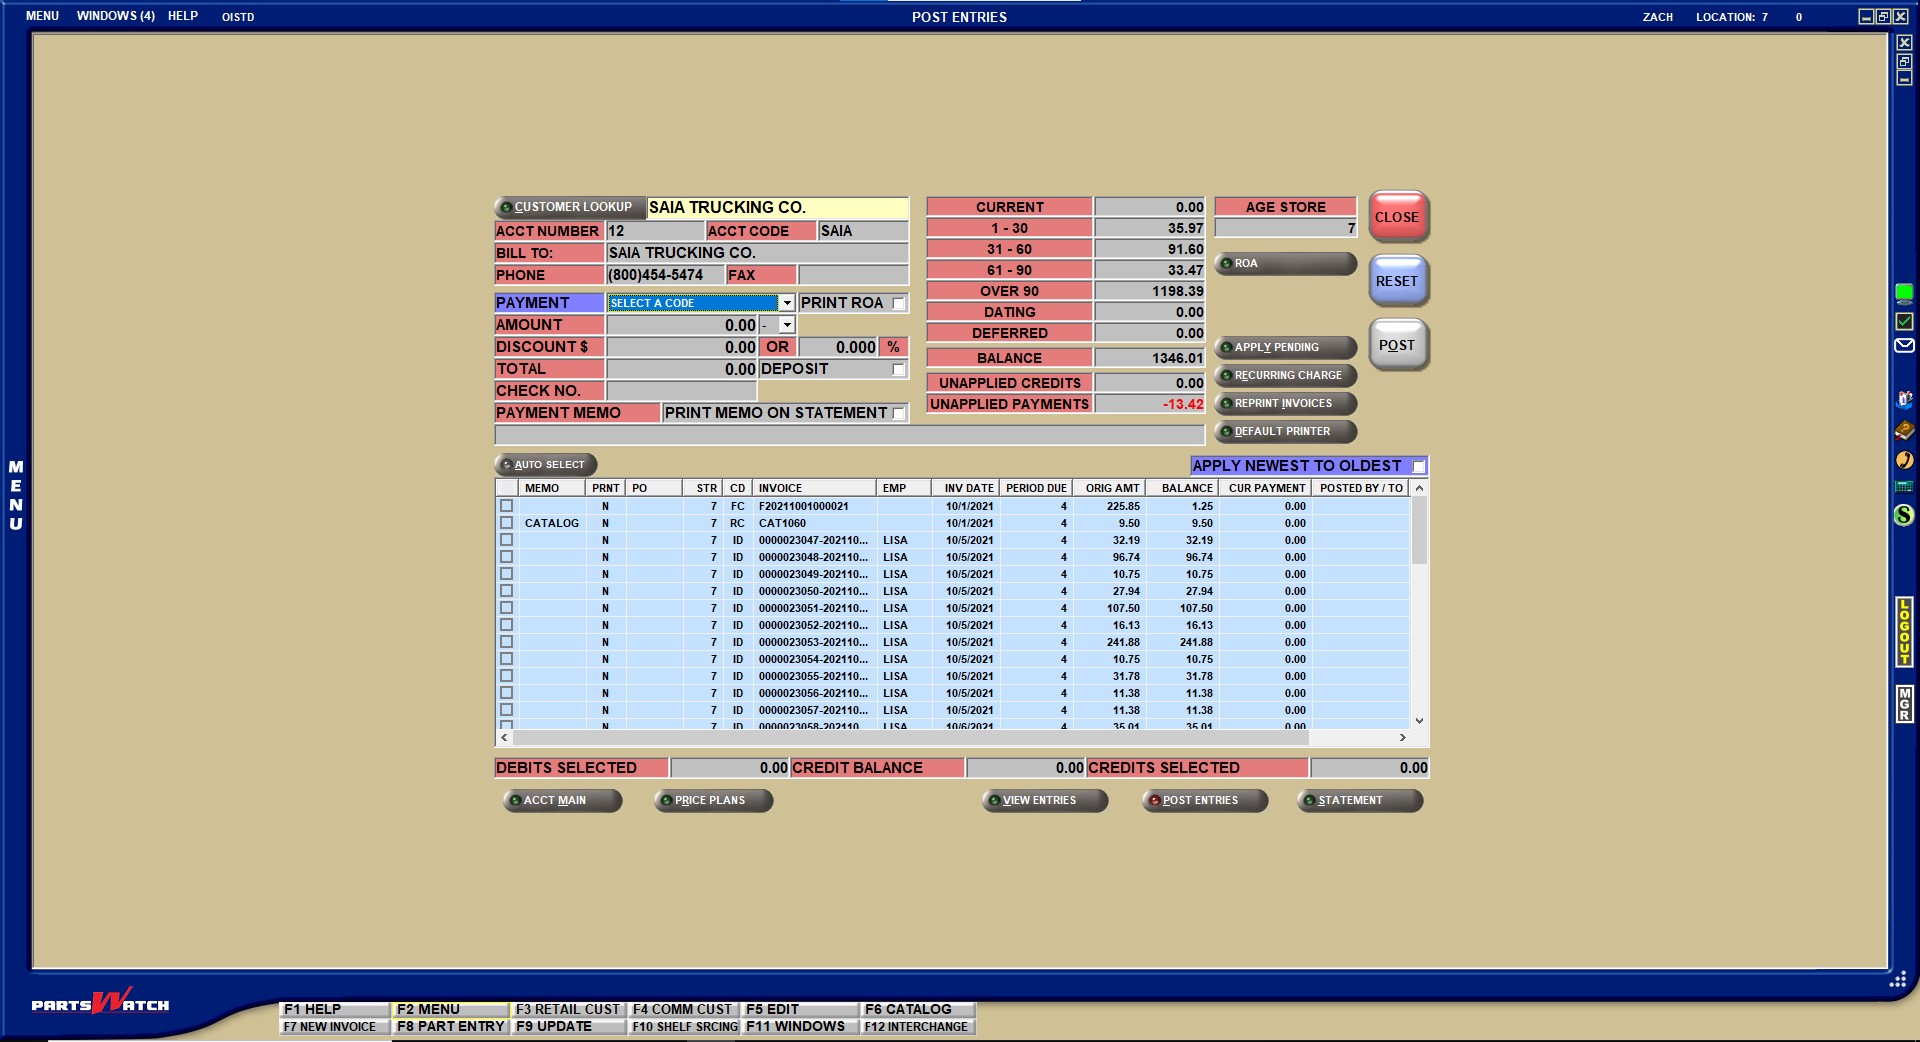
The POST ENTRIES screen is used to manually apply customer debits and credits on an account.
Menu Path: Customer, Entry Info, Post Entries, POST ENTRIES screen
The layout of the screen varies slightly based on whether the account in focus has a 'Pay Type' of 'Open Item' or 'Balance Forward'.
Post Entries Setups
Displays the customer name. Click the button to display the 'FIND ACCOUNT' window to search for a customer. The accelerator key is 'Alt' + 'C'.
Displays the account number.
Displays the account code.
Displays the name of the customer that is billed.
Displays the customer's telephone number.
Displays the customer's fax number.
Indicates the posting code.
Options are:
- 'PC - OTHER PAYMENT' - Used to manually post a payment without tracking it by the type of payment.
- 'PC - CASH PAYMENT' - Used to track payments made with currency (cash).
- 'PC - CHECK PAYMENT' - Used to track payments made by check.
- 'PC - ACH/EFT PAYMENT - Used to track payments where money is deposited directly into the store's bank account; and the store is notified by the bank that the deposit is made so they can post the payment to the customer's account without affecting the daily deposit. The 'DEPOSIT' flag will be unchecked and not editable since the payment was not actually received with the day's business. All other post/apply functionality will be available for the new code.
- 'DC - DISCOUNT CREDIT'
- 'IA - INVOICE ADJUST'
- 'CM - CREDIT MEMO'
- 'DM - DEBIT MEMO' (When a customer makes an online credit card payment to eOffice, optional convencience fees for processing the credit card can be applied to the customers' accounts. When these fees are retrieved, they are posted to the account as a 'DM' debit memo.
- 'DA - DATING'
- 'TA - TAX ADJUST'
- 'PE - POSTED ERROR'
When 'PE' is selected, the 'POSTED ERROR' window displays with a list of all posted transactions that can be reversed.
More Manual Posting Information:

Displays the 'AGE STORE' value, for the account in focus, found on the 'ACCOUNT STATEMENT CONTROLS' pop-up accessed from the MAIN ACCOUNT ENTRY screen.
Determines whether an ROA receipt prints when posting a payment. Prints a payment receipt when a payment is manually posted, when checked. Available only when the 'PAYMENT' type is 'PC - PAYMENT CREDIT' or 'DC - DISCOUNT CREDIT'.
The 'POST ENTRIES PRINT ROA DEFAULT' flag in the AR CONTROL SETUP screen determines the default of the 'PRINT ROA' flag. When the 'POST ENTRIES PRINT ROA DEFAULT' flag is checked, the 'PRINT ROA' flag defaults to checked. When the 'POST ENTRIES PRINT ROA DEFAULT' flag is unchecked, the 'PRINT ROA' flag defaults to unchecked.
Prints a credit memo receipt when the 'PAYMENT' type is 'CM - CREDIT MEMO'. Defaults to checked. The form reflects 'CREDIT MEMO' and the total displays as a negative amount.
Emails a credit memo receipt, when checked. Available only when the 'PAYMENT' type is 'CM - CREDIT MEMO'. Defaults to checked. The form reflects 'CREDIT MEMO' and the total displays as a negative amount.
Displays the amount of the payment or credit.
Indicates the discount amount or percent.
If terms are not set up in the 'ACCOUNT STATEMENT CONTROLS' window in the 'PROMPT PAY STATEMENT TERM' grid accessed from the MAIN ACCOUNT ENTRY screen, this value displays as zero (0.00 / 0.000).
The value of the 'EDIT ROA DISCOUNT' proc under 'MANAGER APPROVAL POPUP' in the OVERRIDE SECURITY screen determines if the DISCOUNT $ and % fields are editable. This proc overrides the value of the 'SHOW ROA DISCOUNT' in the AR CONTROL SETUP screen.
Note: If 'CALCULATE STATEMENT DISCOUNT IF PAST DUE' is checked on the SYSTEM GENERAL SETUP screen, the 'DISCOUNT $' amount is based on the amount in 'CURRENT' if the payment is made after the due date. The 'DISCOUNT $' amount is based on the amount in 'CURRENT' combined with the amount in '1-30' if the payment is made on or before the due date, or if there is no due date set up for the customer.
Note: If 'CALCULATE STATEMENT DISCOUNT IF PAST DUE' is unchecked on the SYSTEM GENERAL SETUP screen, the 'DISCOUNT $' amount is based on whether the account was past due at the time of the most recent statement.
Indicates the total of the payment.
When a value is entered in the field, the DISCOUNT amount and % are automatically calculated and display in the 'AMOUNT' field if the 'SHOW ROA DISCOUNT' flag is checked in the AR CONTROL SETUP screen. When the 'SHOW ROA DISCOUNT' flag is checked, the system uses the value of the 'INCLUDE TAX IN STATEMENT DISCOUNT', located in the AR CONTROL SETUP screen, to determine if tax is included in the calculation when a discount is calculated.
Includes the payment as part of the day's cash intake, when checked. Payment is included in the DAY/CASH CLOSE screen and report. Payment is not included, when unchecked. Available only when the 'PAYMENT' selected is 'PC - PAYMENT CREDIT' or 'CM - CREDIT MEMO'.
Displays the check number of the payment.
Displays the payment memo, up to 90 characters.
Note: If a 'DISCOUNT $ OR %' amount is entered along with a payment 'AMOUNT', resulting in both PC and DC transactions, the 'PAYMENT MEMO' is stored with both transactions. To prevent printing the memo on both transactions, right-click on the transaction that should not have the memo printed on it, select the 'EDIT THE MEMO PRINT FLAG' option and uncheck 'PRINT MEMO?'
Prints memo on statement, when checked. Note: Does not impact ROAs.
Displays 'Y' in the 'PRNT' column in the grid, when checked, when creating a payment. Displays 'N' in the 'PRNT' column in the grid, when unchecked.
CURRENT/1-30/31-60/61-90/Over 90
Displays the total amount due in each of the aging buckets, as appropriate.
Displays the total amount of invoices that will not become due until a future time.
Displays the total deferred core less any applied core returns. Displays only for accounts where the 'DEFERRED CORE BILLING' flag is checked.
If the 'SHOW UNAPPLIED' flag is checked in the AR CONTROL SETUP screen, only the balance of the deferred debits is included. Typically, this would be the ID entries created in the application. However, due to the AR feed, this can also include deferred DM and XD entries.
If the 'SHOW UNAPPLIED' flag is unchecked in the AR CONTROL SETUP screen, the balance of the deferred debits is included, along with the balance of unapplied deferred credits. Typically, this would only be ID and IC entries created in the application. However, due to the AR feed, this can also include deferred DM, CM, XD, and XC entries.
Reflects the total of all of the above fields.
Displays the total of invoice credits, including deferred core credits that have not been applied to core debits and excluding PCs and DCs, not yet applied to a specific debit.
Displays the amount of payments (PC and DC) that are not yet applied.
Determines whether Unapplied Credits and/or Unapplied Payments are auto selected by the system to automatically apply to debits. Used for Open Item accounts with a 'PAY TYPE' of 'OI-STANDARD' or 'OI-STATEMENT PAY' and with the 'PENDING OI CREDITS ON POSTING SCREEN' checkbox in the AR CONTROL SETUP screen checked.
Options are:
- 'ALL' (Default) - Auto selects credits and payments.
- 'UNAPPLIED CREDITS' - Auto selects Unapplied Credits only. Includes all ICs (Invoice Credits) and CMs (Credit Memos).
- 'UNAPPLIED PAYMENTS' - Auto selects Unapplied Payments only. Includes all PCs (Posted Credits) and DCs (Discount Credits).
When the 'APPLY NEWEST TO OLDEST' flag is checked, the system automatically starts with the newest debit and works backwards to the oldest debit until all unapplied credits have been applied or until all debits have been paid. When the 'APPLY NEWEST TO OLDEST' flag is unchecked, the system starts with the oldest debits. Unavailable when IA, TA, and DM transactions are entered.
Selects debits automatically to apply posted PC or CM transactions to for Open Item accounts.
Allows the user to apply credit balances to debit balances without entering a PC, CM, DM, or TA when a balance forward account is in focus. When clicked, the 'MANUAL APPLY' window displays with the period balances.
Allows the user to apply payments to balances other than the oldest. When clicked, the 'MANUAL POST' window displays to allow the amount and balance to be entered.
Click this button with a customer entered, and the 'PAYMENTS RECEIVED ON ACCOUNT' pop-up displays with the 'CUSTOMER LOOKUP' search button unavailable.
Once the payment is tendered, the application returns the user to the POST ENTRIES screen.
Applies credits that exist on the account but have not yet been applied. Used for Open Item Accounts only. Is available regardless whether the 'PENDING OI CREDITS ON POSTING SCREEN' flag in the AR CONTROL SETUP screen is checked or unchecked.
Displays the RECURRING CHARGE screen that is used to display recurring charge setups applied to an account, select recurring charge setups to apply to an account, edit existing recurring charge setups for an account and delete existing recurring charge setups for an account. The accelerator key is 'Alt' + 'E'.
Reprints multiple invoices at the same time, without having to view in Invoice Image first. Displays the 'REPRINT INVOICES' window with each invoice currently available from the screen for the displayed account, when clicked. The accelerator key is 'Alt' + 'I'.
Toggles between 'DEFAULT PRINTER' and 'SELECT PRINTER'. When 'DEFAULT PRINTER' displays, the document is directed to the default printer specified on the 'Printer Assignment' screen. When 'SELECT PRINTER' displays, a 'SELECT PRINTER' pop-up displays at print time, listing available printers. Double-click a printer to select. The word 'REPRINT' prints on the printed ROAs. The accelerator key is 'Alt' + 'D'.
Displays the discount terms for the selected customer.
Note: When the customer is not set up for terms, this text will not display.
Displays the amount of money saved by the customer due to their discount terms on their last statement.
Note: This text will only display if the customer is eligible and if the 'Terms:' text displays.
Open Item - When the 'AUTO SELECT' button is clicked, the system will start with the oldest debits and apply the credits until all unapplied credits have been applied or until all debits have been paid off if the 'APPLY NEWEST TO OLDEST' flag is unchecked. Or it will start with the newest debits and apply the credits until all unapplied credits have been applied or until all debits have been paid off if the flag is checked.
Balance Forward - The 'AUTO APPLY' button always applies oldest to newest for Balance Forward accounts. This checkbox only sorts the grid for Balance Forward accounts.
For both Open Item and Balance Forward accounts, the flag can also be used to only order the transactions in the grid from newest to oldest by checking the flag or oldest to newest by unchecking the flag without applying the transactions.
Post Entries Grid
When a customer is selected or was previously selected in the MAIN ACCOUNT ENTRY screen prior to accessing the POST ENTRIES screen, a small checkbox displays to the left of the transaction row in the grid.
For open item accounts, newly created unapplied PC transactions only show in the grid if the 'PENDING OI CREDITS ON POSTING SCREEN' is checked in the AR CONTROL SETUP screen.
Used to select transactions/rows in the grid.
- To select all transactions/rows, both credits and debits, check the checkbox in the grid header. Uncheck the checkbox to deselect all transactions/rows in the grid.
- To select a specific transaction(s)/row in the grid, check the checkbox of the desired transaction/row.
- To select a range of consecutive transactions/rows, click the first row (not the checkbox) in the range, press and hold down the 'Shift' key and then click the last row in the range. All rows between the two selected rows are highlighted. Once the rows are highlighted, press the 'Space Bar' or click the checkbox on one of the highlighted rows to check all the checkboxes for all the highlighted rows.
- To select a range of nonconsecutive transactions/rows, press and hold down the 'Ctrl' key, and then click each desired row. Once the rows are highlighted, press the 'Space Bar' or click the checkbox on one of the highlighted rows to check all the checkboxes for all the highlighted rows.
Note: To select a row,-
the account must be an Open Item account,
-
the 'PENDING OI CREDITS ON POSTING SCREEN' flag must be checked, and
-
a credit must be checked, or a payment or debit must be entered first.
-
Displays a user-entered memo, up to 16 alphanumeric characters. If a fee description is sent with the fee 'DM', the fee description will display in the 'MEMO' field.
Sets to 'Y' and prints the memo on the statement when the 'PRINT PAYMENT MEMO ON STATEMENT BY DEFAULT' flag is checked.
Sets to 'N' and does not print the memo on the statement when the 'PRINT PAYMENT MEMO ON STATEMENT BY DEFAULT' flag is unchecked.
The right-click selection 'EDIT THE MEMO PRINT FLAG' can override this flag.
Displays the customer's purchase order number for the line item.
Displays the store location where the entry was created.
Displays the posting code for the transaction.
Note: Transactions with a posting code of DA display in orange to easily distinguish Dated Billing transactions from regular transactions.
Displays the system-generated number for the item that was entered through Invoicing and/or the recurring charge prefix and number.
Displays the employee responsible for the transaction.
Displays the date that the invoice was created or the item was posted.
Displays the period that a transaction or balance is due.
Options are:
- '0 = Current'
- '1 = 1 - 30'
- '2 = 31 - 60'
- '3 = 61 - 90'
- '4 = Over 90'
Anything not yet due is negative, such as:
- '-1 = Due next month'
- '-2 = Due the month after next'
For weekly accounts:
- '0 = Current'
- '1 = 1 - 7'
- '2 = 8 - 14'
- '3 = 15 - 21'
- '4 = Over 3 weeks'
Indicates the full amount from the invoice or posted item.
Click the column heading to sort transactions from lowest to highest with negative dollar values first. Click the heading again to sort the transactions from highest to lowest with negative dollar values last.
Indicates the amount that is outstanding on an invoice or posted debit, if partially paid.
Click the column heading to sort transactions from lowest to highest with negative dollar values first. Click the heading again to sort the transactions from highest to lowest with negative dollar values last.
Indicates the credit amount that was applied against the item for payment.
When the header checkbox in the grid is checked, all unpaid debits show as a positive balance, which results in the 'CREDIT BALANCE' field being a positive value and highlighted in bright orange.
Click the column heading to sort transactions from lowest to highest with negative dollar values first. Click the heading again to sort the transactions from highest to lowest with negative dollar values last.
Displays posting information for credits only.
Options are:
- 'ID' - Blank for all debits
- 'PC' - Posted check number
- 'IC' - Original invoice number
For all other adjustments, IA, TA, FC, DA, MC, MD, this field is blank.
If a payment type is available for the fee 'DM', it will display in the 'POSTED BY / TO' field.
Identifies deferred invoices. Deferred debit invoices that have deferred items as well as all deferred credits display with a Y. These do not appear on the customer statement as due. Deferred transactions only display based on the value indicated in the 'DEFERRED ON STATEMENT OVERRIDE' field on the account or the 'DEFERRED ON STATEMENT' flag on the store level.
Indicates the 'NET' flag status of the parts on the invoice.
Options are:
- 'N (Net)' - All parts on the invoice have the 'NET' flag checked in the part table.
- 'M (Mixed)' - Some, but not all, parts have the 'NET' flag checked in the part table.
- 'Blank (Not Net)' - No parts on the invoice have the 'NET' flag checked in the part table.
Indicates the amount of the credit posted to satisfy the outstanding amount (debit) due.
Indicates the amount of the credit still left to post.
Credit balance must equal $0 or negative to complete the posting process. The field highlights in BRIGHT ORANGE when the field value is a positive amount greater than $0. Is not highlighted when the field value is negative or equal to $0.
Displays the total credits selected in the grid, both deferred core and non-deferred core credits.
Click to manually add posted transactions to the grid.
Applies any existing unapplied credits to existing unpaid debits.
When an account number is entered, all entries for that account display in the lower grid. All entries are sorted first by date, then by posting code. Unpaid Invoice debits display at the top, with the corresponding credits and other adjustments directly beneath the debit, in the order in which they were created.
Fully paid debits and their corresponding credits do not display in the POST ENTRIES screen. Paid items display in the VIEW ENTRIES screen, unless the 'PAID ITEMS ON A/R VIEW' flag is set to 'N'. Unapplied credits for Open Item accounts do not display in the POST ENTRIES screen either unless the 'PENDING OI CREDITS ON POSTING SCREEN' flag is checked in the AR CONTROL SETUP screen.
Applying Payments
Entries made in the payment section (blue fields in screen) are applied differently for each Account Type - Balance Forward Accounts and Open Item Accounts.
Balance Forward Accounts
AUTO APPLY
The 'AUTO APPLY' button is used to automatically select open debits.
Procedure to Automatically Select and Post an Open Debit
-
In the POST ENTRIES screen, post a PC or CM.
-
Click 'AUTO APPLY'. Open aging buckets are automatically selected. Selects oldest to newest regardless of the 'APPLY NEWEST TO OLDEST' flag setting.
MANUAL APPLY
Click the 'MANUAL APPLY' button to apply payments to balances other than the oldest. When clicked, the 'MANUAL APPLY' window displays to allow manual entry of an amount and balance.
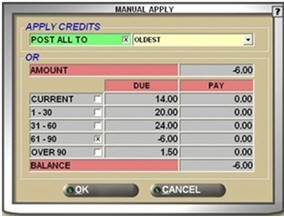
Indicates if the balances are applied to 'OLDEST' or 'NEWEST'. Defaults to 'OLDEST'.
When checked, click the 'APPLY' button so the system can apply the credit balance(s) to the oldest or the newest period depending on the value of the 'POST ALL TO' field.
Displays a total of all credit balances.
Displays the balances due for each of the periods. All credit balances and applicable debit balances are checked. When the 'POST ALL TO' field is unchecked, check the period balance to which the credits should be applied.
Displays the period balance.
Edit the amount, when the 'POST ALL TO' field is unchecked. When the 'POST ALL TO' field is checked, the field is unavailable.
Displays the total of credit balances. The balance is reduced as each period credit balance is applied to a debit balance.
Applies the credit balance to the selected period(s).
Displays a prompts stating, "The credits will not be applied. Are you sure?" Click 'Yes' and the window closes without applying the credits. Click 'No' and the window closes to click 'APPLY' to apply the credits.
Procedure to Apply Balance Forward Credits
To apply a balance forward credit, follow the steps below:
-
From the Menu, select Customer, Entry Info, Post Entries. The POST ENTRIES screen displays.
-
With a balance forward account in focus, click 'MANUAL APPLY'. The 'MANUAL APPLY' window displays.
-
Check or uncheck the 'POST ALL TO' checkbox, as appropriate.
-
Select 'OLDEST' or 'NEWEST' in the 'POST ALL TO' text box.
-
Check the period balances to be credited, if applicable.
-
Change the amount in the 'PAY' field (after deselecting the 'POST ALL TO' checkbox), if necessary. The amount in the 'BALANCE' field adjusts with each entry.
-
Click 'OK'. The credit balance is applied to the selected period(s).The system changes the period of the credit balance amount to the period of the debit balance that it is being applied to. A DM transaction is posted against any credit from one bucket that is applied to a debit balance from another bucket and the offsetting CM transaction against the debit. The 'MEMO' field displays 'JOURNAL ADJUSTMENT' for both the DM and CM transaction. Focus returns to the POST ENTRIES screen.
-
If 'CANCEL' is instead clicked, a prompt displays stating, "Credits will not be applied. Are you sure?" Click 'Yes', and the window closes without applying the credits. Click 'No', and the prompt closes allowing you to click 'APPLY' before closing the window.
Procedure to Post an Entry for Balance Forward Account
To post an entry for a balance forward account, follow the steps below:
-
From the Menu, select Customer, Entry Info, Post Entries. The POST ENTRIES screen displays.
-
Select an account in the 'CUSTOMER LOOKUP' field. The demographic information populates with the account's information. The aging buckets populate accordingly.
-
Select a payment code from the 'PAYMENT' field drop-down.
-
Enter a payment amount in the 'AMOUNT' field.
-
Enter the discount amount or %, check number, or payment memo in the appropriate fields, as needed.
-
Press the 'Enter' key.
-
Click 'AUTO APPLY' or 'MANUAL APPLY', as appropriate. If 'AUTO APPLY' is clicked, the program automatically applies the payment from the oldest debit to the newest debit until the full amount of the check is applied. If 'MANUAL APPLY' is clicked, the 'MANUAL POST' window displays to allow the amount and balance to be entered.
-
Press the 'Enter' key. The payment posts as a line item that displays in the entries grid. The aging buckets adjust according to the transaction posted.
Open Item Accounts
APPLY PENDING
The 'APPLY PENDING' button is used to apply credits that exist on the account but have not yet been applied. Clicking the 'APPLY PENDING' button causes the screen to split into two sections with the Debits displaying on the top half and the Credits on the bottom half. Click the boxes to select or clear items, so you can first choose Credits and then select the Debits to pay.
When all desired items have been checked, click 'APPLY' to apply existing unapplied credits to selected unpaid debits. Any items completely paid off are removed from the screen and any outstanding credit amount is displayed in the 'TOTAL UNAPPLIED CREDITS' field.
'APPLY PENDING' is used only for Open Item Accounts and is disabled when a Balance Forward customer is in focus.
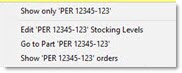
Right-Click Menu
Right-click on a line item in the grid to display the right-click menu.
CHANGE PERIOD DUE
Use to change the period that an invoice is due in. To be available, the following conditions must be met:
- For OI accounts, no amount can be already paid (i.e. 'ORIG AMT' must be equal to 'BALANCE'.)
- The posting code must be ID or DA.
- The invoice cannot be a Deferred Core Billing invoice.
- The period must be 'Current (0)'.
Displays the 'EDIT PERIOD DUE' pop-up when clicked.
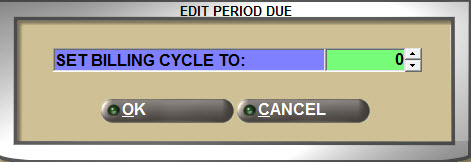
Select a billing cycle for the selected transaction and click 'OK'.
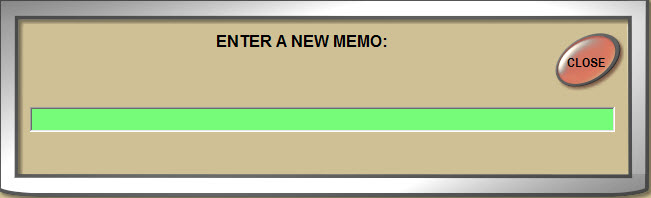
EDIT THE MEMO
Displays the following pop-up, when clicked, to enter a new memo in the 'MEMO' field for the selected transaction.
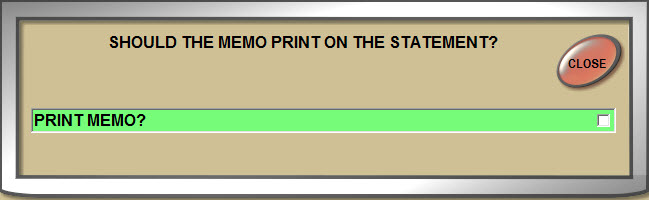
EDIT THE MEMO PRINT FLAG
Displays the following pop-up, when clicked, to check or uncheck the 'PRINT' flag, as applicable, for the selected transaction to print or not print the memo on the customer's statement.
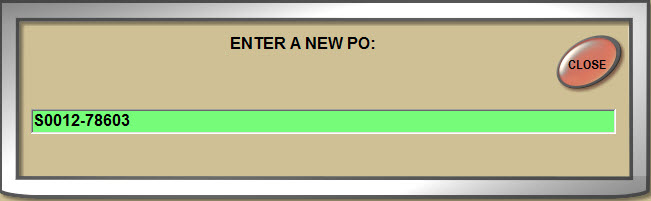
EDIT THE PO
Displays the following pop-up, when clicked, to edit the PO number.
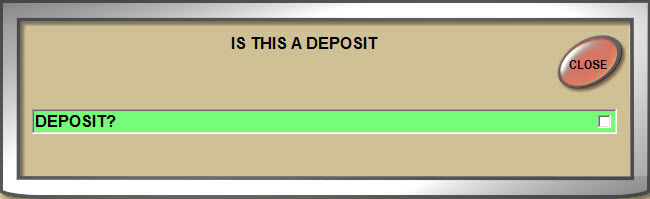
EDIT THE DEPOSIT FLAG
Displays the following pop-up, when clicked, to check or uncheck the 'DEPOSIT' flag, as applicable, for the selected transaction. Checked indicates that the item should be included in the store's deposit.
VIEW INVOICE IMAGE
Displays the Invoice Image.
REPRINT INVOICE
Prints a copy of the invoice to the default printer using the current store's form, without having to view in Invoice Image first.
FAX INVOICE
Faxes the invoice using the fax number entered in the 'FAX' field in the MAIN ACCOUNT ENTRY screen, without having to view in Invoice Image first. Option is unavailable for accounts that do not have a fax number set up.
EMAIL INVOICE
Emails the invoice using the email address in the 'EMAIL' field in the MAIN ACCOUNT ENTRY screen, without having to view in Invoice Image first. Option is unavailable for accounts that do not have an email address set up.
REPRINT ROA
Reprints an ROA. The word "REPRINT" prints on the copy. Available when the highlighted row is a posted credit (PC).
Posted Errors
The 'PE - POSTED ERROR' posting code is used to reverse posting errors.
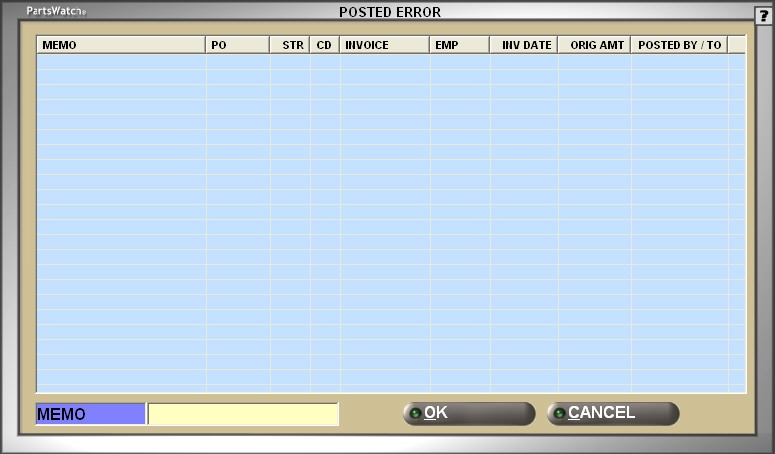
When selected in the 'PAYMENT' field in the POST ENTRIES screen, the 'POSTED ERROR' window displays with a list of all the posted transactions that can be reversed.
The PE posting code can be used to reverse the following posted debit and posted credit transactions manually added:
- 'PC - PAYMENT CREDIT' (Credit)
- 'IA - INVOICE ADJUST' (Debit/Credit)
- 'CM - CREDIT MEMO' (Credit)
- 'DM - DEBIT MEMO' (Debit)
- 'TA - TAX ADJUST' (Debit/Credit)
- 'DC - DISCOUNT CREDIT' (Credit)
The 'PC - PAYMENT CREDIT' transaction can be reversed when posted from the POST ENTRIES screen or created as an ROA from the INVOICE screen.
AR posting codes that are created by the system cannot be reversed. However, if any manually posted codes are applied to these system-generated transaction types, the PE posting code will undo the postings and return the transaction to its original status. These posting codes are:
- 'ID - INVOICE DEBIT'
- 'IC - INVOICE CREDIT'
- 'PB - PREVIOUS BALANCE'
- 'FC FINANCE CHARGE'
- 'CE - CASH ENTRY'
- 'DA - DATED INVOICE'
- 'XC - EXTERNAL CREDITS'
- 'XD - EXTERNAL DEBITS'
The PE code is available to reverse a posted transaction until the end of day has been run. Posted transactions (PC, IA, CM, DM, TA or DC) entered erroneously that were created before the last end of day close are not available to apply a PE code against regardless whether the 'DEPOSIT' flag is checked at the time of posting or not. An erroneous transaction is backed out of the DAY/CASH CLOSE screen when the PE transaction is created and will "undo" any transactions entered by mistake. The PE code is not available for transactions that have aged at end of period.
Erroneous transactions and their reversals are deleted by the system if the Account Conversion Utility is run.
User Security
Procedure to Reverse Posting Error on Manually Added Posted Debit/Credit
To reverse a posting error on a manually added posted debit or posted credit, follow the steps below:
-
From the Menu, select Customer, Entry Info, Post Entries. The POST ENTRIES screen displays.
-
Select the desired account. The screen populates with account related information.
-
Search for an ROA from Point-of-Sale or post a PC, DC, DM, CM, TA, or IA erroneously.
-
Select 'PE - POSTED ERROR' in the 'PAYMENT' field. The 'AMOUNT', 'DISCOUNT $ or %', 'TOTAL', 'CHECK NO.', and 'MEMO' fields are grayed out and unavailable. The 'DEPOSIT' and 'PRINT' fields are unchecked and unavailable. The 'POSTED ERROR' window displays listing all posted transactions that can be reversed. The last transaction manually posted by the user or the last ROA added by the program is highlighted.
-
Select an entry. (Only one posted transaction can be reversed at a time.)
-
Click 'OK'. The window closes. A prompt displays stating, "The selected transaction will be removed. Are you sure?"
-
Click 'YES' to clear the erroneous transaction or 'NO' to close the prompt to return to the POST ENTRIES screen without resetting the screen. If 'YES' was clicked, the erroneous transaction is reversed. For example, if a 'PC - PAYMENT CREDIT' was posted, a PE debit transaction is posted to offset the credit.
-
Navigate to the VIEW ENTRIES screen to view the PE transaction.
When the 'PAYMENT' Type for an OI-Statement, OI-Standard, and Balance Forward payment type is 'PC-PAYMENT CREDIT', the 'PRINT' field displays. When an applied or unapplied payment transaction is completed, the same ROA form that prints when an ROA is tendered from the INVOICE screen prints with the payment information, when the 'PRINT' field is checked. The application prints the selected form from the 'ROA FORM' field in the FORMS SETUP screen.
The check number prints on the ROA when a check number is entered in the 'CHECK NO.' field. The memo prints on the printed receipt when a memo is entered in the 'PAYMENT MEMO' field. The employee logged in to the application is tracked as the 'CASHIER' on the printed receipt.
Reprint Invoices
The 'REPRINT INVOICES' button allows the reprinting of multiple invoices at the same time. When clicked, the 'REPRINT INVOICES' window displays with each invoice currently available from the screen for the displayed account.
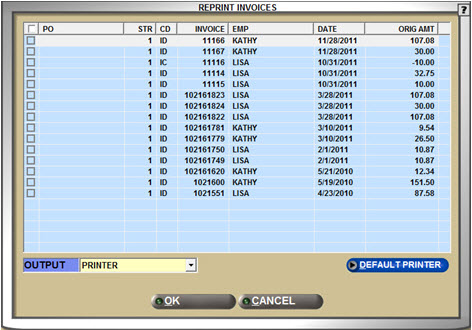
To select one, several or all invoices to reprint, check the check box on each appropriate row, or check the check box in the grid header to select all invoices. The accelerator key is 'Alt' +'I'.
STATEMENT Button
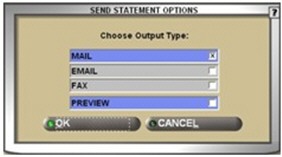
When an account is selected and the 'STATEMENT' button is clicked, the 'SEND STATEMENT OPTIONS' window displays to select the output type. The window populates based on the selected customer or store's account settings. For instance, if the selected customer or store account setting has mail selected, the 'MAIL' output type defaults to checked.
An email generated statement must be in a Portable Document Format (PDF). When the PDF software is not installed, a message displays stating, "Account xxxxxxxx – Email Error. PDF Creator Printer not found. Please install PDFCreator", and the statement is not generated.