Store Information
The STORE GENERAL SETUP screen sets up store-specific controls by process type and opens to the 'STORE INFORMATION' tab. The additional tabs narrow the setups per process.
The screen provides several separate tabs for setup:
- Store General Setup - 'Store Information' Tab
- Store General Setup - 'Deferred Core' Tab
- Store General Setup - 'Report GPM %' Tab
- Store General Setup - 'G/L Export' Tab
- Store General Setup - 'SORO' Tab
- Store General Setup - 'IWS' Tab
- Store General Setup - 'Shelf Sourcing' Tab
- Store General Setup - 'Email' Tab
- Store General Setup - 'Price Change' Tab
- Store General Setup - 'Cash Drawer' Tab
- Store General Setup - 'Time Clock' Tab
- Store General Setup - 'Consignments' Tab
Menu Path: Controls, Store, Store Info, STORE GENERAL SETUP screen, STORE INFORMATION tab
Note: The 'EDIT' button must be enabled to edit the screen. The 'UPD' (update) button must be clicked in order to save changes. If the screen is closed without updating, the system prompts to save the changes.

Accelerator keys are 'F5' to 'EDIT' and 'F9' to 'UPD' (update).
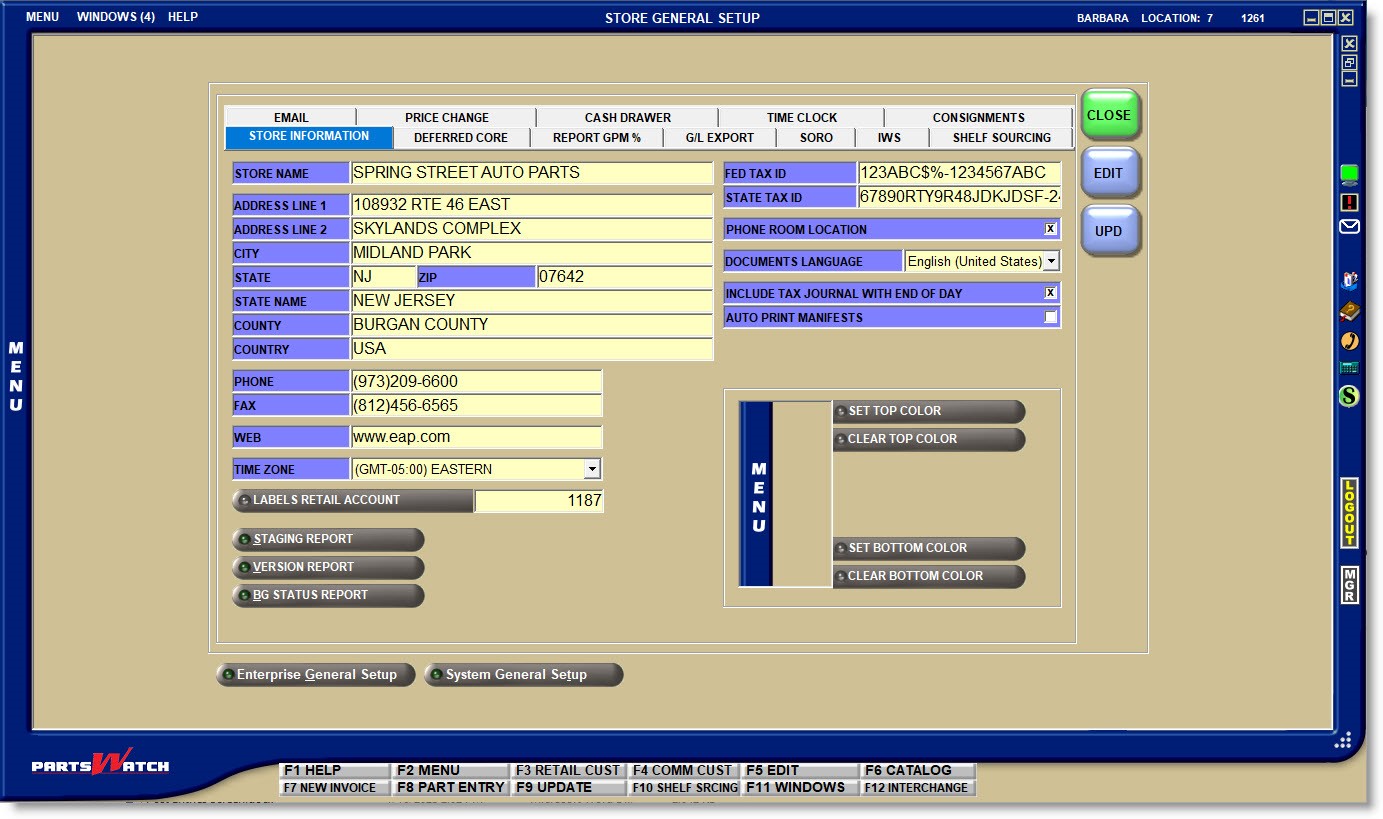
The upper-left section is used to define the store's name and address.
Allows entry of up to 32 alphanumeric and special characters. The store name prints on all invoices and customer statements.
Allows entry of up to 30 alphanumeric and special characters per address field.
Enter the city, state, and zip code associated with the address entered above.
Enter additional location information:
Allows entry of up to 30 alphanumeric and special characters.
Allows entry of up to 30 alphanumeric and special characters.
Allows entry of up to 30 alphanumeric and special characters.
Enter the phone number of the store.
Enter the number of the fax machine for the store, if one is present.
WEB
Enter the store's internet address to print the address in the header section on PW Standard Invoice forms. The alpha characters can be entered as upper or lower case.
TIME ZONE
Click the drop-down field and select the time zone the store is located in. The time zone is used to track the time that processes are performed. For example, invoice print time.
Read-only text field displaying the store address latitude/longitude coordinates.
Note: If changes are made to the 'ADDRESS LINE 1', 'ADDRESS LINE 2', 'CITY', 'STATE'/'PROVINCE' or 'ZIP'/'POSTAL CODE' fields, the 'LATITUDE' and 'LONGITUDE' values will be cleared.
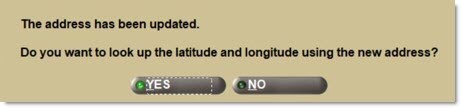
Note: When the 'Upd' button is clicked, if the store's 'Address Line 1', 'Address Line 2', 'City', 'State/Province', or 'Zip/Postal Code' fields are updated, and if the 'Address Line 1', 'Address Line 2', 'City', 'State/Province', or 'Zip/Postal Code' all have non-blank values, the system performs the following:
-
Update the store's 'Latitude' and 'Longitude' fields to blank values.
-
Call the Google interface passing the values of the store's 'Address Line 1', 'Address Line 2', 'City', 'State/Province', or 'Zip/Postal Code' , without performing any validation of the five values passed.
-
If any error occurs after the call to the Google interface is made:
-
Display a prompt with the text “Failed address geocode lookup” and an 'Ok' button.
-
When the 'Ok' button is clicked, the store's 'Latitude' and 'Longitude' field values will remain blank values.
-
-
If no errors occur with the call to the Google interface:
-
Receive from the Google interface the Latitude and Longitude values associated with the address values passed to Google.
-
Update and display the store's 'Latitude' and 'Longitude' field values provided by Google.
-
Note: Only available if the hidden switch 'EnableGoogleGeocodeLookup' is enabled.
When either the 'Latitude' or 'Longitude' fields are edited, the following validations occur:

- Display a prompt pop-up with the text “Please enter a valid latitude.” when the 'LATITUDE' value entered is a number greater than 90 or less than -90.
- Display a prompt pop-up with the text “Please enter a valid longitude.” when the 'LONGITUDE' value entered is a number greater than 180 or less than -180.
The following rules will be applied when any of the pertinent address fields are edited, which include: 'ADDRESS 1', 'CITY, 'PROVINCE/STATE', and 'POSTAL CODE/ZIP' and/or the 'LATITUDE' field, and/or the 'LONGITUDE' field on the two screens and one pop-up above:
- The Google API will be called and update the 'LATITUDE'/'LONGITUDE' fields when:
- The value of the 'LATITUDE' field or the 'LONGITUDE' field is set to zero, as long as all pertinent address fields have a value, regardless of whether any values of the address fields were changed.
- Any of the pertinent address fields are entered and saved, as long as all pertinent address fields have a value, and the current value of the 'LATITUDE' or 'LONGITUDE' field is zero.
- Any of the pertinent address fields are entered and saved, as long as all pertinent address fields have a value, the current value of both the 'LATITUDE' and 'LONGITUDE' fields are non-zero, and the 'YES' button is clicked after the prompt pop-up is displayed below:
LABELS RETAIL ACCOUNT
Enter the account number used to calculate price label prices and is used as an override to the account number set up in the 'LABELS RETAIL ACCOUNT' setting on the enterprise level.
When neither the store nor the enterprise-level 'LABELS RETAIL ACCOUNT' field is populated, the account number set up in the 'DEFAULT ACCOUNT' field is used to calculate price label prices.
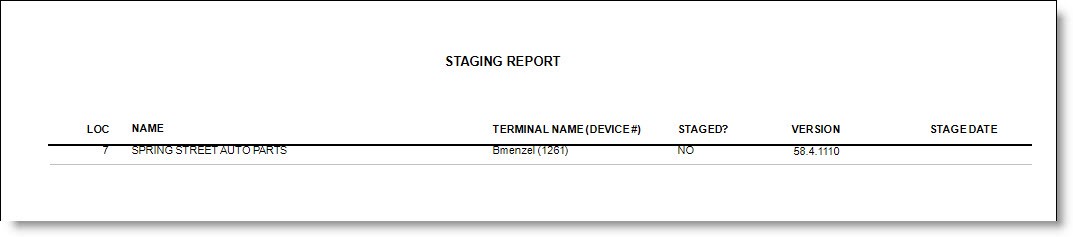
STAGING REPORT
Click the 'STAGING REPORT' button to preview a report used to identify the terminals in the store that have already successfully downloaded ("staged") a new release version as well as the terminals that have not. The previewed report can be printed or exported as an Excel formatted file.
The report outputs the store location number ('LOC'), store name ('NAME'), terminal name ('TERMINAL NAME'), and device # ('DEVICE #') as well as whether or not the download has been staged ('STAGED?'), the release version number ('VERSION'), and the staged date ('STAGE DATE').
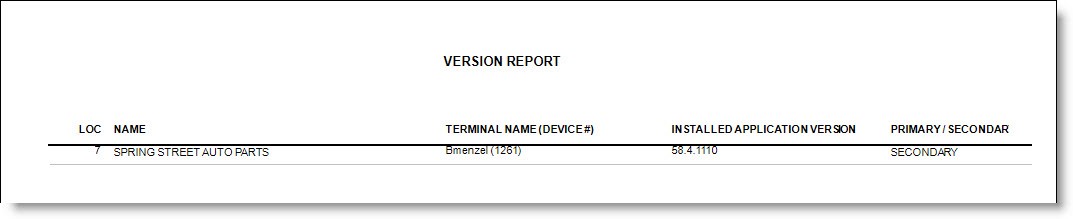
Click the 'VERSION REPORT' button to preview a report used to identify the build version of the application each terminal in the store is currently running and to identify which terminals are set as Host or Subscriber for Mode 2 purposes.
When used in conjunction with the Automated Software Deployment (ASD) function, the report can also be used by store managers to determine if all PC terminals in the store have been upgraded and are running the latest client build version. The previewed report can be printed or exported as an Excel formatted file.
The report outputs the store location number ('LOC'), store name ('NAME'), terminal name ('TERMINAL NAME'), and device # ('DEVICE #') as well as the application version ('INSTALLED APPLICATION VERSION'), and identifies the terminal as a Mode 2 'primary' or 'secondary' terminal.
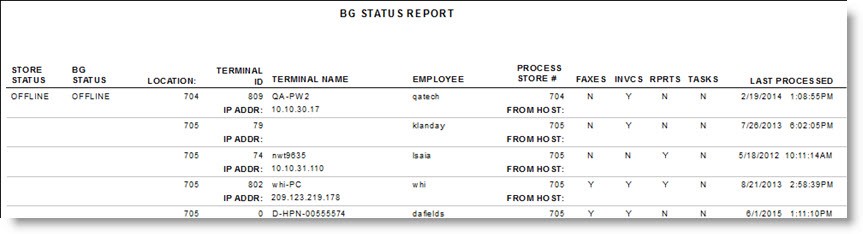
Click the 'BG STATUS REPORT' button to preview a report that provides an easy way for system administrators to review the status of the background job processors across stores, thereby identifying problems that need to be identified and addressed more quickly.
The reported fields come from the 'bgstatus' table and the terminal table and contain all of the terminals that have run the BG Processor for a schema database organized by three major sections:
- Both the store and all BG Processors are offline.
- The store is online but BG Processor is offline.
- Both the store and BG Processor are online.
The report outputs:
- 'STORE STATUS' - Whether the store is 'ONLINE' or 'OFFLINE'.
- 'BG STATUS' - Whether the background job is 'ONLINE' or 'OFFLINE'.
- 'LOCATION' - Store number associated with the PC terminal that ran the background job.
- 'TERMINAL ID' - Terminal ID of the PC terminal that ran the background job.
- 'TERMINAL NAME' - Terminal name of the PC terminal that ran the background job.
- 'EMPLOYEE' - Employee associated with the PC that ran the background job.
- 'PROCESS STORE #' - Store number entered on the 'BACKGROUND PROCESSOR SETUP' window.
- 'FAXES' - Whether the 'PROCESS OUTGOING EMAIL/FAX DOCUMENTS' checkbox is checked on the 'BACKGROUND PROCESSOR SETUP' window: 'Y' (Yes) or 'N' (No).
- 'INVCS' - Whether the 'PROCESS BACKGROUND INVOICES' checkbox is checked on the 'BACKGROUND PROCESSOR SETUP' window: 'Y' (Yes) or 'N' (No).
- 'RPRTS' - Whether the 'PROCESS BACKGROUND REPORTS' checkbox is checked on the 'BACKGROUND PROCESSOR SETUP' window. Options are 'Y' (Yes) or 'N' (No).
- 'TASKS' - Whether the 'PROCESS TASK SCHEDULER' checkbox is checked on the 'BACKGROUND PROCESSOR SETUP' window: 'Y' (Yes) or 'N' (No).
- 'LAST PROCESSED' - Date and time the Background Processor last ran.
- 'IP ADDR' - IP Address of the PC that ran the background processor.
- 'FROM HOST' - Internet host for the PC that ran the background processor.
Optionally enter up to 50 alphanumeric and special characters for the store’s federal tax identification number.
STATE TAX ID
Optionally enter up to 50 alphanumeric and special characters for the store’s state tax identification number.
PHONE ROOM LOCATION
The setup only displays if Phone Room functionality is enabled. Determines whether or not the store uses Phone Room functionality.
- Checked - Phone Room functionality is enabled for the store.
- Unchecked - Phone Room functionality is disabled and not available for the store.
DOCUMENTS LANGUAGE
Click the drop-down and select the language that prints for documents created in the store if other than English (United States).
Examples are:
- 'Spanish (United States)'
- 'Spanish (Honduras)'
- 'English (United Kingdom)'
INCLUDE TAX JOURNAL WITH END OF DAY
Determines whether or not the Tax Journal is output as part of the End-of-Day reports.
- Checked - The Tax Journal is output.
- Unchecked - The Tax Journal is not output.
Determines whether or not manifests automatically print when the 'CLOSE' button on the MANIFEST DETAIL screen is clicked.
- Checked - Closed manifests automatically print.
- Unchecked - Closed manifests do not print.
Colors can be set up, per store that display in the left application border as a visual indication of the store currently open on the screen. Set up the same or different colors in the upper and lower sections of the border.

Click the button to open the 'Color' pop-up and select the color to display in the upper section of the left border.
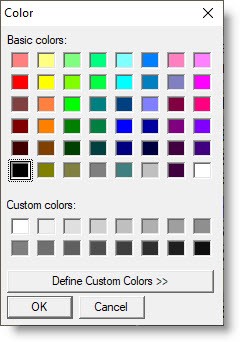
Click 'Define Custom Colors' to search through and select additional colors.

Click 'OK' and the selected color is previewed to the left of the button.
Click 'UPD' to save the changes and to display the selected color in the application border.
CLEAR TOP COLOR
Click the button to clear the color selected in the upper section of the left border and a prompt open to make sure the color should be cleared.
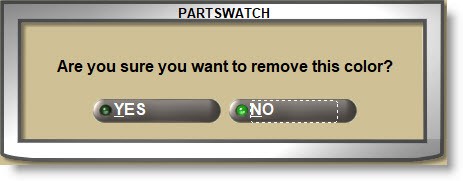
Click 'YES' to remove and the color is removed from the preview to the left of the button.
Click 'NO' to save changes and to clear the color from the application border.
SET BOTTOM COLOR
Follow the same process as defined for 'SET TOP COLOR' to set the color that displays in the lower section of the left application border.
CLEAR BOTTOM COLOR
Follow the same process as defined for 'CLEAR TOP COLOR' to clear the color from the lower section of the left application border.
Enterprise General Setup
The 'Enterprise General Setup' button at the bottom of the screen is used to open the ENTERPRISE GENERAL SETUP screen to set up multi-store controls.
Click the 'Store General Setup' button on the bottom of the ENTERPRISE GENERAL SETUP screen to return to the STORE GENERAL SETUP screen.