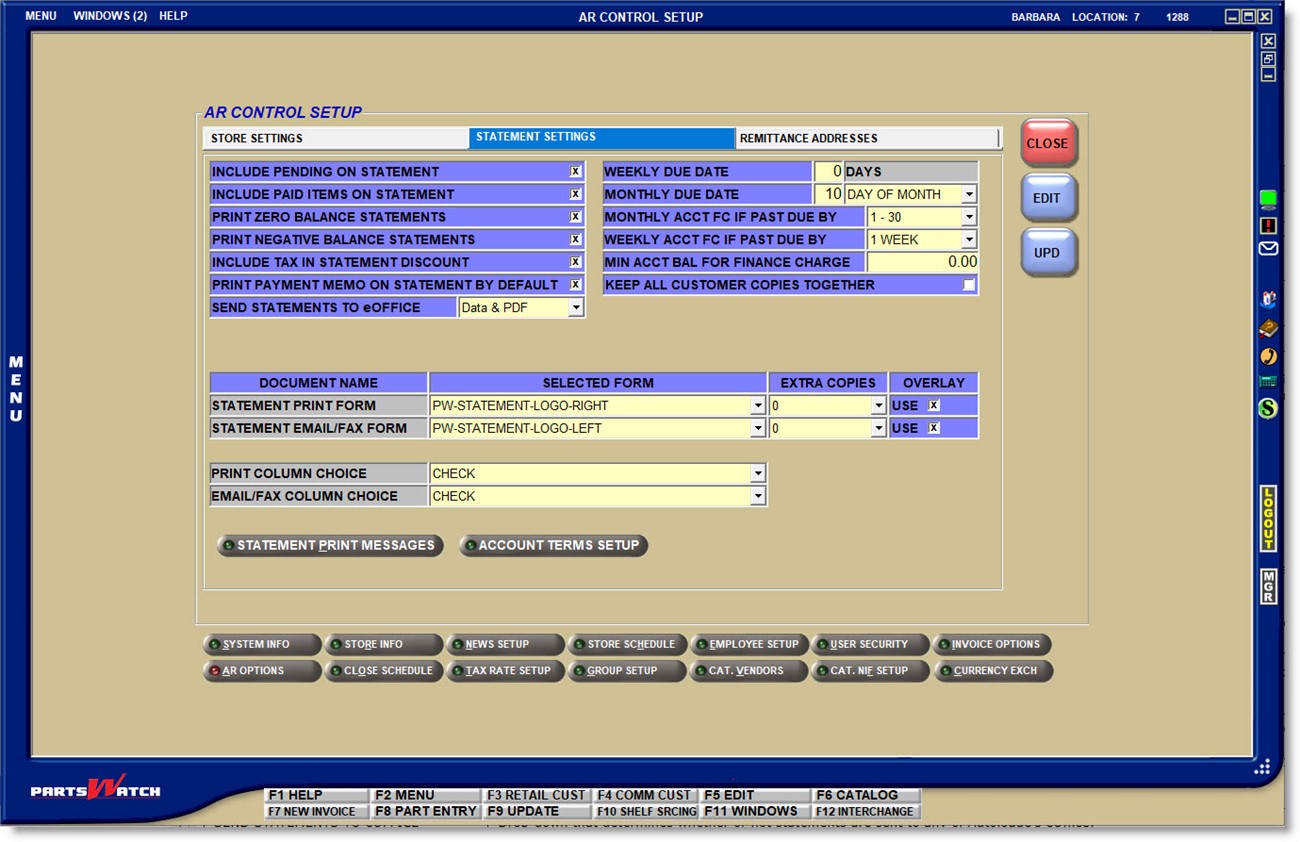
Statement Settings Tab
The AR CONTROL SETUP screen is used to set up controls that affect all accounts with Account Receivables payment terms and for multi-stores, must be setup per store. The screen provides three separate tabs for setup:
- 'AR Control Setup Screen - 'STORE SETTINGS' Tab
- 'AR Control Setup Screen - 'STATEMENT SETTINGS' Tab
- 'AR Control Setup Screen - REMITTANCE ADDRESS' Tab
The 'STATEMENT SETTINGS' tab is used to set up controls that affect all accounts with Account Receivables payment terms that determine how the customers' statements will be output.
Menu Path: Controls, Store, AR and Close Options, AR CONTROL SETUP screen, 'STATEMENT SETTINGS' tab.
INCLUDE PENDING ON STATEMENT
For Open Item accounts only. Determines whether or not unapplied credits are reflected on the statement.
- Checked - Unapplied payments and unapplied credits print on account statements and are deducted from the statement balance.
- Unchecked - The statement does not reflect payments and credits not yet applied nor does the system deduct them from the statement balance.
INCLUDE PAID ITEMS ON STATEMENT
Determines whether all transactions created in the statement period or only fully paid transactions are included on the statement.
- Checked - Transactions fully paid off in the statement period are included on the statements.
- Unchecked - Only unpaid transactions are included on the statements.
Determines whether or not to print statements for customers with a zero account balance.
- Checked - All statements print regardless of whether the account has a balance or not.
- Unchecked - Only statements print for accounts with a balance greater than zero.
PRINT NEGATIVE BALANCE STATEMENTS
Determines whether or not to print statements for customers with a credit balance.
- Checked - All statements print regardless of whether the account has a balance due or not.
- Unchecked - Only statements print for accounts with a balance due.
INCLUDE TAX IN STATEMENT DISCOUNT
Determines whether or not tax is included in the prompt payment statement discount.
- Checked - Includes tax in the prompt payment statement discount, per store and uses the customer's 'AGE STORE', which can differ from the store printing the statements.
Note: If the 'AUTO-CALC DISCOUNT ON POSTING SCREEN' and/ or 'AUTO-CALC DISCOUNT ON ROA WINDOW' control is enabled so that the discount is automatically calculated when a payment is created, the system uses the value of the 'INCLUDE TAX IN STATEMENT DISCOUNT' flag to determine whether or not tax is included in the calculation.
- Unchecked - Does not include tax (including tax on fees), in the prompt payment statement discount, per store. The statement can potentially have the discount terms print with 'Available Discount 0.00' since the credits applied to the current balance may have already paid off the full amount on the non-tax values and only tax values (which don't get a prompt payment discount) are left. For example:
3 invoices total 2232.88 with 2080.00 eligible for a 2% discount of 41.60:
- 1000.00 in part sales and 73.50 in taxes
- 1000.00 in part sales and 73.50 in taxes
- 80.00 in part sales and 5.88 in taxes
2 payments are created:
- 1500.00 and a discount of 30.61 is given
- 625.00 and a discount of 10.99 is given
The discounts given are: 30.61 + 10.99 = 41.60 are the total discount allowed.
Since the total discount on parts is already given with a remaining balance of 66.28, the statement will show the 'Available Discount' of '0.00'.
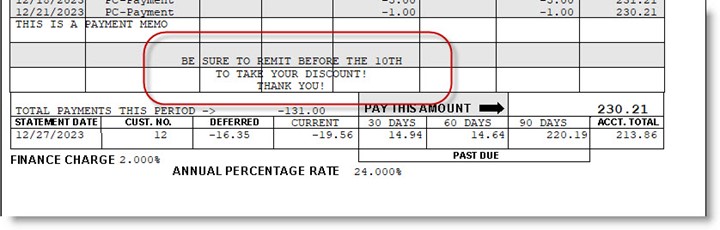
PRINT PAYMENT MEMO ON STATEMENT BY DEFAULT
Determines the default for whether or not to print the 'PAYMENT MEMO' on the statement at the time the payment is posted in the POST ENTRIES screen or tendered as an ROA. Regardless of the default, the flag can be changed after creation.
- Checked - Defaults the 'PRINT MEMO ON STATEMENT' checkbox to 'Y' so that the 'PAYMENT MEMO' prints on the statement.
- Unchecked - Defaults the 'PRINT MEMO ON STATEMENT' checkbox to 'N' so that the 'PAYMENT MEMO' does not print on the statement.
SEND STATEMENTS TO eOFFICE
This field is available when any of the subscription-based Autologue eProducts are enabled. Click the drop-down and select how statements are sent to ePaperlessOffice (eOffice) by the end-of-week/end-of-month process:
- 'None' - Statements are not sent to eOffice.
- 'Data Only' - Statement data only is sent to eOffice.
- 'Data & PDF' (default) - Both the statement data and a statement image (PDF) file are sent to eOffice.
Print Store With Invoice Number on Statement
When checked, the store number will print with associated Invoice Debits (IDs), Invoice Credits (ICs), Dating transaction line items (DAs), or Unpaid CODs (CUs), and the invoice number. When unchecked, the store number does not print.
Enter a value, between 0 and 31, as the number of days from the time the statement is issued until payment is due for weekly accounts. If a value greater than 31 is entered, the system prompts with the allowed value.
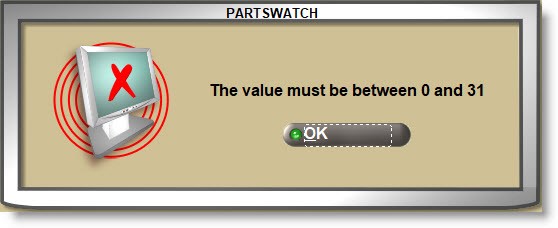
This setting determines when the statement balance is due. Enter a value between 0 and 31 and click the drop-down field to select:
- 'DAYS' - The program adds the value entered to the statement date to determine when the balance is due. For example, if '10' 'DAYS' is the value set up and statements are run on June 25, then the due date is July 4 (June 25 plus '10' days).
- 'DAYS OF MONTH' - The program looks at the next close date and sets the due date to the specified day in the month following the close date. For example, if '10' 'DAYS OF THE MONTH' is the value set up and month-end is run for June, the balance is due on July 10.
Note: A monthly 'DUE DATE' setting on the account level can be used as an override to the store-level setting.
MONTHLY ACCT FC IF PAST DUE BY
Click the drop-down and select the age period that determines finance charge eligibility for accounts past the monthly statement due date.
- '1-30'
- '31-60'
- '61-90'
- 'OVER 90'
WEEKLY ACCT FC IF PAST DUE BY
When Finance Charges are calculated the period selected determines which weekly aging buckets get Finance Charges. Click the drop-down and select the age period that determines finance charge eligibility for weekly accounts past due.
- '1 WEEK' (Default)
- '2 WEEKS'
- '3 WEEKS'
- '4 + WEEKS'
Calculation of finance charges for both Balance Forward and Open Items accounts does not occur when end-of-week is run. Finance charges are only calculated during end of month, regardless if the account's 'AGE CODE' is set to 'WEEKLY'.
MIN ACCT BAL FOR FINANCE CHARGE
Enter the minimum balance amount that must be overdue before finance charges are applied. For example, if set to '100.00' and the balance past due is $98.00, a finance charge will not be applied, but if the balance is $101.00 past due, the finance charge will be applied.
Note: A 'MIN ACCT BAL FOR FC' setting on the account level can be used as an override to the store-level setup.
KEEP ALL CUSTOMER COPIES TOGETHER
Determines how copies are output when printing statements and the 'MAIL DELIVERY' statements flag is checked, and the statement is set to print 'EXTRA COPIES' '1' or greater.
- Checked - Statement print will keep extra copies with the original copy. For example, some customers may request more than one copy
- Unchecked - Statement print will output the full statement run, followed by a full run for each extra set of copies. For example, the store may need one set for the customers and one set for their records.

Statement Form Setup
Statement Examples
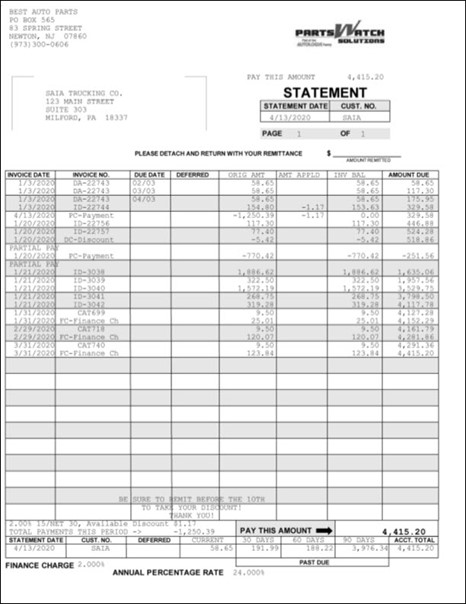
Statement - Plain Paper - Overlay - Logo Right / Overlay = Yes
Balance Forward

Open Item
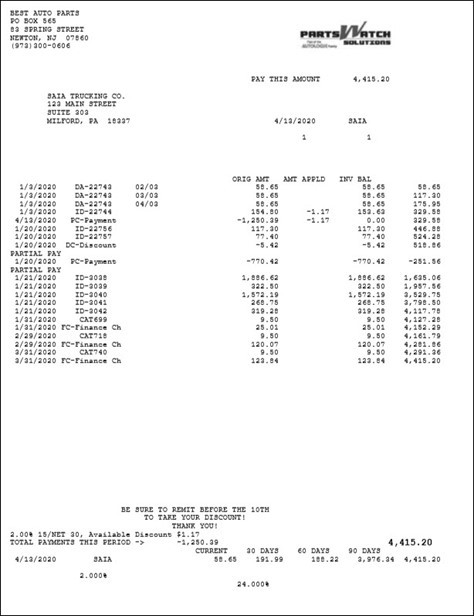
Statement - Plain Paper - Overlay - Logo Right / Overlay = No
Balance Forward

Open Item
Statement - Plain Paper - Overlay - Logo Left / Overlay = Yes
Balance Forward
Open Item
Statement - Plain Paper - Overlay - Logo Left / Overlay = No
Balance Forward

Open Item
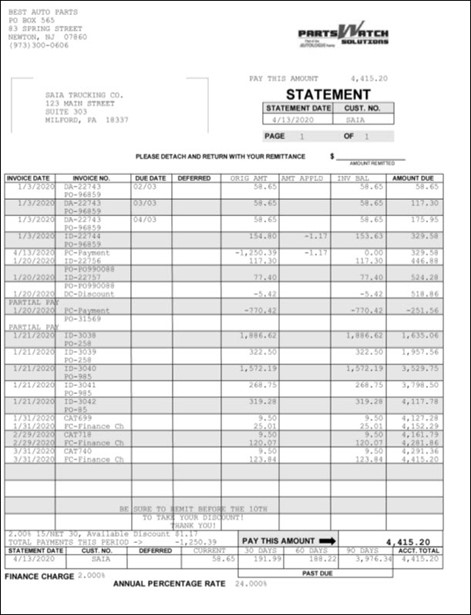
Statement - Logo Right - W/PO / Overlay = Yes
Balance Forward
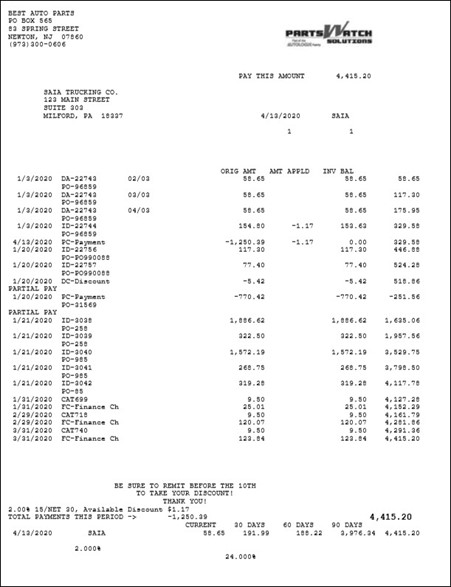
Open Item
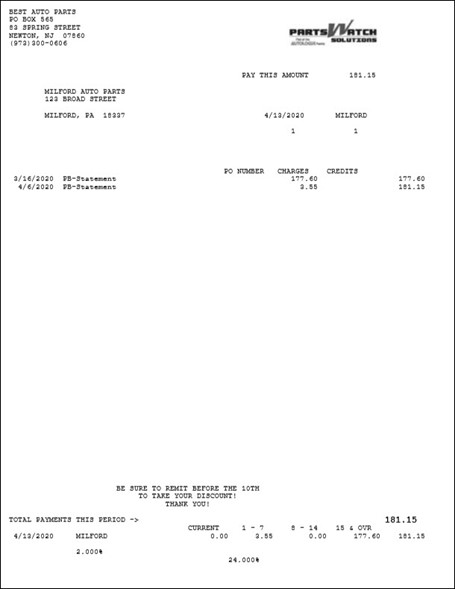
Statement - Logo Right - W/PO / Overlay = No
Balance Forward
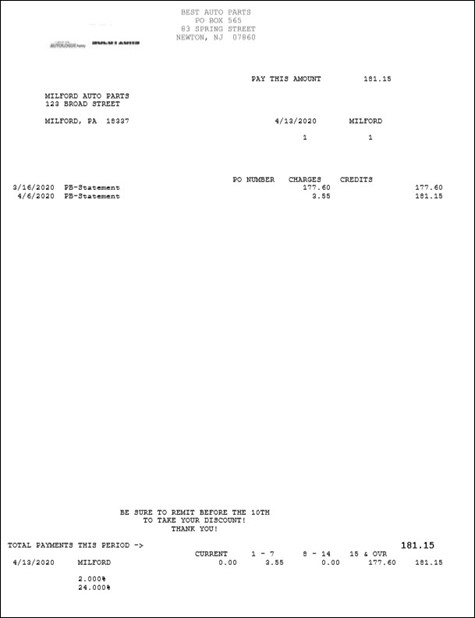
Open Item
Statement - Logo Left - W/PO / Overlay = Yes
Balance Forward

Open Item

Statement - Logo Left - W/PO / Overlay = No
Balance Forward
Open Item

JCON Plain Paper Statement / Overlay = Yes
Balance Forward
Open Item
JCON Plain Paper Statement / Overlay = No
Balance Forward
Open Item
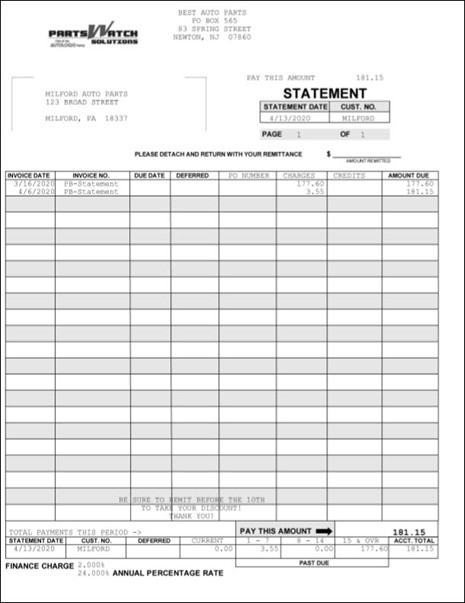
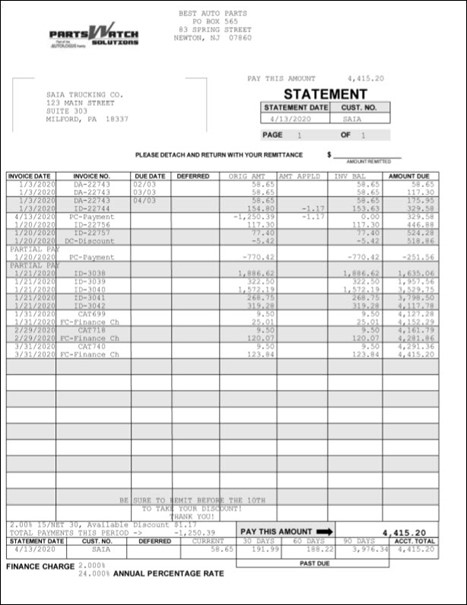
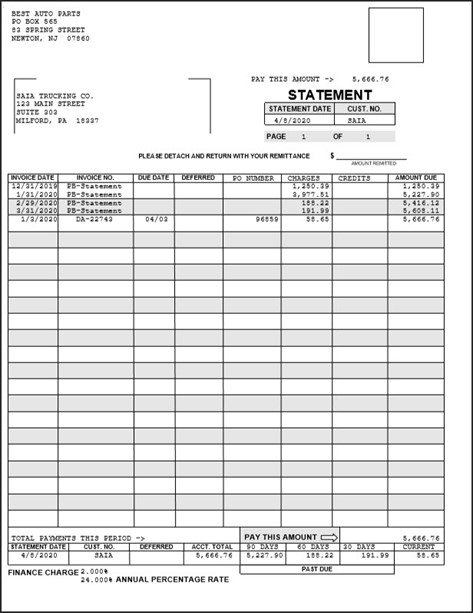
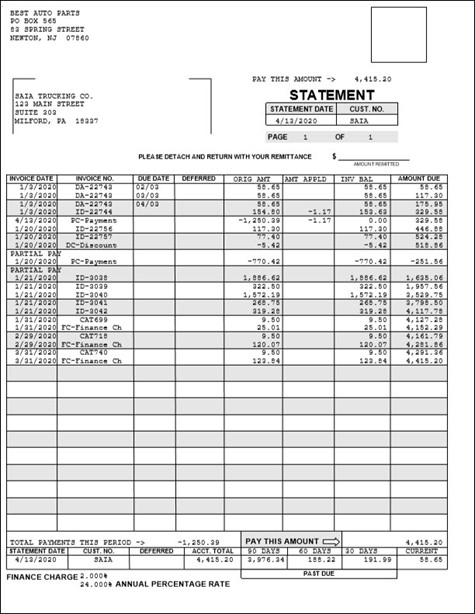
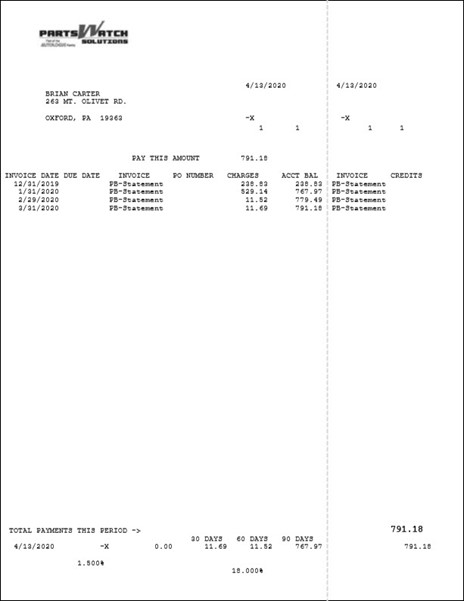
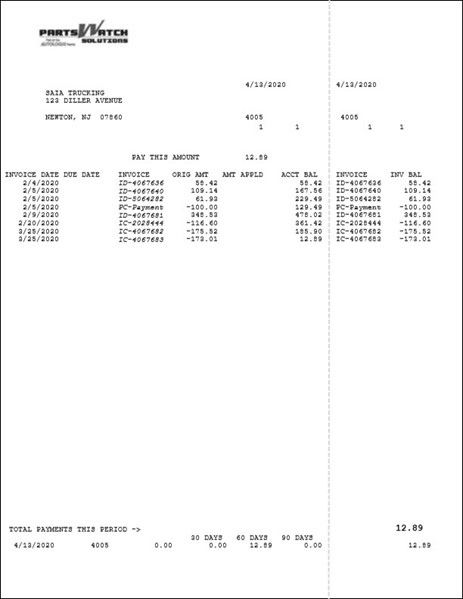
Account Statement - Blank Form / Overlay = N/A
Balance Forward
![]()
Open Item
![]()
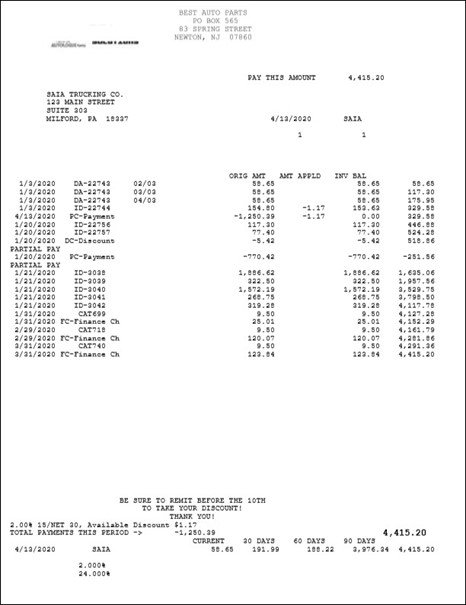
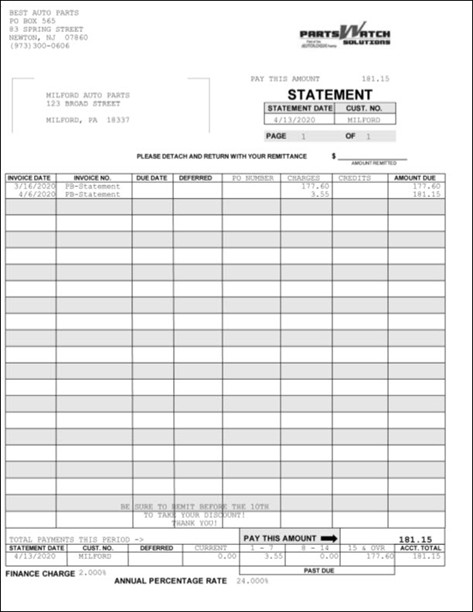
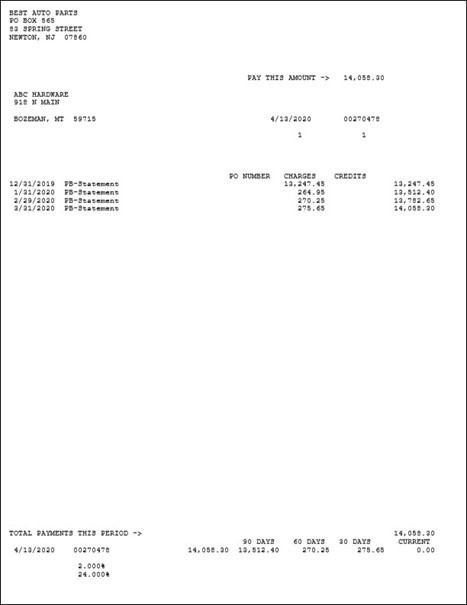
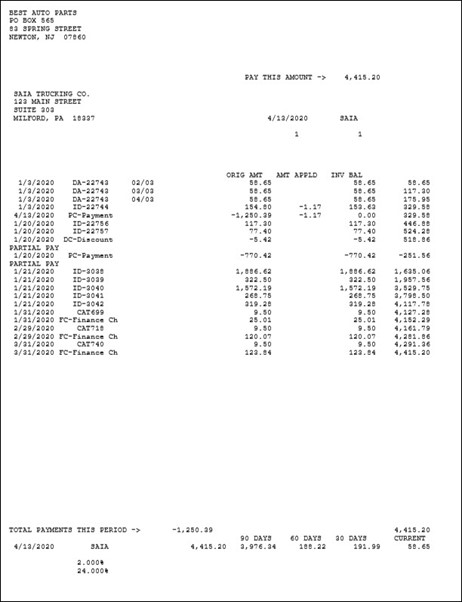
Statement Tear-Off Right / Overlay = N/A
Balance Forward
Open Item
Set up both printed and email/fax statement forms:
- 'STATEMENT FORM' - Printed statement forms.
- 'STATEMENT EMAIL/FAX FORM' - Emailed or faxed statement forms.
Note: To email and/or fax customer statements, email and/or fax addresses must be set up for both the customer and the store:
- Customer setup - Menu Path: Customers, Accounts, Account Main, MAIN ACCOUNT ENTRY screen
- Store setup - Menu Path: Controls, Store, Store General Setup, STORE GENERAL SETUP screen, 'EMAIL' tab, 'FAX' field
SELECTED FORM
Click the drop-down field and select the statement form to output for both the 'STATEMENT FORM' and 'STATEMENT EMAIL/FAX FORM'.
Refer to the Statement Form Examples guide to determine which form to use.
EXTRA COPIES
Click the drop-down field and select up to '9' additional statement copies to output when printing statements and the 'MAIL DELIVERY' statements flag is checked.
OVERLAY
Determines whether or not to print data and a graphic overlay, such as company logo, graphics, and grid lines, on a plain paper form selection.
- Checked - Resembles a pre-printed paper form. When the 'USE' flag is checked, all data, graphics, and grid lines print on the form.
- Unchecked - Plain paper form. Prints data only.
How to Add a Custom Logo to a Statement Form
To add a custom logo to a statement, save the graphic as a .jpg with a size somewhere around 300 x 100 pixels. The larger the graphic, the larger it will be on the form.
Using the example of a .jpg sized 306 x 103 pixels:
![]()
The logo will appear larger on the statement and it displays just below the upper edge of the paper.
![]()
Adding white space and reducing the logo size repositions the logo.
![]()
For example, the .jpg which is still sized 306 x 103 pixels appears on the statement as follows:
![]()
The logo must be saved as a .jpg named exactly as: LogoStatement.
Using File Explorer, save the LogoStatement.jpg to the Partswatch\Overlays\IC folder:
Menu Path: Local Disk (C:), Program Files (x86), PartsWatch Solutions, PartsWatch, Overlays, IC

The image must be added in the IC folder for every PC printing statements.
To test the statement, open the MAIN ACCOUNT ENTRY screen from the menu or press the 'F4' button and:
- Select a commercial customer with a balance due.
- Click the 'STATEMENT' button on the button of the screen.
- 'MAIL' prints the statement or check 'PREVIEW' to view the statement without printing.
If necessary, adjust the logo, re-save it with the same name, replace the one in the IC folder, and then output the statement again.
Click the drop-down field and select the additional column if other than the default of 'CHECK' for statement output.
Note: The functionality is available when the 'MAIL DELIVERY' statements flag is checked at print time.
The setting is disabled and set to 'NOT SUPPORTED' for forms that do not provide the functionality.
- 'DEFERRED' - Outputs 'DEFERRED' as the column header and outputs the deferred core amount.
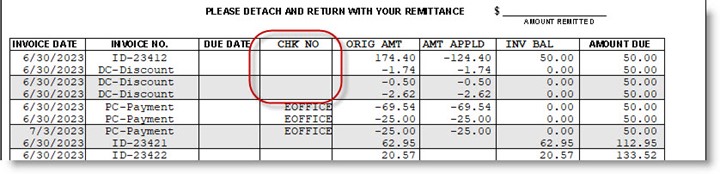
- 'CHECK OR PO NUM' - Outputs 'PO/CHK NO.' as the column header and outputs the invoice 'PO NUMBER', if one was used at Point-of-Sale, or the 'CHECK' Number used when an ROA was posted. Note: The data reported in the 'PO/CHK NO.' column will be truncated at the beginning if longer than the column width.
- 'CHECK' - Outputs 'CHK NO' as the column header and outputs the check number entered when an ROA was posted with a payment type of 'CHECK'.
- 'PO NUM' - Outputs 'PO NO' as the column header and outputs the 'PO NUMBER' from the invoice.
Note: This field is only enabled when the 'STATEMENT PRINT FORM' setting is set to 'PW-STATEMENT-LOGO-RIGHT', 'PW-STATEMENT-LOGO-LEFT', 'PW-STATEMENT-LOGO-RIGHT- W/PO', or 'PW-STATEMENT-LOGO-LEFT-W/PO'.
Click the drop-down field and select the additional column if other than the default of 'CHECK'. The setting is disabled and set to 'NOT SUPPORTED' for forms that do not provide the functionality.
For field output, refer to the field section defined for 'PRINT COLUMN CHOICE' above.
Note: The functionality is available when the 'EMAIL DELIVERY' and/or the 'FAX DELIVERY' statements flags are checked at print time.
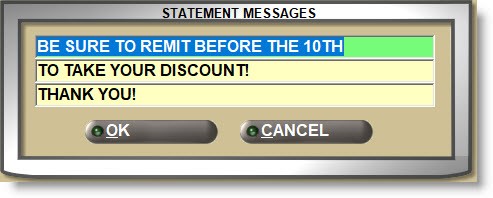
STATEMENT PRINT MESSAGES
With or without clicking 'EDIT' ('F5'), click the button to open the 'STATEMENT MESSAGES' window to enter up to 3 rows of 32 alphanumeric and special characters each as a message that prints on every statement, depending on the statement form.
With or without clicking 'EDIT' ('F5'), click the button to open the 'ACCOUNT TERMS SETUP' window used to enter prompt payment statement terms available for selection for all A/R customers. For multi-stores, the terms entered in one store are available for all stores.
Customer terms must be set up and enabled for each customer that will be allowed prompt payment discounts.
Affects statement-calculated discount as well as auto-calculated posted and ROA discounts (DC).
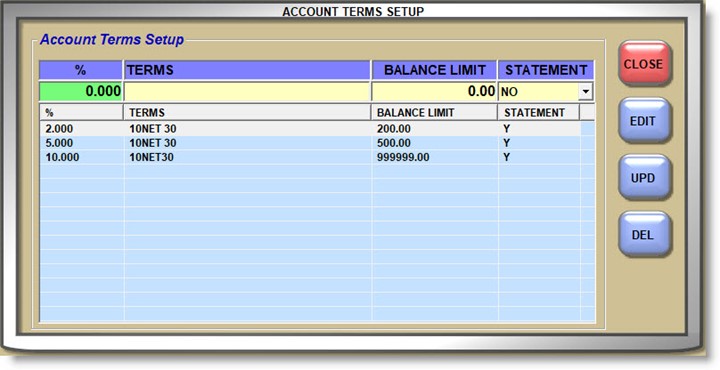
%
Enter a value from 0.001 to 99.999 as the percentage used to calculate the prompt payment discount.
TERMS
Enter up to 30 alphanumeric characters that best describe the term. For example "10 NET 30".
BALANCE LIMIT
Enter a value up to 999999.99 as the upper-level balance due limit that determines how much the customer owes to determine the '%' to use.
If 'TERMS' are normally set up for any balance, enter an upper limit. For example:
2% 10, net 30 for current balances up to $99,999.99
If 'TERMS' are normally set up for increased discounts depending on increased balances, enter a range of setups. For example:
2% 10, net 30 for current balances up to $200
2.5% 10, net 30 for current balances up to $5000
3% 10, net 30 for current balances up to $99,999.99
Note: Once the customer's balance exceeds the 'BALANCE LIMIT', terms are no longer considered. For example: 2% up to $500. If the customer balance is $499, a 2% discount is allowed. If the customer balance is $501.00, a discount is not calculated on that percentage.
STATEMENT
Determines whether or not the terms are printed on the statement.
- Checked - Terms are printed on the statement.
- Unchecked - Terms are not printed on the statement.