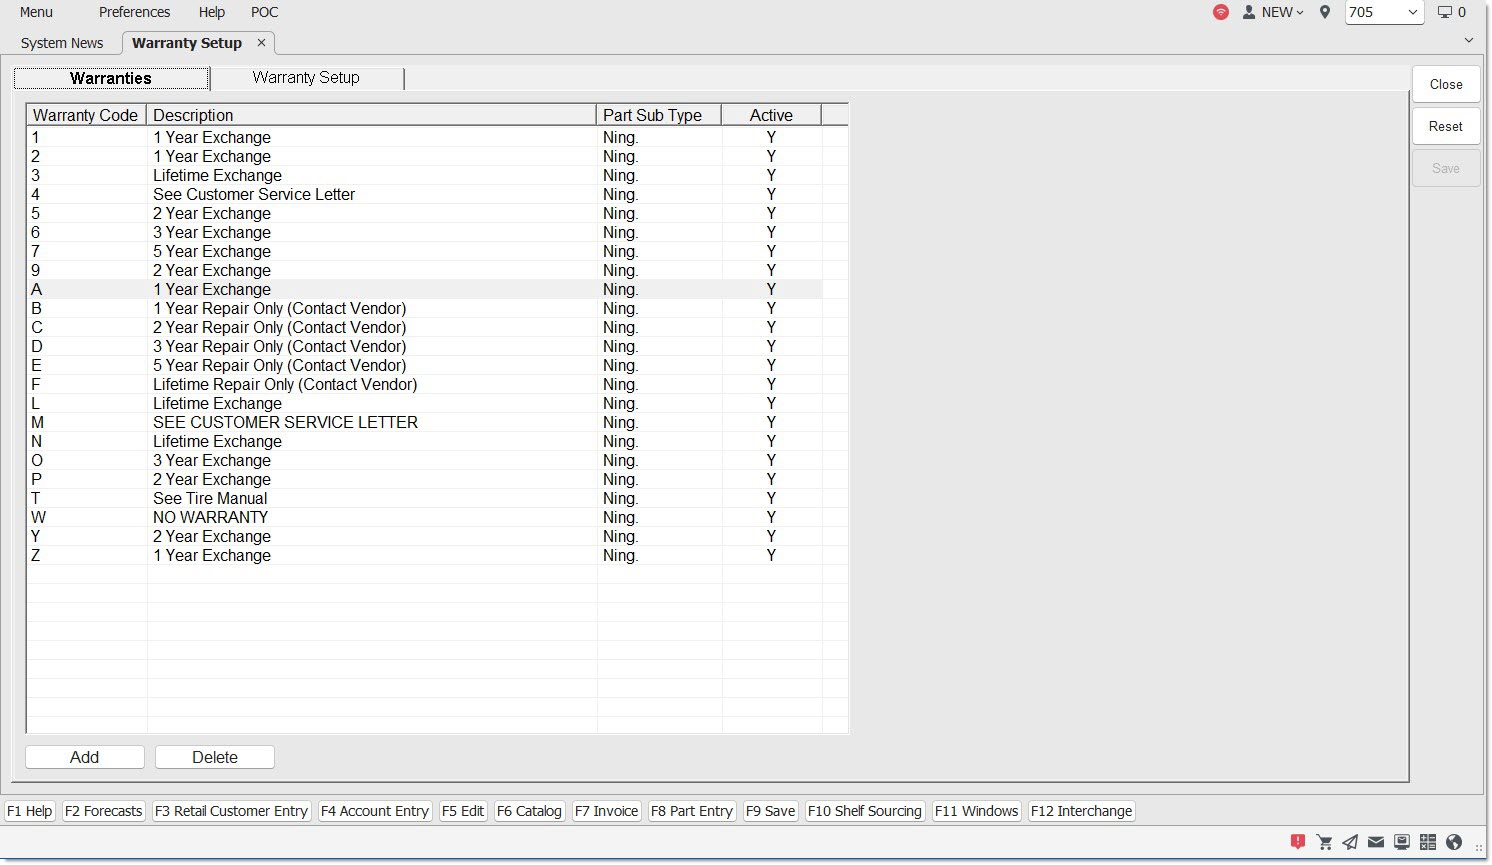
Warranties Tab
The Warranty Setup screen is used to create warranty records that can, in turn, be attached to a part record. These warranty records are designed to function across all locations within the database. The warranty records are the same regardless of the location.
Once set up, warranty messages can be associated with parts that have a warranty. The 'Warranty' button in the Part Entry screen displays the 'Active Warranty Terms' window that enables the linking of a warranty to a part.
Menu Path: Inventory, Part Utility, Warranty Setup, Warranty Setup screen, 'Warranties' tab
![]() Warranty Setup 1 of 2 - 7 minutesWarranty Setup 1 of 2 - 7 minutes
Warranty Setup 1 of 2 - 7 minutesWarranty Setup 1 of 2 - 7 minutes
![]() Warranty Setup 2 of 2 - 8 minutesWarranty Setup 2 of 2 - 8 minutes
Warranty Setup 2 of 2 - 8 minutesWarranty Setup 2 of 2 - 8 minutes
![]() Warranty Returns at POS - 5 minutesWarranty Returns at POS - 5 minutes
Warranty Returns at POS - 5 minutesWarranty Returns at POS - 5 minutes
Click on a column heading to sort records in the grid. Proper use of the search fields reduce the number of records returned in the grid.
Warranty Code
Displays the 3-character alphanumeric code that was entered in the Warranty Code in the part record.
Description
Displays the 30 character alphanumeric description that was entered in the part record.
Part Sub Type
Displays the type of the part, either 'Battery', 'Tire', or 'None'.
Active
Displays whether or not the warranty is active.
'Y' activates the warranty record. Note: The warranty code may not be applied to any new parts.
'N' deactivates the warranty record and removes it from the Warranties tab, but does not remove it from the file. Note: The record remains in the file for historical purposes so that Invoice Images and other reports can continue to show the representative warranty values from the date of the original transaction.
Add
Adds the selected warranty to the list.
Delete
Removes the selected warranty from the list.
Double-click a record in the grid on the 'Warranties' tab to pull the entire record into the 'Warranty Setup' tab or click 'Add'/'Edit' on the 'Warranties' tab screen to display the 'Warranty Setup' tab. This tab is used to add and/or edit a warranty record.
Once created, a warranty record cannot be changed. Only the 'Active' flag and the 'Note' field can be changed.
Procedure to Add a New Warranty Record
To add a new warranty record, follow the steps below:
-
From the Menu, select Inventory, Part Utility, Warranty Setup. The 'Warranties' tab displays.
-
Click 'Add'. The 'Warranty Setup' window displays. The focus is in the 'Warranty Code' field.
-
Complete the appropriate fields.
-
Click 'Ok'. A prompt displays stating, "Only active flag and note can be edited afterwards. Are you sure to add this warranty record?"
-
Click 'Yes'. The warranty record is added. When 'No' is clicked, the tab closes without adding the record.
Procedure to Edit Warranty Record
To edit a warranty record, follow the steps below:
-
From the Menu, select Inventory, Part Utility, Warranty Setup. The 'Warranties' tab screen displays.
-
Click 'Edit'. The 'Warranty Setup' tab displays. Only the 'Active' and 'Note' fields are enabled and editable.
-
Edit the 'Active' and 'Note' fields, as needed.
-
Click 'Ok'. The changes are saved and the window closes. Click 'Cancel' to exit the window without making changes.
Procedure to De-Activate a Warranty Record
A warranty record cannot be deleted but can be de-activated. Once de-activated, the record remains on the Warranty Message Setup grid with an 'N' (No) in the 'Active' column.
To de-activate a warranty record, follow the steps below:
-
From the Menu, select Inventory, Part Utility, Warranty Setup. The 'Warranties' tab screen displays.
-
Double-click on the record to be de-activated. The 'Warranty Setup' tab displays.
-
Change 'Y' to 'N' in the 'Active' field. A pop-up with the following text displays: "Deactivating the warranty will remove it from all associated parts. Continue?"
-
Clicking 'No' will close the pop-up and the warranty will not be deactivated.
-
Clicking "Yes' removes the warranty from all parts that have that warranty ID assigned, and these parts will no longer have a warranty unless updated with a new/different warranty. Furthermore, 'Yes' removes the warranty ID from all non-sku parts to which that warranty ID is assigned, and these parts will no longer have a warranty unless updated with a new/different warranty.
-
Click 'Ok'. The changes are saved. Click 'Yes' to continue to remove the term from the selected parts. Click 'No' to abort the action.
Procedure to Link Warranty to a Part
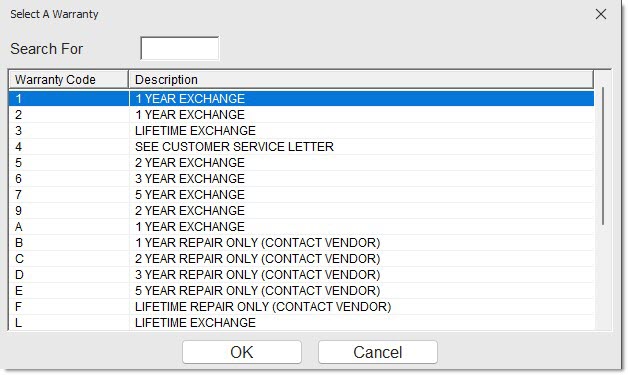
Once added, warranty records are searchable on the Part Entry screen. On the Part Entry screen, click 'Warranty' to display the 'Active Warranty Terms' window. The 'Active Warranty Terms' window enables the linking of a warranty to a part.
To link a warranty to a part, follow the steps below:
-
From the Menu, select Inventory, Part Entry, General Info. The Part Entry screen displays.
-
Enter the line in the 'Line' field and the Part Number in the 'P/N' field. The part is brought into focus.
-
Click 'Edit'. Fields and buttons are enabled.
-
Click 'Warranty'. The 'Active Warranty Terms' window displays. Note: When a warranty is selected to be added to a part record and the part record has a 'Subtype' of 'Batt', only a warranty with the Unit type of 'MO' (Month) or 'NO' (None) is allowed to be added to the part record.
-
Enter the applicable warranty record in the 'Search For' field or highlight the desired row in the grid.
-
Click 'Ok'. The 'Active Warranty Terms' window closes. The warranty record displays in the 'Warranty' field in the Part Entry screen. The part number in focus is now linked to the warranty record.