Scan Session
Scan Sessions can be used to scan multiple parts to a list without having to specify what the list will be used for.
A successful scan beeps and an unsuccessful scan buzzes.
Click here to view the SCAN SESSIONS REPORTS screen.
Select the 'Scan Session' option on the 'Main Menu' screen to display the 'Scan Session' screen.
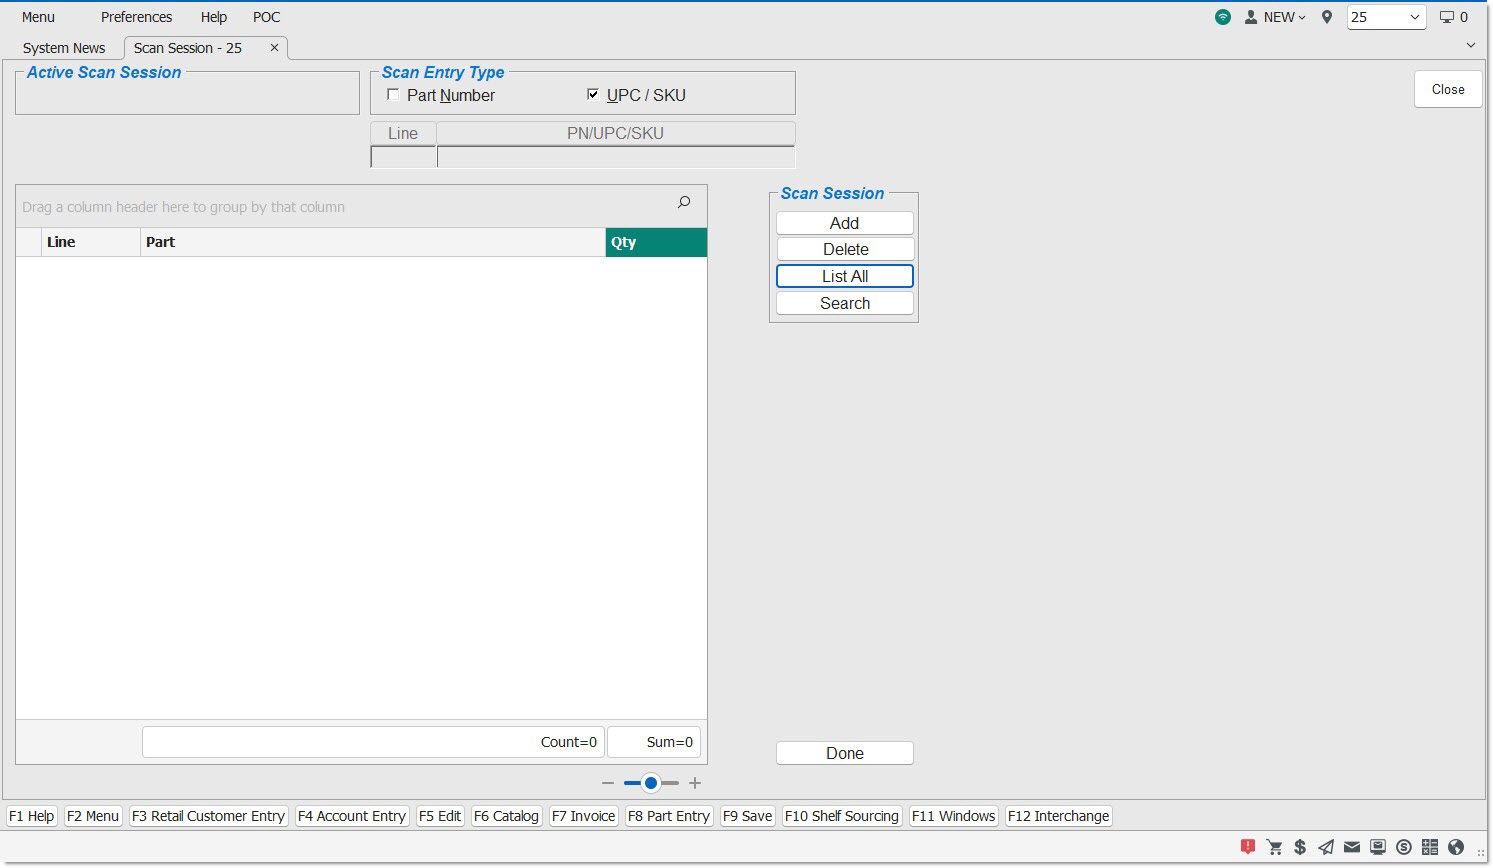
Textbox that allows for entry of a new session, enter up to 20 characters.
An active session name can only be used once per store.
The same session name can be active in different stores.
Tap the center of the radio button to select one or multiple sessions in the grid.
Displays the session ID in the grid on the RF device.
Displays the session name in the grid on the RF device.
Displays the session status in the grid on the RD device.
Statuses are:
- 'INPRG' - In Progress
- 'INCMP' - Incomplete
- 'CMP' - Complete
Tap to return to the 'Main Menu' screen.
Tap to go forwards or backwards one page in the list of scan sessions.
Indicates the page number of the current page. Enter a new page number and tap the button to jump to that page.
Confirms a selection for the 'Name' textbox and the 'Page' textbox.
Process to Scan Items in a Scan Session
![]() Scan Session - 7 minutesScan Session - 7 minutes
Scan Session - 7 minutesScan Session - 7 minutes
-
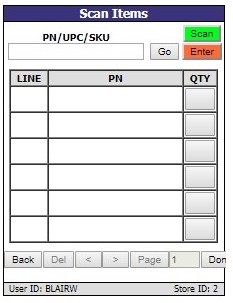
Open a Scan Session from the 'Scan Session' screen to open the 'Scan Items' screen.
-
Scanning an item will auto-populate the grid with the item's 'LINE', 'PN', and 'QTY'.
-
Navigate to different pages in the session one page at a time by using the '<' and '>' buttons, or by typing in the page you wish to navigate to in the 'Page' textbox and clicking the 'Done' button.
-
At any point during the process, click the 'Done' button to stop scanning.
-
Tap the 'Done' button to display the prompt "Entry of scanned quantities complete?" with two buttons; 'OK' and 'CANCEL'.
-
Tap the 'CANCEL' button on the prompt "Entry of scanned quantities complete?", and the system displays the prompt "Continue with item scanning?" with two buttons; 'OK' and 'CANCEL'.
-
Tap 'OK' on the prompt "Continue with item scanning?" to save the scanned quantities in the database, return to the 'Scan Items' screen, and keep the session 'Status' as 'INPRG'.
-
Tap the 'CANCEL' button on the prompt "Continue with item scanning?", to save the scanned quantities in the database, return to the 'Main Menu', and mark the session with a 'Status' of 'INCMP'.
-
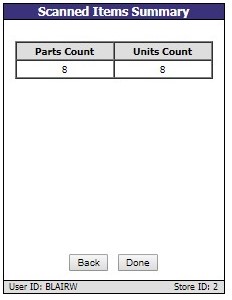
Tap 'OK' to the "Entry of scanned quantities complete?", and a screen summarizing the total parts and units scanned is displayed; see sample below:
-
Click the 'Back' button to return to the 'Scan Items' screen, keep the session 'Status' as 'INPRG', and allow the continuation of item scanning.
-
Tap the 'Done' button to mark the session 'Status' as 'CMP' and return to the 'Main Menu'.
-
On the 'Scan Sessions' screen, enable the selection any active session marked as 'CMP' by the user who created the session, or any other user. Once selected, change the session 'Status' back to 'INPRG' enabling the scanning of more parts within that previously completed session.
-
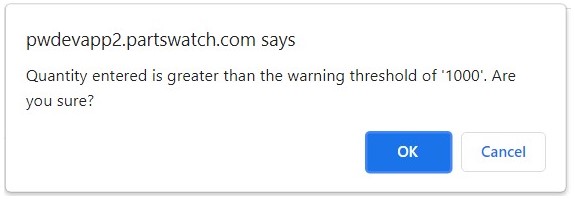
If parts are scanned or entered and the upper limit is exceeded, a message prompt is displays with the text: "Quantity entered is greater than the warning threshold of '1000'. Are you sure?" with an 'OK' and 'Cancel' button.
-
Tap 'OK' to accept the quantity and close the pop-up.
-
Tap 'Cancel' to abandon the changes and return to the screen behind the message prompt.
Hidden Switches
