Bulk Parts Delete
The Bulk Parts Delete functionality provides the ability to mass delete multiple parts. Even parts that have historical transactions can be deleted.
The Bulk Parts Delete screen is used to mark selected parts within multiple lines or stores for deletion, schedule the deletion date, preview and print a report showing parts marked for deletion, and unmark parts before being deleted.
A part can be deleted when it has:
-
a quantity available equal to zero and
-
all stocking level values (min, max, and order point) equal to zero and
-
the part does not exist on any open document (e.g., sales or purchase order).
Since a large number of parts across multiple stores and lines can be deleted, and since there is no "undo" capability, parts are not immediately deleted. Instead, parts are "marked" and recorded into a "staging table" where they remain until the date they are scheduled to be physically removed from the database. This delay provides users time to review, react and, potentially, "unmark" some parts selected for deletion. Marked parts that are in the staging table do not impact normal store operations; they can continue to be sold or ordered.
The delete program runs on a daily basis checking the specified dates of deletion. When the specified date matches the current date, the program deletes the marked parts. The System Administrator determines the run time. At their discretion, the System Administrator may temporarily place the delete program on hold for a period of time, for example, on the day the EOM is run.
When a part record is deleted, all of the following part record-related information is deleted:
-
Buy quantity record
-
Price label records
-
SKU, UPC, or Product records that are store-specific (and not store zero)
After the deletion program completes, summary count statistics of how many parts were deleted and not deleted are recorded in System Messages. A part is only counted once as deleted or not deleted regardless of the number of times the part exists in the staging table. Any part not deleted is listed in System Messages with one of the following reasons:
-
Parts with key quantities (a key quantity, such as Quantity Available or Stocking Levels, was not zero)
-
Parts on active documents (part existed on an active transaction)
-
Parts not processed (for any other miscellaneous reason)
Deleted parts can be re-added into the parts table from the Part Entry screen. If a deleted part is re-added, and it is desired to re-use the prior part history, contact Customer Support and request a re-sync of all the history fields in the Part Entry screen if the deleted part had sales history. Historical transactions for deleted parts are available on all history reports.
Kit and BOM parts are included in this function.
-
The system prevents the deletion of a BOM part if a 'QOH' value exists.
-
The system cannot delete a BOM component part if a 'QOH' value exists for the BOM part at the time of deletion.
-
Note: Since a Kit or BOM part or component part can be deleted in a single or multi-store system, a Kit or BOM in one store can be "sale ready" and not be "sale ready" in other stores. Even in one store, if Kit or BOM component parts are deleted, the Kit or BOM can change from "sale ready" to not "sale ready".
Menu Path: Inventory, Part Utility, Bulk Parts Delete, Bulk Parts Delete screen
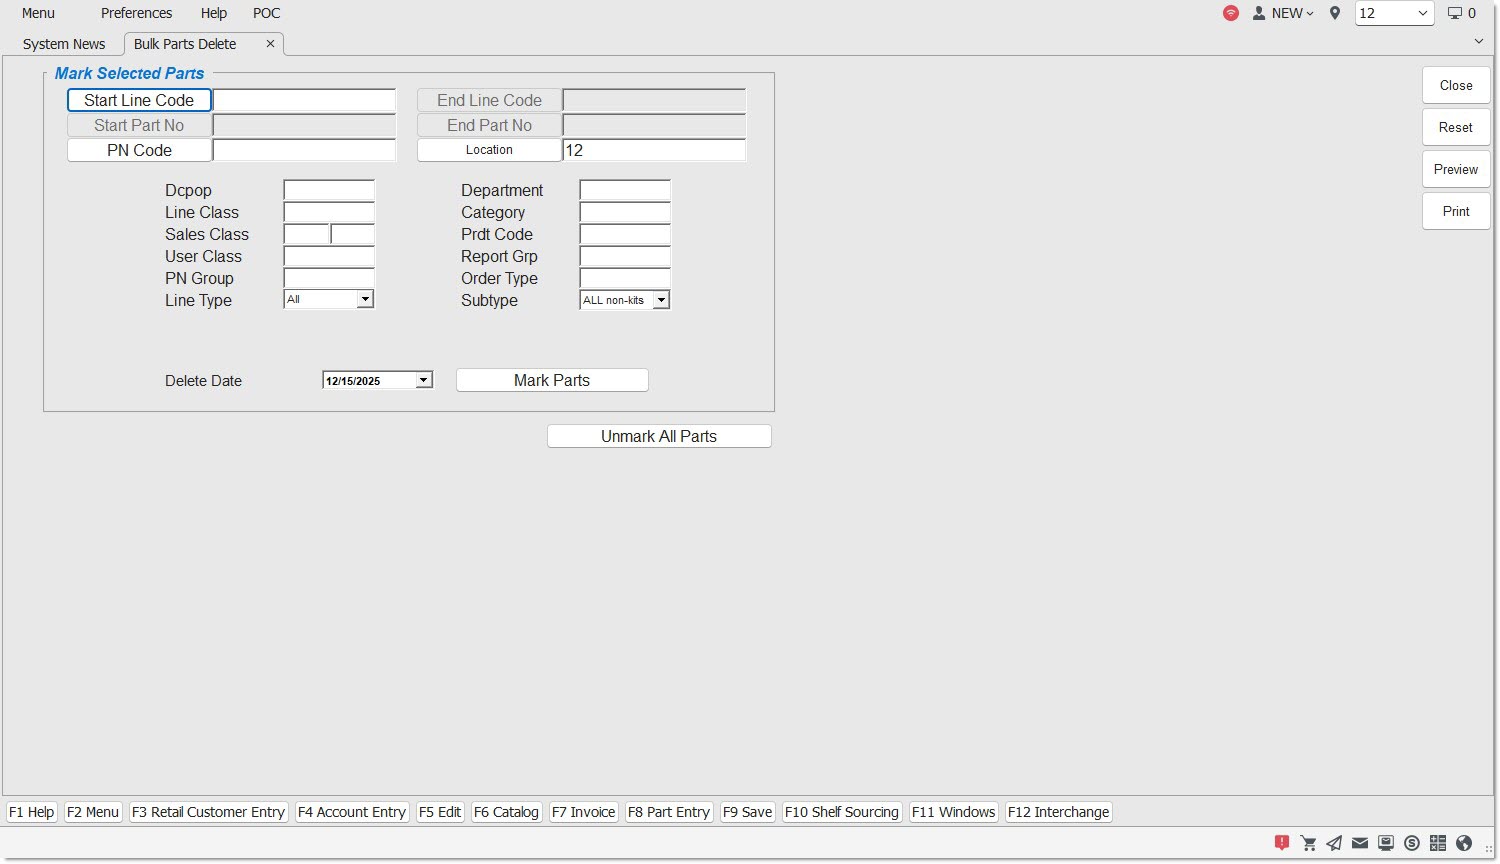
Mark Selected Parts
Start Line Code/End Line Code
Indicates the Start Line Code and End Line Code to set a range of line codes for deletion. Click the 'Start/End Line Code' button to display the 'Browse Line Codes' window to search for a specific line code.
Start Part No / End Part No
Indicates the 'Start Part Number' and the 'End Part Number' to set a range of part numbers for deletion. Click the 'Start/End Part No' button to display the 'Find Part' window to search for a specific part number.
When the 'Customer Lookup Stripped Match' flag is checked in the System General Setup screen only letters and numbers are searched; spaces, special characters and punctuation are "stripped-out" of the search and ignored.
PN Code
Indicates the PN Code. Click the button to display the 'P/N Code Selection' window to add or edit the part's P/N Code.
Location
Indicates the store location. Click the button to display the 'Browse Locations' window to search available store locations. Defaults to current location. Displays the word "Multiple" when multiple locations are selected.
DC Pop
Indicates the Distribution Center (DC) Popularity (Pop) Code. Code is up to three alphanumeric characters and is for informational purposes only.
Line Class
Indicates the Line Class.
Sales Class
Indicates the Sales Class code. Used to compare the popularity of a part across two separate rankings. The Sales Class code is two fields, each containing one alphanumeric character, is user-defined and updated by the Popularity Rank report. The character in the first field is the current Popularity Code. This character moves into the second field when the next ranking runs.
User Class
Indicates the User Class Code. The code is a one alphanumeric character.
PN Group
Indicates the Part Number Group code. Code is up to 10 alphanumeric characters.
Indicates the type of parts in the line.
Options are:
-
'All'
-
'Freight'
-
'Gift Cards'
-
'Labor'
-
'Parts'
Department
Indicates a three character department code that is used in conjunction with 'Category' to classify specific Departments within a store for purchasing and reporting.
Category
Indicates a three character category code that is used mainly to classify specific Categories within a 'Department' for purchasing and reporting.
Prdt Code
Indicates the Product Code. Code is up to three alphanumeric, user-defined characters.
Report Grp
Indicates the Report Group Code. Code is up to eight alphanumeric, user-defined characters.
Order Type
Indicates an entered description used for filtering reports and orders. Up to 10 characters.
The system sets the field to 'Sourced' when the 'Min / Max # Days Sourced Returns' field in the Store General Setup screen, 'Overstock' tab, are set to a value greater than zero (0). The 'Sourced' value indicates parts were received into stock that were purchased from customer Sourcing and/or Shelf Sourcing.
Identifies the sub type of the parts in the selected 'Line Type'.
Options are:
-
'All'
-
'None'
-
'Tire'
-
'Batt' (Battery)
-
'Kit'
-
'BOM'
Include Virtual Inventory Parts (non-SKU)
When the checkbox is unchecked, clicking the 'Mark Parts', 'Unmark All Parts', 'Preview', and 'Print' buttons follow normal functionality.
When the checkbox is checked:
-
When the 'Mark Parts' button is clicked, for every part record "marked" in the staging table with specific store number(s), also insert an additional part record in the staging table with store zero to indicate the virtual inventory.
-
When the 'Unmark All Parts' button is clicked, remove all parts from the staging table including any parts with a store zero.
-
When the 'Preview' or 'Print' button is clicked, display all virtual inventory parts on the report output of the 'Marked Parts to be Deleted Report' first using a 'Loc' value equal to zero, before parts displayed in other stores. For each virtual inventory part in the output, display report columns values obtained from the virtual inventory.
Delete Date
Indicates the date when parts will be deleted. The System Administrator determines the deletion time, which is typically after normal business hours. The window of time between when parts are marked for deletion and when parts are actually deleted provides the system with a last chance opportunity to unmark parts before they are physically removed from the database.
Mark Parts
Marks parts based on selected criteria and writes a record to the audit table, when clicked. Various prompts display when insufficient criteria are entered.
Prior to marking the parts, the prompt, "Are you sure you want to continue?", displays to confirm the selected parts should be marked. Click 'Cancel' to abort the action. Click 'Ok' to mark the selected parts. A prompt then display stating, "[x] part(s) successfully marked for deletion". Marked parts are copied into a deletion staging table.
A part can be marked for deletion even if the part exists on the 'Parts on Open Documents Report', accessed from the Inventory Information Reports screen.
Important: Extreme care must be taken when deleting multiple parts. There is no part delete "Undo" capability.
Unmark All Parts
Unmarks every part in the staging table for all stores that the user has access to and writes a record to the audit table. The prompt, "This will unmark ALL parts. Are you sure?", displays to confirm the action. Click 'Ok' and the prompt, "[xx] part(s) successfully unmarked and will not be deleted", displays.
Different parts can be marked for deletion on different dates. The same part can be marked for deletion multiple times on different dates. When a part is marked for different dates, only the first instance of that part is removed from the staging table when the deletion program runs on the first date. Any other instances remain until those future dates occur.
When the same part is marked multiple times for the same deletion date, multiple instances of that part exist in the staging table. All instances are removed on the deletion date.
When parts marked for deletion are within multiple store locations that are in different time zones, all of the parts across all stores begin the deletion process on the same day and at the same time within an Eastern time zone.
Invoicing and Mode 2 Upload
If a marked part is added to an active sales order (e.g., via an Internet order) after it has passed the deletion criteria but has not yet been deleted, and then the part is deleted before the invoice is finalized, the part is treated as a NIF part on the sales order instead of a stocked part when the invoice is finalized.
If a part is deleted after that part has already been downloaded to the Mode 2 database and the part is sold on a Mode 2 sales order, then when the Mode 2 sales order is uploaded to the server and the invoice is finalized, the deleted part is treated as a NIF part for that sale instead of a stocked part.
However, in both instances, if the deleted part also happens to exist in the non-SKU table, then when the invoice is finalized, the deleted part is not treated as a NIF part, but is re-added back into the parts table.
Marked Parts to be Deleted Report
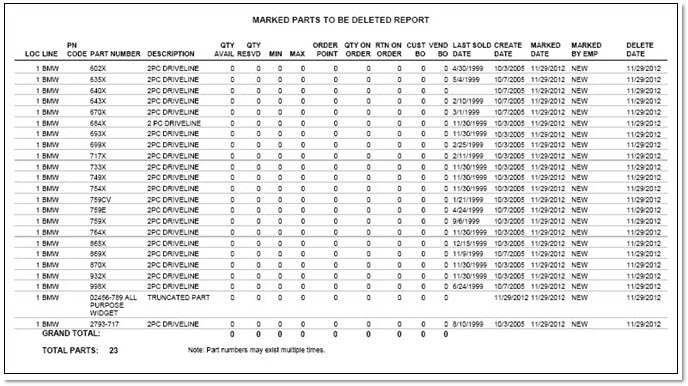
The 'Marked Parts to be Deleted Report' displays a detailed list of all parts presently marked for deletion, regardless of who marked the parts for deletion or when they were marked. However, only those marked parts within the stores that the logged-in employee has access to are displayed. Only a logged-in employee with access to all stores in the system may see every marked part if parts were marked in all stores in the system. The same part may be marked (and exist in the staging table) multiple times for the same line within the same store location. In this instance, the same part number is counted multiple times in the marked parts summary counts and displays multiple times on the report and is recorded in the report's 'Grand Total' count.
The report displays when the 'Preview' button is clicked. The report does not display when no marked parts currently exist. Once in the Preview mode, print or export the report.
The following is an example of the 'Marked Parts to be Deleted Report'.
Procedure to Delete Multiple Parts
To delete multiple parts at the same time, follow the steps below:
-
From the Menu, select Inventory, Part Utility, Bulk Parts Delete. The Bulk Parts Delete screen displays.
-
Select the line code range in the 'Start Line Code' field and 'End Line Code' field.
-
Select the part number range in the 'Start Part No' field and 'End Part No' field.
-
Select the location(s) in the 'Location' field.
-
Select other criteria, as appropriate.
-
Select the date to delete the parts in the 'Delete Date' field.
-
Click 'Mark Parts'. Marks parts in the staging table for all stores that the logged-in employee has access to and writes a record to the audit table. The parts are marked for deletion to occur on the date specified in the 'Delete Date' field. Note: To unmark all marked parts, click 'Unmark All Parts'. All parts are unmarked in the staging table for all stores that the user has access to and writes a record to the audit table.
-
Click 'Preview'. The 'Marked Parts to be Deleted' based on the selected 'Mark Selected Parts' criteria displays to view prior to printing.
-
Click 'Print'. The 'Marked Parts to be Deleted' prints.