Select Columns
Click the 'Report Generator' button (or the 'Columns Displayed' button, depending on the screen) to display the 'Select Columns' window used to select fields to be reported. The 'Select Columns' window consists of two sections: 'Available Columns' and 'Selected Columns'. The 'Available Columns' section shows all fields not currently selected and displayed in 'Selected Columns' section. The 'Selected Columns' section shows all fields that have been selected and moved from the 'Available Columns' section. Note: User Security cost security applies.
By using the 'Up' and 'Down' buttons, the section sequence of the 'Available Columns' and 'Selected COlumns' can be reordered to reflect the preferred order that the fields display or when exported into an Excel spreadsheet. The version of the report that displays when the 'Preview' and 'Print' buttons are clicked do not include fields selected from the 'Selected Columns'.
If a profile was saved/loaded in a screen, the selected fields for that profile are checked. If a profile was not loaded, the window displays with the default fields checked.
Account Information Reports
On the Account Information Reports screen, click the 'Report Generator' button.
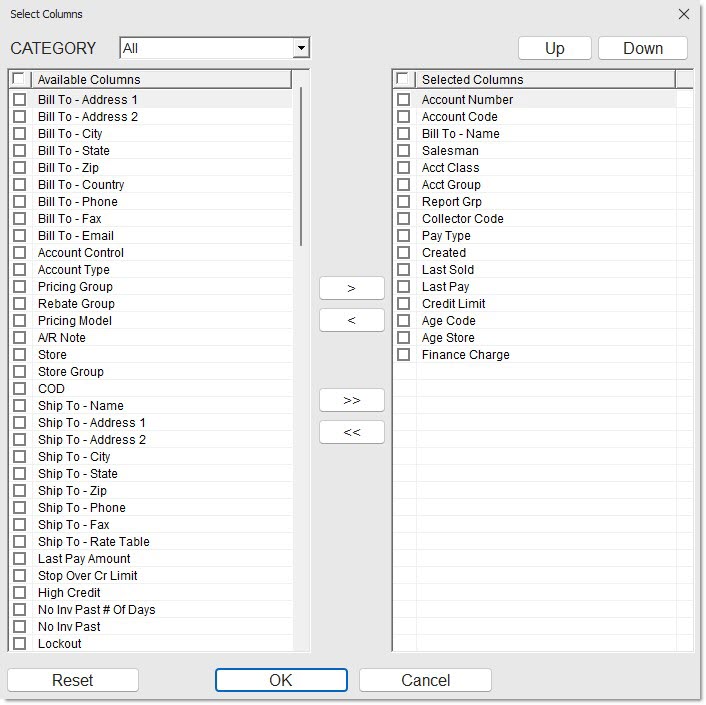
Check one or multiple checkboxes next to the fields that are in the 'Available Columns' and click the '>' button to move the fields to the 'Selected Columns' grid.
Check one or multiple checkboxes next to the fields that are in the 'Selected Columns' and click the '<' button to move the fields to the 'Available Columns' grid.
Click the '>>' button to move all fields that are in the 'Available Columns' grid to the 'Selected Columns' grid.
Click the '<<' button to move all fields that are in the 'Selected Columns' grid to the 'Available Columns' grid.
Check the checkbox next to a field in either grid and use the 'Up' or 'Down' buttons to change the output order of either grid.
The available fields in the Account Information Reports screen are:

Procedure to Select and/or Reorder Columns
To select and/or reorder columns to reflect the order they will display on the report, follow the steps below:
-
From the Menu, select Reports, Financial, A/R Info. The Account Information Reports screen displays.
-
Select the desired 'Report Criteria'.
-
Click 'Report Generator'. The 'Select Columns' window displays. The 'Selected Columns' list defaults with the Account Information Report default settings.
-
To select individual column names from the 'Available Columns' section, click the checkbox to the left of each column name.
-
When all desired columns names are selected, click the 'greater than' arrow (>) to move the selected column names out of the 'Available Columns' section and into the 'Selected Columns' section. The column names are moved to the end of the 'Selected Columns' list.
-
To deselect certain fields, click the single 'less than' arrow to move the selections from the 'Selected Columns' section to the 'Available Columns' section.
-
To select all column names from the 'Available Columns' section, simply click the double 'greater than' arrow (>>). 'All Available Columns' fields are moved to the 'Selected Columns' section.
-
To deselect all fields, click the double 'less than' arrow to move all fields from the 'Selected Columns' to the 'Available Columns' section.
-
To reorder the position of the selected column names, check the desired column name checkbox. Click 'Up', and continue to click 'Up', until the column name is in the desired position in the list or click 'Down', and continue to click 'Down', until the column name is in the desired position in the list.
-
Click OK to save the 'Selected Columns' list. The 'Selected Columns' list is saved for future use and the window closes.
-
Click 'Cancel'. The window closes without saving the newly edited fields.
Inventory Information Reports
On the Inventory Information Reports screen, click the 'Report Generator' button:
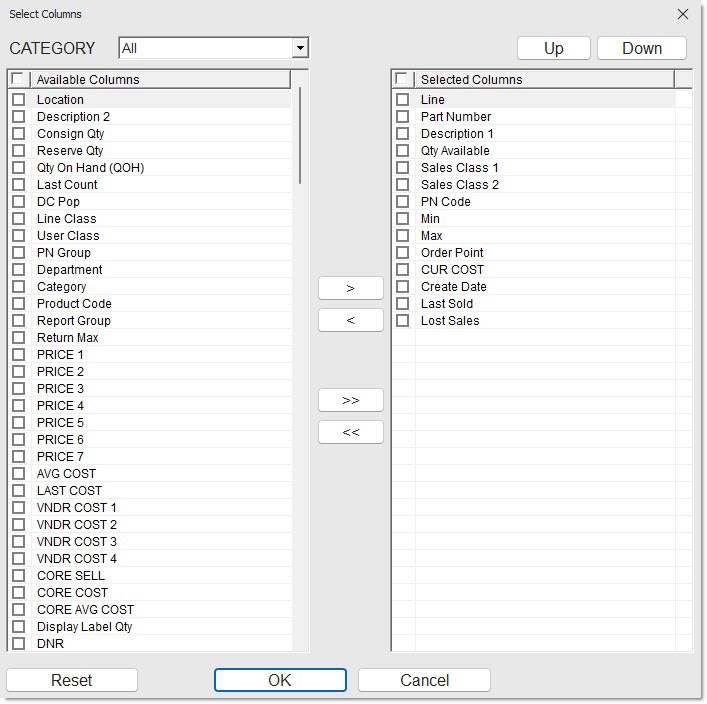
Check one or multiple checkboxes next to the fields that are in the 'Available Columns' and click the '>' button to move the fields to the 'Selected Columns' grid.
Check one or multiple checkboxes next to the fields that are in the 'Selected Columns' and click the '<' button to move the fields to the 'Available Columns' grid.
Click the '>>' button to move all fields that are in the 'Available Columns' grid to the 'Selected Columns' grid.
Click the '<<' button to move all fields that are in the 'Selected Columns' grid to the 'Available Columns' grid.
Check the checkbox next to a field in either grid and use the 'Up' or 'Down' buttons to change the output order of either grid.
The available fields on the Inventory Information Reports screen are:
LISA Transactions Report
On the LISA Transactions Report screen, click the 'Columns Displayed' button:
![]()
Check one or multiple checkboxes next to the fields that are in the 'Available Columns' and click the '>' button to move the fields to the 'Selected Columns' grid.
Check one or multiple checkboxes next to the fields that are in the 'Selected Columns' and click the '<' button to move the fields to the 'Available Columns' grid.
Click the '>>' button to move all fields that are in the 'Available Columns' grid to the 'Selected Columns' grid.
Click the '<<' button to move all fields that are in the 'Selected Columns' grid to the 'Available Columns' grid.
Check the checkbox next to a field in either grid and use the 'Up' or 'Down' buttons to change the output order of either grid.
Click 'Save Settings' to save the currently displayed columns in the 'Selected Columns' list for the login user who clicked the button. Each login user can save different selected columns. Once a login user has clicked the button, at least once in a PartsWatch session, clicking the 'Reset' button redisplays the login user's 'Selected Columns' that were last saved. The selected columns list can no longer be re-displayed for that login user.
The available fields on the LISA Transactions Report screen are:
Available Columns


Selected Columns

