Supplier Main
The SUPPLIER ENTRY screen is used to set up and maintain the vendors that product lines are purchased from by the store for purchasing, sales, and reporting.
Menu Path: Vendor, Vendor/Supplier, Supplier Main, SUPPLIER ENTRY screen

Like most PartsWatch maintenance screens, the 'EDIT' and 'UPD' (update) buttons must be used when changes are made. 'EDIT' must be "off" when entering a line code and "on" when changing the supplier settings. 'UPD' must be clicked to save the changes.
Adding Supplier Codes
Enter up to 3 letters, numbers, and/or special characters for each unique supplier code.
Press the 'Enter' key and if the 'SUPPLIER' does not already exist, a prompt opens to add the supplier. Answer 'YES' and the supplier is added.
Save in Multi-Stores

Pressing the 'Enter' key opens a pop-up to select the locations to add the Supplier in depending on:
- The 'ALLOW SAVE LINE INFO IN MULTIPLE LOCATIONS' User Security restriction that must be enabled for edit.
- The fields on the EMPLOYEE SETUP screen that allow access to more than one location.
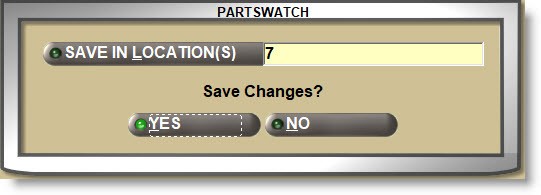
The pop-up defaults to the current location. Click the 'SAVE IN LOCATIONS' button to open the multi-select 'BROWSE LOCATIONS' window and check, one, multiple, or all locations. Answer 'YES' to save the changes to the selected locations.
Optionally enter the supplier information:
- 'NAME'
- 'DESCRIPTION'
- 'ADDRESS 1' and 'ADDRESS 2'
- 'CITY', 'STATE', and 'ZIP CODE'
- 'STATE NAME'
- 'COUNTY'
- 'COUNTRY'
- 'PHONE #' and/or 'FAX #'
Optionally enter contact information:
- 'LINE SALESMAN'
- 'SALES PHONE'
- 'SALES FAX'
- 'WWW LINK' - Supplier's website URL
- 'EMAIL'
A/P ACCOUNT
Account name or number used by the G/L EXPORT to QuickBooks process.
A/P TERMS
Select the payment terms from the supplier used by the A/P EXPORT to QuickBooks process.

Enter up to 128 alphanumeric characters for vendor information and displays on the PO INFO screen for orders created from the ORDER CREATE screen.
Optionally enter the manifest information:
Identifies the address that core and warranty parts returned at Point-of-Sale are sent back to for the supplier.
The system looks at the 'RETURN POINT' in the following hierarchy:
- Supplier
- Line Code
- Store-level
If a 'RETURN POINT' is set up for a Supplier, it is used as an override to the store 'RETURN POINT'.
Enter a 'RETURN POINT' and if it does not exist, the 'SELECT RETURN POINT' window opens to select one, or click the 'RETURN POINT' button to open the window. Click the column headers to re-sort the rows to assist in searching for a return point. Highlight a row and click the 'OK' button to select the return point.
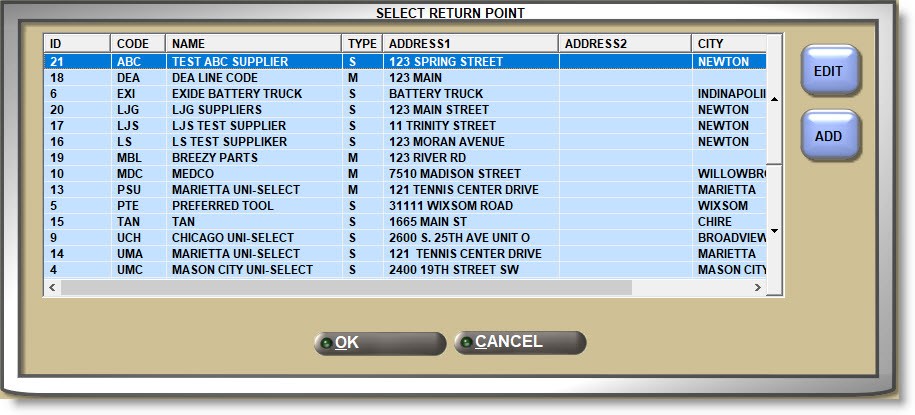
ADD
If the 'RETURN POINT' does not currently exist, with the 'SELECT RETURN POINT' window open, click the 'ADD' button to open the 'RETURN POINT' window to add one. Enter the 'NAME', 'ADDRESS 1 / 2', 'CITY', 'STATE', and 'ZIP'. Once added, it is available from the 'SELECT RETURN POINT' window as the store default 'RETURN POINT' or for selection for all Line and Supplier setups.
For multi-store setup, check the 'ALL STORES' field if the 'RETURN POINT' is available in all stores.

EDIT
With the 'SELECT RETURN POINT' window open, highlight a row in the grid and click the 'EDIT' button. Edit the 'NAME', 'ADDRESS 1' and/or 'ADDRESS 2', 'CITY', 'STATE', and 'ZIP' as needed. The 'ALL STORES' flag cannot be edited.
Enter up to 12 alphanumeric characters for the account number assigned to the supplier. The number is output on the manifest printed report but is not transmitted to the vendor with the return manifest.
If a 'RETURN POINT ACCT #' is not entered for the Supplier, the default store 'RETURN POINT ACCT #' will be used by the manifest process.
VENDOR ACCT #
Enter up to 12 alphanumeric and special characters for the vendor number assigned to the supplier. The number is output on overstock return order printed reports but is not transmitted to the vendor with the overstock return.
FLOOR #
Enter up to 20 alphanumeric and special characters used as needed. Outputs on the ORDER RECEIPT VARIANCE REPORT.
GROUP
If multiple suppliers are "linked" together for reporting, enter up to 8 alphanumeric and special characters across the applicable suppliers. Check the 'SUPPLIER VENDOR ONLY' filter under the 'Report Criteria' on the VENDOR LINE REPORTS screen to output the report with Groups.

Select the type of supplier:
- 'OTHER' - Any outside supplier
- 'SISTER' - Multi-store sister store
- 'DC' - Primary warehouse
- 'HUB' - Multi-store central store used as a warehouse
Edit a Supplier
Enter an existing supplier in the 'SUPPLIER' field and it will display all information already set up on the screen.
The 'SUPPLIER' button can be used to open a browser to locate an existing Supplier.
Click the 'EDIT' button ('F5' key) to edit.
Click the 'UPD' button ('F9' key) to save changes.
For multi-store, a pop-up will open to select the stores the changes will affect. Optionally select additional stores and answer 'YES' to save changes or 'NO' to abort the update.
