Core Activity Report
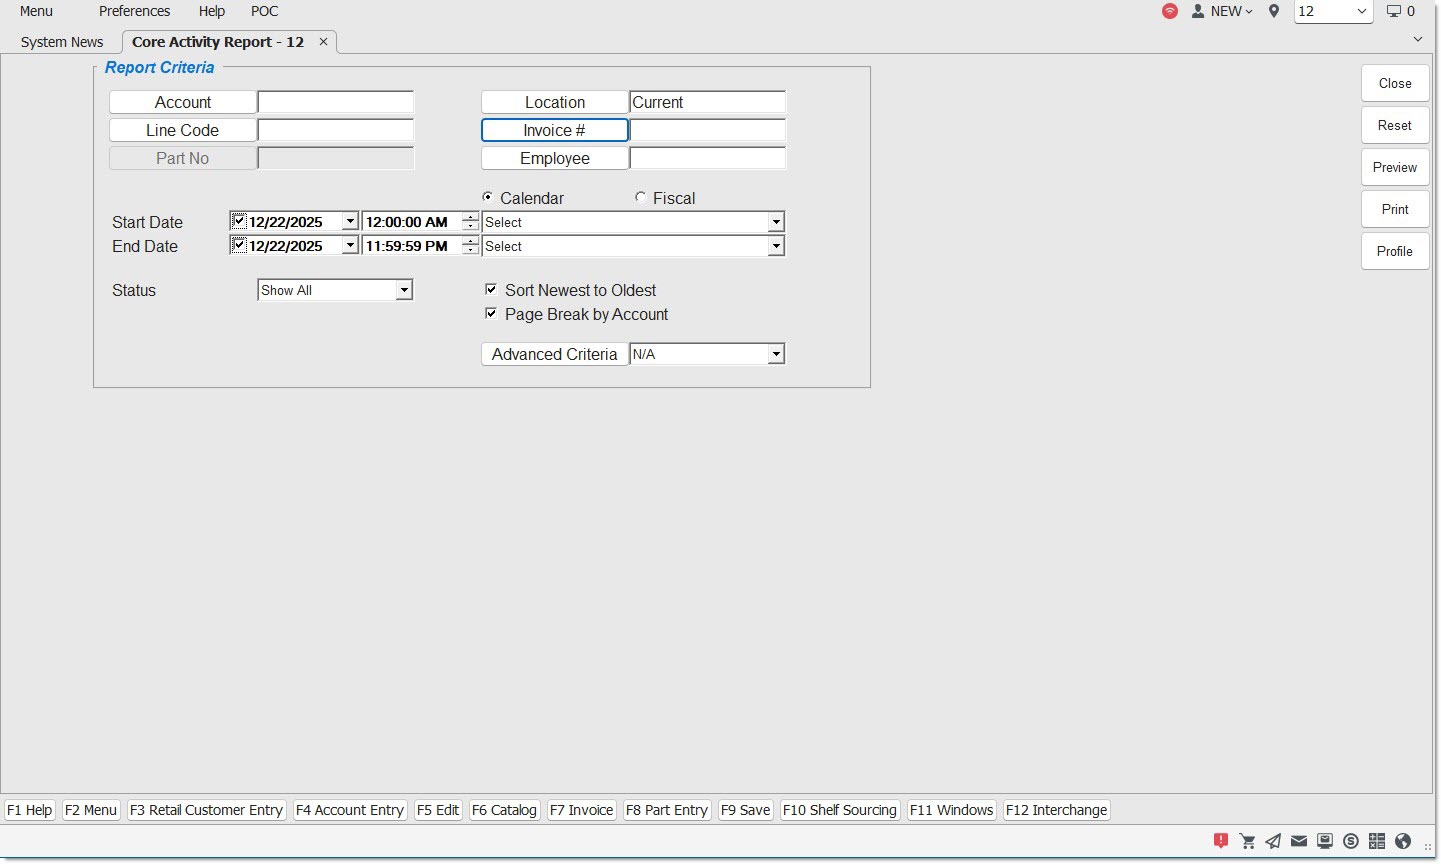
The Core Activity Report screen is used to generate the 'Core Activity Report'. When manually run and depending on the report date range, the 'Core Activity Report' reports all deferred core, whether deferred or delinquent, that have not been returned.
Menu Path: Reports, Inventory, Core Activity, Core Activity Report screen
The ability to generate a 'Core Activity Report' for the current location and other locations is controlled through User Security permission in the User Security Setup screen. When the 'Deny Core Activity Report Locations' proc in the User Security Setup screen is checked, the 'Location' field in the Core Activity Report screen defaults to the current location and the button is unavailable. A report can only be generated for the current location. When the 'Deny Core Activity Report Locations' proc is not available, the 'Location' field in the Core Activity Report screen defaults to the current location and the button is available to to select one or more locations.
Report Criteria
Account
Filters by a specific customer account. Leave the field blank to report all accounts. Click the button to display the 'Find Account' window to select one or several accounts.
Only accounts with the 'Deferred Core Billing' field checked in the 'Account Statement Controls' window, accessed from the 'Statement Setup' button in the Account Entry screen, display in the 'Find Account' window.
Line Code
Filters by a line code. Click the button to display the 'Browse Line Codes' window to select a line code.
Part No
Filters by a part number in the selected line code. Enter a part number or click the 'P/N' button to display the 'Find Part' window to search for a part.
Location
Filters by a selected store. Click the button to display the 'Browse Locations' window.
The default is the current location. Zero (0) reports all locations. To display multiple locations, check all the applicable location checkboxes in the 'Browse Locations' window. The field displays 'Custom' when reporting multiple locations. Reporting capability is controlled by User Security permission.
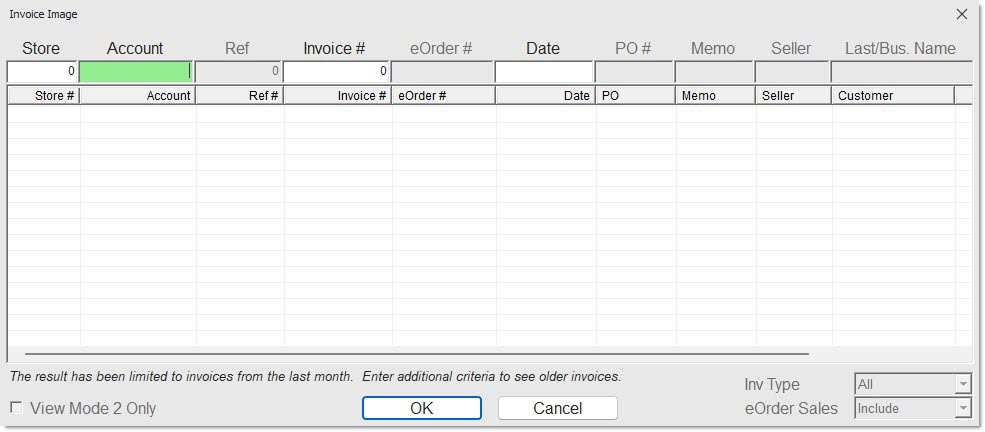
Invoice #
Filters by an invoice #. Click the button to display the 'Invoice Image' window used to search for a specific invoice. Only invoices for deferred core billing accounts display.

Employee
Filters by a User ID, which is any unique 6-digit code. Click the button to display the 'Browse Employees' window to search for a specific employee.
Start Date
Indicates the start date and time for the search for reporting purposes. Click the small down arrow to display a calendar. Click the desired date to select. Use the small left and right arrows to display previous/next months. Transactions created or submitted within the date range display. Enter a check mark in the field to report sales for a certain period. Displays all transactions, when unchecked. Defaults to current date.
Automatically populates with the appropriate date range when a 'Calendar' or 'Fiscal' option is selected.
When saving as a profile, using the relative date option is recommended rather than selecting dates from the pop-up calendar. If the profile is saved with a fixed date range, then whenever the report is run using the saved profile, the report's output always contains the same information for that fixed date range only. If the profile is saved with a relative date range, the dates included are adjusted based on when the report is run.
End Date
Indicates the end date and time for the search for reporting purposes. Click the small down arrow to display a calendar. Click the desired date to select. Use the small left and right arrows to display previous/next months. Transactions created or submitted within the date range display. Enter a check mark in the field to report transactions for a certain period. Displays all transactions, when unchecked. Defaults to current date.
Automatically populates with the appropriate date when a 'Calendar' or 'Fiscal' option is selected.
When saving as a profile, using the relative date option is recommended rather than selecting dates from the pop-up calendar. If the profile is saved with a fixed date range, then whenever the report is run using the saved profile, the report's output always contains the same information for that fixed date range only. If the profile is saved with a relative date range, the dates included are adjusted based on when the report is run.
Calendar
Uses Relative Calendar dates, when selected. Works in conjunction with the 'Start Date' and 'End Date' fields.
Fiscal
Uses Relative Fiscal dates, when selected. Works in conjunction with the 'Start Date' and 'End Date' fields.
Options are:
-
'Show All' - Reports all transactions.
-
'Write-In' - Reports only transactions where the part was not in file.
Sort Newest to Oldest
Displays transactions in date order from newest to oldest, when checked.
Page Break By Account
Prints each account on a separate page, when checked. Prints a grand total page at the end of the report totaling all accounts.
Prints each account, one after the other, on the same page, when unchecked. Prints a grand total at the end of the report totaling all accounts.
Advanced Criteria
Displays the 'Inventory Report Overrides' window used to set override defaults for the inventory report, when clicked.
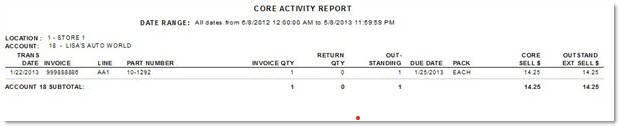
Core Activity Report
When manually run and depending on the report date range, including historical dates, the 'Core Activity Report' reports all deferred core, whether deferred or delinquent, that has not been returned. Upon selecting the desired criteria, the report can be previewed, printed and exported. Based on the user's preference, the report can print each account, one after the other, on the same page, followed by a grand total at the end of the report totaling all accounts; or, the report can print each customer on a separate page totaling all reported customers at the end of the report. The report automatically prints as part of the End of Day process along with the other End-of-Day reports.
The report automatically prints as part of the End-of-Day process along with the other End-of-Day reports and reports all core that have not yet been returned and are not yet delinquent. Once a core is returned or becomes delinquent, it is no longer reported. For example, if a core is sold on 10/20 and not returned, and if the 'Reprint Deferred Inv / # Days' field on the Store General Setup screen, 'Deferred Core' tab is 3, the core is reported as part of the End-of-Day process on 10/20, 10/21, 10/22 and 10/23. Since it becomes delinquent at the end-of-day on 10/23, it is not reported at end-of-day on 10/24. If a core is still outstanding and has a due date of 10/23 but the store does not perform an end-of-day on 10/23, the core does not print when the next end-of-day is performed.
Procedure to Generate the Core Activity Report
To generate the 'Core Activity Report', follow the steps below:
-
From the Menu, select Reports, Inventory, Core Activity. The 'Core Activity Report' screen displays.
-
Enter the appropriate 'Report Criteria' to narrow the scope of the report, as needed.
-
Click 'Preview' to review the resulting report. A preview of the report displays.
-
Click 'Print' to print the report. The printout is sent to the default printer.