PWMobile
Overview
PWMobile provides PartsWatch functionality on a mobile device.
PWMobile User Guide - 28 pages
The available PWMobile functions are:
-
Enables store employees to scan VIN bar codes off of vehicles parked outside the store in the parking lot, and transmit the VIN to PartsWatch using a mobile device. The employee can then select the scanned VIN in PartsWatch, so that when the ACES CATALOG screen is opened, the scanned vehicle's 'Year', 'Make', 'Model', and 'Engine' are already displayed.
-
Enables store owners and managers to graphically view their store sales or number of transactions in total and by hour for any date range and any Store Group using their mobile device. Note: The store sales and transactional information displayed on the mobile device is similar to the Transactions By Hour Report.
-
Enables store owners and managers to scroll through a list of their customer account sales (ranked in descending order) for any date range and any Store Group. Note: The sales information displayed on the mobile device is similar to, but not the same as, the 'Account Ranking Report' within the Sales Analysis suite of reports.
-
Enables store owners and managers to scroll through a list of their mfg line sales (ranked in descending order) for any date range and any Store Group. Note: The sales information displayed on the mobile device is not similar to any PartsWatch report but could be thought as an extension of the Line Sales Report.
PWMobile is available for use by both Android and iOS devices. An Android device is a mobile device using the Google® Android Operating System. Any mobile application that runs on an Android device can only be installed by downloading the application from Google's Play store. This device is typically a smart phone or a tablet. An iOS device is a mobile device using the Apple® iOS Operating System. Any mobile application that runs on an iOS device can only be installed by downloading the application from Apple's App Store. This device is a smart phone (also called an iPhone) or a tablet (also called an iPad).
Unlike using a mouse on a PC desktop, a "tap" selects a button, menu or other icon, on a mobile device. A tap can be performed with a finger, a "tapping’" stick, or pen (stylus).
Also, a "swipe" refers to scrolling through a list of items or selecting from a rotating circular list of options. A swipe also allows hidden panels to display. For example, swipe from left-to-right to open the menu screen and right-to-left to close the menu screen, or right-to-left to open the 'Report Options' settings and left-to-right to close the 'Report Options' settings.
Unlike using PartsWatch on a PC desktop, should the PartsWatch database be unavailable due to network issues or the database in down, the PWMobile application is not available. There is no Mode 2 on the PWMobile device.
Since the mobile app needs to obtain and send information to PartsWatch, a QR Code is on the SYSTEM INFORMATION screen. Once the PartsWatch Mobile App has been installed, this QR code can be scanned from the SYSTEM INFORMATION screen to enable the mobile device to be connected to the PartsWatch database for sending information back and forth.
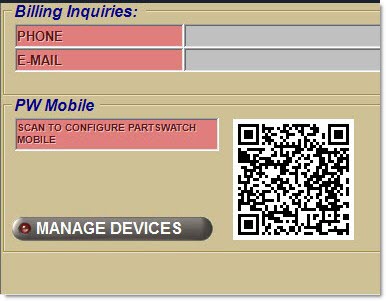
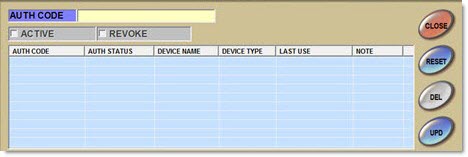
Click the 'MANAGE DEVICES' button to open the 'MANAGE DEVICES' window to authorize or de-authorize mobile devices for use with PWMobile.
Once the app is installed and setups are complete, click on the PartsWatch icon on the mobile device to access the login screen.
Install PWMobile on a Mobile Device
Search for the application called "PartsWatch" in either Google's Play Store or Apple's App Store and download and install the application using the same method that all mobile device applications are downloaded and installed.
If required, contact the mobile device vendor, use the Internet for assistance, or contact Customer Support to assist with installing the application on a mobile device.
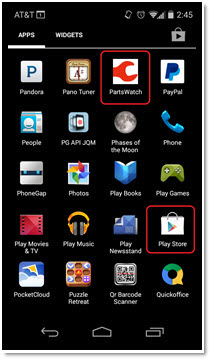
The following screen is an example of an Android mobile device that has the PWMobile application called PartsWatch (circled in red) already loaded. The Play Store application (circled in red) must be used to find and download the PWMobile application.
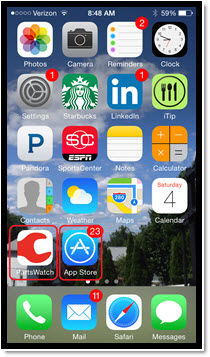
The following screen is an example of an iOS mobile device (e.g., iPhone) that has the PWMobile application (circled in red) already loaded. The App Store application (circled in red) must be used to find and download the PWMobile application.
Log In to PWMobile
-
Tap the 'PartsWatch' icon and the splash screen displays. If this is the first time the PWMobile application is opened, the 'Config' screen displays.

-
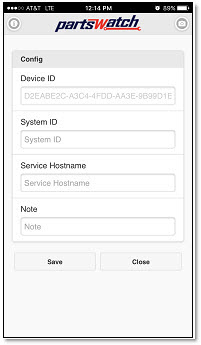
Similar to the PartsWatch DATABASE CONFIGURATION screen, the 'Config' screen connects the mobile device to a PartsWatch application database. Note: It is possible to connect a mobile device to multiple PartsWatch databases but only one PartsWatch database can be accessed at a time.
-
The 'Device ID' automatically populates and is not editable.
-
Enter the 'System ID' (required).
-
Enter an optional 'Note' about the mobile device.
-
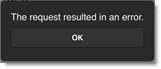
Tap the 'Save' button to connect the mobile device to the PartsWatch database. Note: After approximately 10 seconds of an unsuccessful connection, a "communication time-out" error may occur between the PWMobile application and its attempt to access the PartsWatch database. Tap 'OK' and contact PWS Customer Support for assistance. (The System ID and/or Service Hostname may be incorrect or misspelled.)
-
This communication error may occur at any time on any screen when running the PartsWatch application. Tapping the 'OK' button may result in the PWMobile application resuming a function being performed if the communication issue is immediately resolved.
-
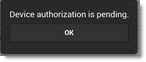
On the initial attempt to access a PartsWatch database with a mobile device, a pop-up message displays stating "Device authorization is pending." when the PartsWatch database connection is successful. The mobile device still cannot access any information within the PartsWatch database until someone using the PartsWatch application within the same PartsWatch database authorizes the specific mobile device. Note: This authorization is only required once within a PartsWatch database for as long as the mobile device is used. However, if someone using the PartsWatch application within the same database revokes access from that specific mobile device, the mobile device needs to be authorized again within that same PartsWatch database.
-
-
Tap the 'OK' button on the pop-up. The 'Config' screen redisplays with two additional fields, 'Authorization Code' and 'Authorization Status'.
-
The 'Authorization Code' can be provided to the store manager to help authorize the device. The 'Authorization Status' remains in 'Pending' status until someone using the PartsWatch application within the same PartsWatch database authorizes this specific mobile device.
-
Note: An alternate method to connect to a PartsWatch database using a mobile device is through the SYSTEM INFORMATION screen in the PartsWatch application.
-
-
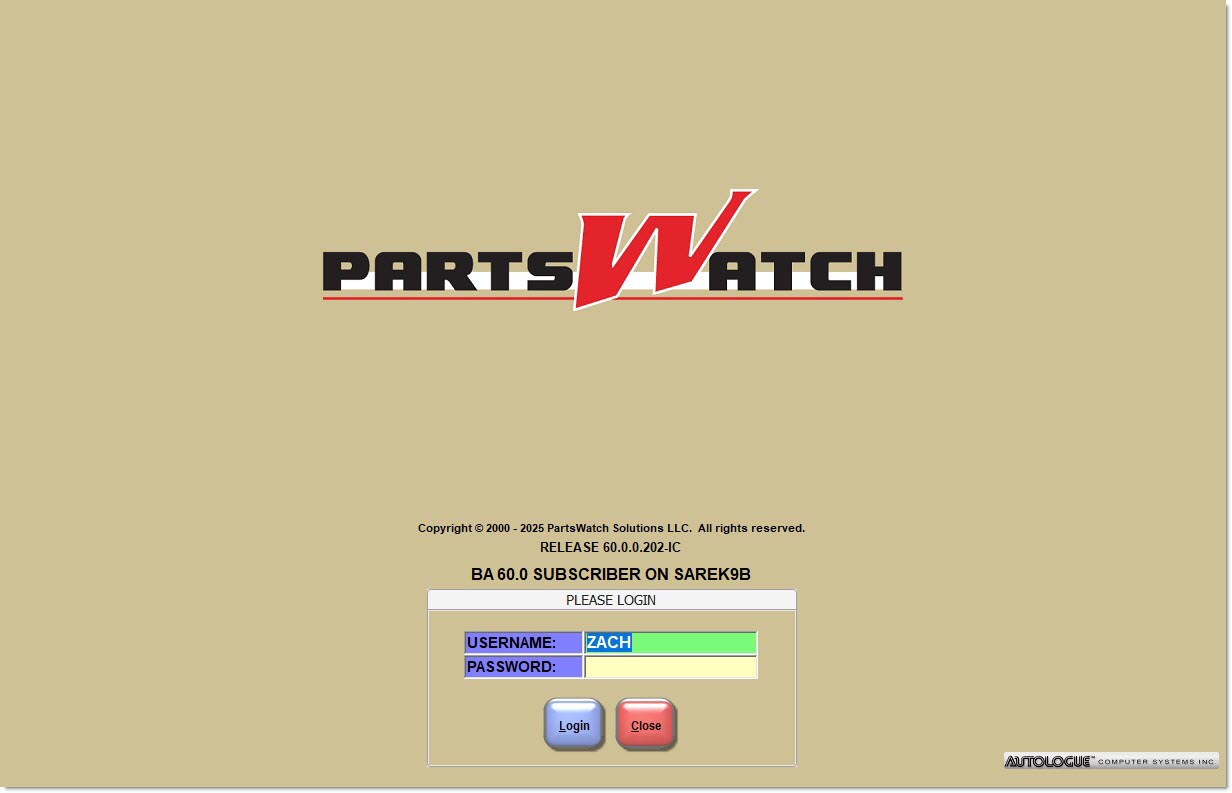
Tap the 'Close' button when the device is authorized. The 'Login' screen displays.
-
Enter the current 'Store Number' within the PWMobile application in the 'Store Number' field. Note: This number can be changed if the device has access to multiple stores in that PartsWatch database. The 'Store Number' can only be changed on the PWMobile Login screen.
-
Enter a username in the 'Username' field. Note: Use the same username used to log into the PartsWatch application on a PC desktop.
-
Enter a password in the 'Password' field. Note: Use the same password used to log into the PartsWatch application on a PC desktop.
-
Optionally tap the 'Settings' icon in the upper-right corner of the 'Login' screen. The 'Config' screen displays to update configuration settings, if needed.
-
Tap the 'Login' button. The device logs into the PWMobile application. The PWMobile 'Home' screen displays. (The 'VIN Scan' screen displays as the default 'Home' screen on the initial login to the PWMobile application. However, the home screen can be changed.) Note: Once logged in, it is not necessary to log in again (even if the PWMobile application is closed) unless:
-
The 'Logout' menu item is tapped on the 'Menu' screen.
-
The user's PWMobile application session expires on the mobile device. Note: The Default expiration is set to 'Never'.
-
The mobile device 'Authorization Status' is set to 'REVOKE'.
-
The mobile device authorization record is deleted in the 'MANAGE DEVICES' window in the PartsWatch application.
-
-
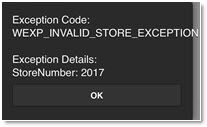
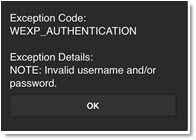
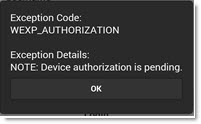
Note: The following pop-ups display when:
-
The 'Store Number' is changed and the 'Store Number' entered does not exist in the PartsWatch database.
-
The 'Username' and/or 'Password' do not match the values within the PartsWatch database.
-
The 'Username' and 'Password' match the values with the PartsWatch database but the mobile device is not yet authorized by the PartsWatch application in the PartsWatch database.
-
PWMobile Icons
The following icons are used int he PWMobile application:


Options (Report and Config Settings)

Camera (for Config and VIN Scan Functions)

Menu Panel
Tap the 'Menu' icon in the upper-left corner of the screen or swipe to open the menu panel. The PWMobile 'Menu' panel displays. Make a selection to continue.
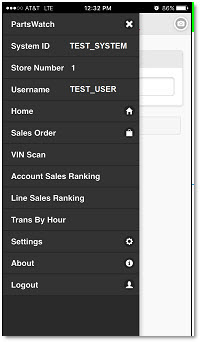
PartsWatch
Displays the application name.
System ID
Displays the system identifier.
Store Number
Displays the location number.
Username
Displays the user's login name.
Home
Navigates to either the default 'Home' page or the screen selected as the preferred 'Home' screen.
Sales Order
Used to create a sales order on the mobile device and submit it to the PartsWatch desktop application.
VIN Scan
Used to scan a VIN off a vehicle and transmit the information to the PartsWatch ACES Catalog. Available to all PWMobile users.
Account Sales Ranking
Displays the Account Sales Ranking report. Available to only those PWMobile devices with User Security permission to access the PartsWatch application's Sales Analysis suite of reports.
Line Sales Ranking
Displays the Line Sales Ranking report. Available to only those PWMobile devices with User Security permission to access the PartsWatch application's Line Sales Report.
Trans By Hour
Displays the Trans By Hour report. Available to only those PWMobile devices with User Security permission to access the PartsWatch application's Transaction By Hour Report.
Settings
Navigates to the 'Settings' screen for selecting user preferences. Use this screen to select a preferred 'Home' screen.
About
Displays the 'About' pop-up used to identify the version of the application.
Logout
Exits the application.
Sales Order Screen
The 'Sales Order' screens allows for the creation of a sales order on a mobile device and he ability to submit it to the PartsWatch desktop application.
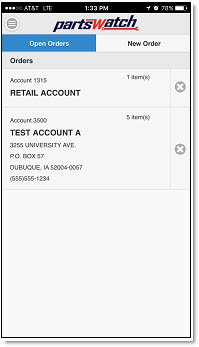
When the 'Sales Order' option is selected from the menu, PWMobile displays the list of open orders (if any exist). The 'Open Orders' screen includes the customer information and the number of items on each order. Tap on an open order to continue working on it or tap the delete icon to remove the open order (a confirmation prompt displays before the order is removed). Tap 'New Order' in the navigation bar to start a new order.
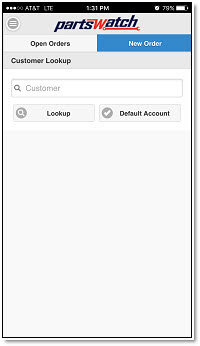
On the 'New Order' screen, tap 'Default Account' to use the store's 'DEFAULT ACCOUNT' on the STORE INVOICE OPTIONS screen in the PartsWatch desktop application or type in a customer and tap 'Lookup'. Search for a customer by name (full or partial), account number, account code, or phone number. Tap 'Open Orders' in the navigation bar to return to the list of open orders.
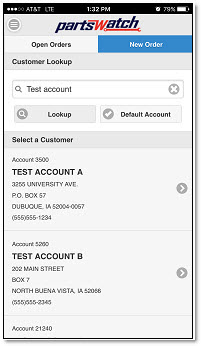
After tapping the 'Lookup' button, if multiple matches are found, a customer list displays. Tap on the correct customer or look up another customer. A "No matches found" message displays if no customers are found matching the search criteria.
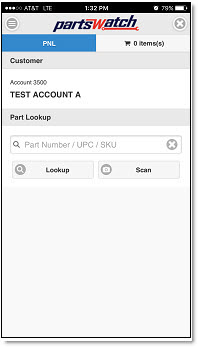
After a selecting a customer from the list of matches, the Part Number Lookup ('PNL') screen displays. If 'Default Account' is tapped or only one matching customer is found when 'Lookup' is tapped, the 'PNL' screen displays immediately.
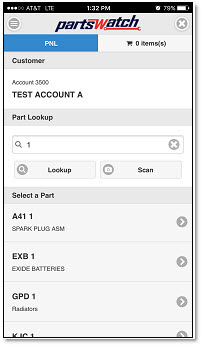
On the 'PNL' screen, tap the 'Scan' button to scan a bar code to look up a part or type in a part to look up. You can search for a part by part number, UPC, SKU, product, alias, or OEM number.
After tapping the 'Lookup' button, if multiple matches are found, a part list displays. Tap on the correct part or look up another part. A "No matches found" message displays if no parts are found matching the search criteria.
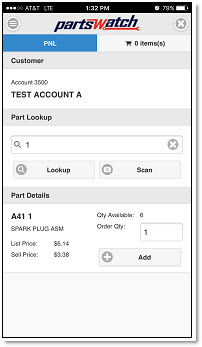
After selecting a part from the list of matches, additional part details display. If only one matching part was found when 'Lookup' is tapped, the part details display immediately.
Change the 'Order Qty' value (if necessary) and tap the 'Add' button. The shopping cart summary in the navigation bar is updated and a message displays confirming that the part was added to the order. Tap the shopping cart summary in the navigation bar to view all of the parts on the order.
The 'Shopping Cart' screen displays the list of parts on the order. Change the 'Order Qty' (if necessary) and tap 'Update' or tap 'Delete' to remove the part from the order (a confirmation prompt displays before the part is removed). Tap 'PNL' in the navigation bar to add more parts to the order. Tap 'Continue to Order Summary' to review the order.

The 'Order Summary' screen displays the customer, parts, totals, and the reference number. Optionally enter a 'PO Number' or 'Memo'. Tap 'Place Order' and the Background Processor running in the PartsWatch desktop application prints the order in the store. Tap 'PNL' in the navigation bar to add more parts to the order. Tap the shopping cart summary in the navigation bar to return to the 'Shopping Cart' screen.
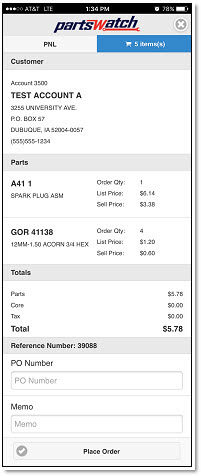
After the order has been place, a confirmation message displays with the reference number of the sales order that was created in the PartsWatch desktop application.

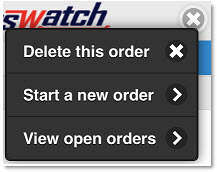
When working on a sales order, tap the 'Cancel' icon in the upper-right corner of any of the screens to view the following list options.
VIN Scan
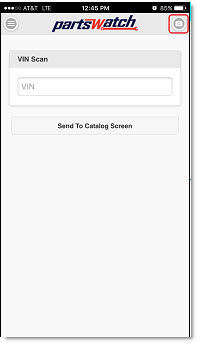
The 'VIN Scan' screen enables the scanning of a VIN bar code by tapping the Camera icon, or typing the VIN directly into the edit box.
When using the Camera icon, hold the mobile device over a VIN bar code on a vehicle and scan the VIN bar code. The mobile device's camera performs the scan.
For most vehicles, the VIN number bar code is located on the inside of the driver's side door. Align the mobile device directly over the VIN bar code and hold the mobile device very steady in order for the picture to be automatically taken. Note: When the device is unsteady, the mobile device may not be able to automatically take a picture. In this case, type the VIN.
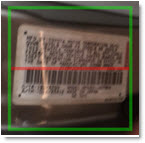
Once properly aligned, the camera automatically scans the VIN bar code. When successful, the edit box automatically populates with the VIN bar code.
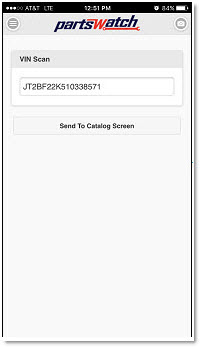
Tap the 'Send To Catalog Screen' button to send the vehicle's VIN to the PartsWatch application's pop-up that displays a list of recently scanned VIN values.
A message displays stating "Invalid VIN" when the VIN scanned by the mobile device's camera, or typed manually, is considered invalid for any reason, or if a VIN was not scanned or entered.
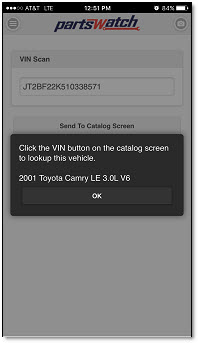
Once the VIN is received by the PartsWatch application, click the 'VIN' button in the ACES CATALOG screen in the PartsWatch application. All recently scanned VIN values display in the pop-up.
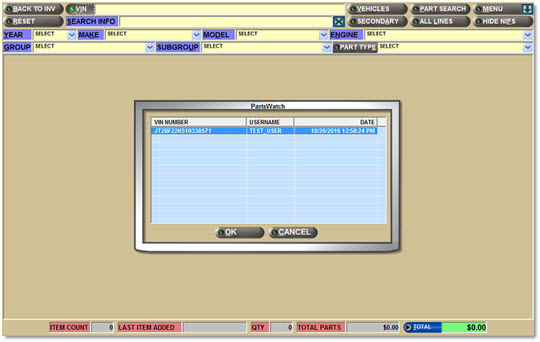
The pop-up displays the following fields:
-
'VIN NUMBER' - Displays the VIN. The VIN values remain in the pop-up until they are purged from the PartsWatch application.
-
'USERNAME' - Displays the login of the employee who transmitted the VIN from the PWMobile application.
-
'DATE' - Displays the date/time when the PartsWatch application received the scanned VIN.
Click 'OK' and the ACES CATALOG screen displays populated with the 'Year', 'Make', 'Model', and 'Engine' type for the vehicle that had its VIN scanned. It is then possible to display the available applicable parts for the vehicle.
Reports
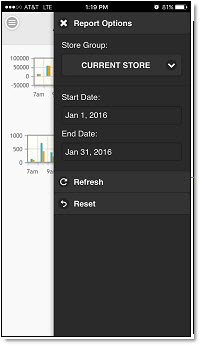
Report Options Panel
Tap the Options icon on any report screen, or swipe the report screen from right-to-left to display the 'Report Options' panel used to change the PWMobile application settings. The two settings are 'Store Group' and 'Date Range'.
Store Group
-
Current Store is the default.
-
Current Store is always the login store and cannot be changed.
-
Current Store number can be viewed on the 'Menu' panel.
-
Current Store number can be changed on the 'Login' screen.
-
A 'Store Group' value of 'ALL' represents all of the stores that can be accessed in the PartsWatch database based on the PartsWatch store security in that database.
-
The remaining 'Store Group' selections represent all 'Store Groups' that have been created in that PartsWatch database.
-
All PWMobile users with access to any of the three reports can see all of the available 'Store Groups'.
-
Only store sales for the stores within the selected 'Store Group' (that can be accessed via the User Security access in that PartsWatch database) display.
-
A new 'Store Group' can be created in the PartsWatch database when stores that the PWMobile user wants to report sales for are not in any available 'Store Group' selection. Note: The new 'Store Group' would be available to all PWMobile users with access to any of the three reports.
Date Range
-
Today's date is the default for both 'Start Date' and 'End Date'.
-
Both dates can be any valid date: past, present, or future.
-
No validation is performed between the two dates. 'Start Date' can be after the 'End Date'.
-
Only records within the date range are returned in any report.
Tap the 'Store Group' drop-down icon to change the selected 'Store Group'.
Tap the 'Start Date' or 'End Date' value to change the selected 'Start Date' or 'End Date'.
Tap the 'Refresh' button to execute the report with the revised settings.
Tap the 'Reset' button to reset the settings back to the PWMobile application defaults of 'Current Store' and today's date.
Setting changes remain in effect across all three reports until the 'Reset' button is tapped or the PWMobile application is logged-out. Upon login, the report settings always contain the PWMobile application defaults.
Account Sales Ranking
Tap the 'Account Sales Ranking' menu item to open the 'Account Sales Ranking' screen. The report immediately runs against the PartsWatch database using the report option settings that are currently set.
Since the report option settings include a default selection of the 'Current Store' and a default date range of "today", if the report is run first thing in the morning before the current store opens, the screen may display with no sales results yet for the store.
To change the current report options settings, tap the Options icon, or swipe the screen from right-to-left to display the 'Report Options' panel. Change 'Store Group' and/or 'Date Range', as applicable. The following is an example of the 'Account Sales Ranking' report.
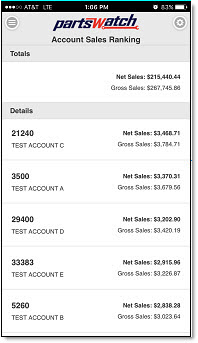
The Account Sales Ranking report outputs the following information:
-
'Totals' - Reports the total 'Net Sales' and 'Gross Sales' for the 'Store Group' within the selected 'Store Group' and 'Date Range'.
-
'Details' - Lists all Accounts (Account Name and Account Number), or Account Code (if set in the PartsWatch application), that had 'Net Sales' and 'Gross Sales' within the selected 'Store Group' and 'Date Range'.
Line Sales Ranking
Tap the 'Line Sales Ranking' menu item to open the 'Line Sales Ranking' screen. The report immediately runs against the PartsWatch database using the report option settings that are currently set.
Since the report option settings include a default selection of the 'Current Store' and a default date range of "today", if the report is run first thing in the morning before the current store opens, the screen may display with no sales results yet for the store.
To change the current report options settings, tap the Options icon, or swipe the screen from right-to-left to display the 'Report Options' panel. Change 'Store Group' and/or 'Date Range', as applicable. The following is an example of the 'Line Sales Ranking' report.
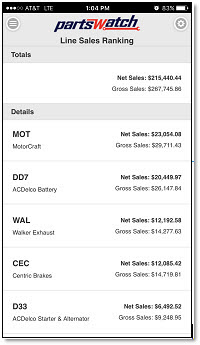
The 'Line Sales Ranking' report outputs the following information:
-
'Totals' - Reports the total 'Net Sales' and 'Gross Sales' for the 'Store Group' within the selected 'Store Group' and 'Date Range'.
-
'Details' - Lists all Lines (Line Name and Line Code) that had 'Net Sales' and 'Gross Sales' within the selected 'Store Group' and 'Date Range'.
Trans By Hour
Tap the 'Trans By Hour' menu item to open the 'Trans By Hour' screen. Two graphs immediately run against the PartsWatch database using the report option settings that are currently set.
To change the current report options settings, tap the Options icon, or swipe the screen from right-to-left to display the 'Report Options' panel. Change 'Store Group' and/or 'Date Range', as applicable.
The following is an example of the first 'Trans By Hour' graphs in portrait.
![]()
The following is an example of the first 'Trans By Hour' graph in landscape (after rotating the mobile device).
![]()
The bar graph displays 'Gross Sales' for the selected 'Store Group' and 'Date Range', and 'Net Sales' for the selected 'Store Group' and 'Date Range' by hour starting with 7 am and ending with 10 pm. These sales figures are based on the 'GPM%' field values used on sales reports within the PartsWatch application.
Swipe the screen from bottom-to-top to display the second graph (after rotating the mobile device).
![]()
The bar graph displays the total number of all sales order transactions ('# Trans') for the selected 'Store Group' and 'Date Range', and total number of Internet sales order transactions ('# eOrders') for the selected 'Store Group' and 'Date Range' only by hour starting with 7 am and ending with 10 pm.
Settings
Tap the 'Settings' menu item to display the 'Settings' screen used to select the preferred 'Home' screen function from the list of available application functions. The selected 'Home' screen function displays whenever the PWMobile application is logged-into.
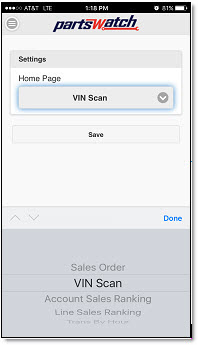
Tap the 'Home Page' drop-down arrow to select an available application function as the 'Home' screen. The list of available PWMobile application functions is based on the User Security permissions in the PartsWatch application.
Once a function is selected, tap the 'Save' button to save the selection.
About
Tap the 'About' menu item to display the 'About' pop-up, which identifies the version of the application.
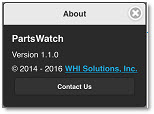
Tap the 'Contact Us' button to display an email message addressed to pwmobile@partswatch.com in the mobile device's email application. Enter content and tap 'Send' to submit.