System Inventory Options
The System Inventory Options screen is used to store settings that affect all stores on the same database (specifically for the inventory module) and can be changed by the owner rather than by the support department. The setting is changed for all stores in the database when the setting is changed in the screen.
Menu Path: Controls, System, Inventory Setup, Inventory Options, System Inventory Options
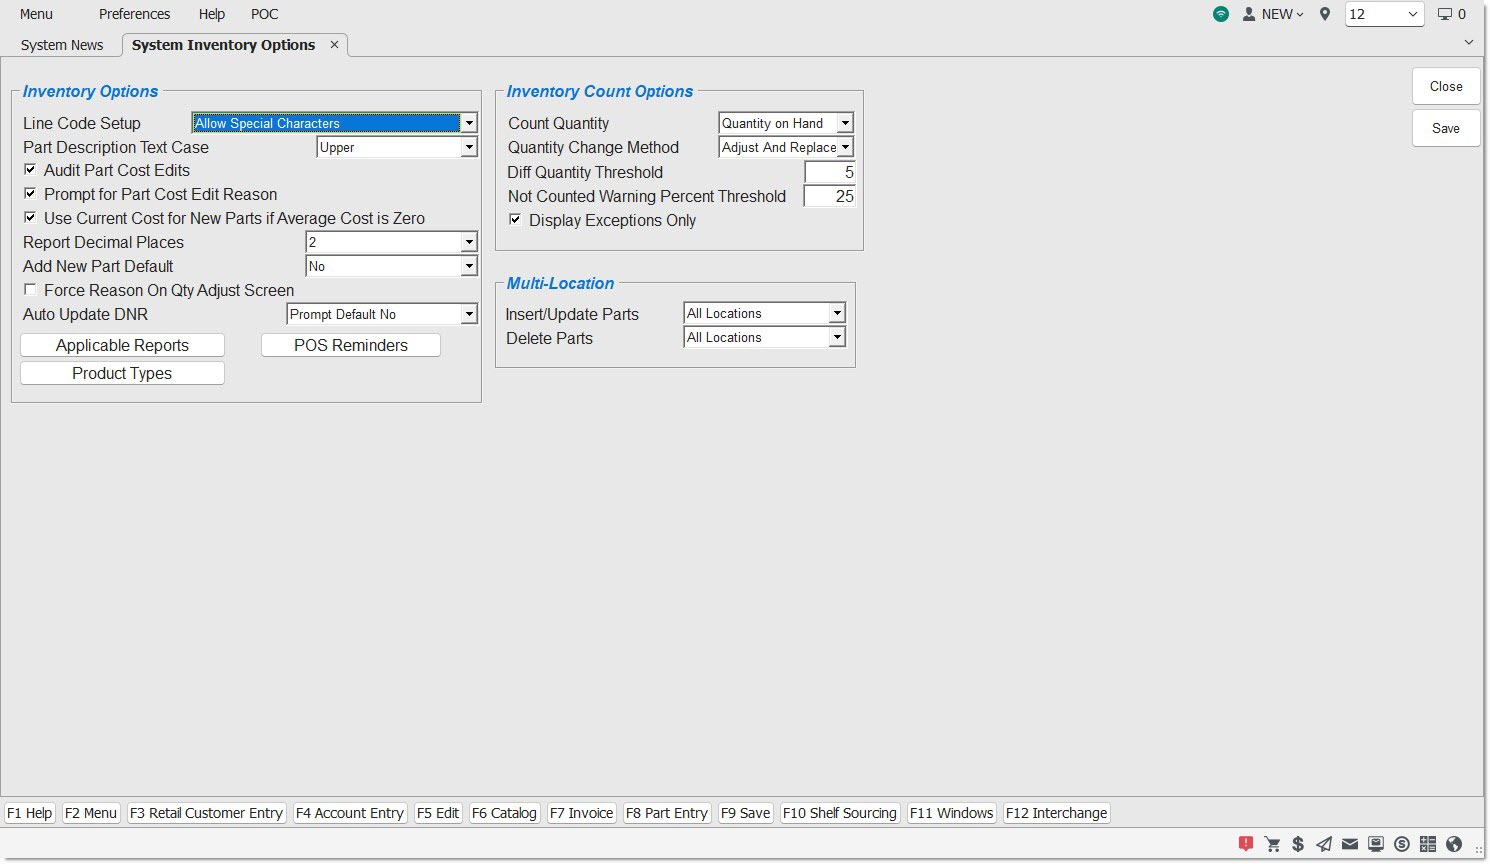
Inventory Options
Determines the way line codes can be set up in the stores.
Options are:
- 'ALLOW SPECIAL CHARACTERS' - Allows letters, numbers, and special characters, and can be one, two, or three characters long.
- 'NO SPECIAL CHARACTERS' - Allows letters only in the first two characters and allows letters or numbers in the third character. The line code can be two or three characters long - a one-character line code is not allowed.
Note: Historical reporting may output line codes with special characters, such as ***, if they exist.
Drop-down that allows for the selection of 'UPPER' or 'MIXED' so that the following areas that display text are either in the default all upper-case labeling, or mixed-case lettering including upper and lower-case labels.
The setting will affect the 'DESCRIPTION 1' and 'DESCRIPTION 2' fields on the following screens:
- Part Entry
- PART PRICE ENTRY
- ORDER – COST
- INVENTORY MASS UPDATE UTILITY
- MULTI-LOCATION PART Part Creator/Editor
- MULTI-LOCATION MASS UPDATE
At Point-of-Sale, the setting will apply to the 'DESCRIPTION' field as follows:
- If the setting is 'UPPER', the 'DESCRIPTION' field will now force upper-case when entered in this field, in the invoice body grid, and on the printed invoice.
Note: If the setting is 'UPPER', if mixed case is keyed in to the 'DESCRIPTION' field, the text won't change to upper-case until the 'Enter' key is pressed, moving the focus to the next field.
- If the setting is 'UPPER', but the 'DESCRIPTION' field under the Sell line was not edited, upper-case will not be forced. It will display in that 'DESCRIPTION' field, in the invoice body grid, and on the printed invoice with the text that was last entered and updated in the inventory fields according to the 'PART DESCRIPTION TEXT CASE' setting at the time of entry and update (e.g. if entered and updated as mixed case in an inventory field, the 'DESCRIPTION' field under the Sell line, the invoice body grid, and on the printed invoice will be in mixed-case, regardless of the current 'PART DESCRIPTION TEXT CASE' setting).
- If the setting is 'MIXED', the 'DESCRIPTION' field will allow lower-case text.
At POS, the setting will apply to the 'DESCRIPTION' field in the 'PRICE EDIT' pop-up as follows:
- If the setting is 'UPPER', the 'DESCRIPTION' field will now force upper-case.
Note: If the setting is 'UPPER', if mixed-case is keyed in to the 'DESCRIPTION' field, the text won't change to upper-case until the 'Enter' key is pressed, moving the focus to the next field.
- If the setting is 'MIXED', the 'DESCRIPTION' field will allow lower-case text.
The setting will also apply to the 'DESCRIPTION' field on the 'WRITE-IN PO FORM' pop-up when a NIF (Not-in-File) part is entered.
In DFIU, this setting will apply to the 'DESCRIPTION' field.
Controls the auditing and reporting of cost edits, when enabled. Auditing tracks user edits to all nine cost fields (seven part costs and two core costs). The part's 'QTY AVAILABLE', which is critical in determining the inventory cost impact of the cost edit, is written to the audit table at the time of the cost edit.
- Checked - Cost edits are audited and the 'PART LEDGER COST EDITS REPORT' button is available on the PART LEDGER REPORT screen, when checked. Ability to print the PART LEDGER COST EDITS REPORT is available with User Security permission.
- Unchecked - Cost edits are not audited and the 'PART LEDGER COST EDITS REPORT' button is not available on the PART LEDGER REPORT screen.
The PART LEDGER COST EDITS REPORT proc in the USER SECURITY SETUP screen must be enabled to allow a user to access the report.
- If set to 'NOT VISIBLE', the 'PART LEDGER COST EDITS REPORT' button is not visible.
- If set to 'ALLOW EDIT', the 'PART LEDGER COST EDITS REPORT' button is visible.
- If set to 'VIEW ONLY', the 'PART LEDGER COST EDITS REPORT' button is visible but not clickable.
PROMPT FOR PART COST EDIT REASON
Checkbox that determines whether or not the system will prompt with a pop-up to define a reason for editing a part cost.
- Checked - Displays the 'EDIT PRICE LEVELS' pop-up before auditing part cost edits.
- Unchecked (default) - Part and core costs are audited silently, without prompting to enter a reason code.
Note: For part and core costs to be included in the G/L Export, the 'AUDIT PART COST EDITS' checkbox must be checked.
USE CUR COST FOR NEW PARTS IF AVG COST IS ZERO
Determines whether or not to use the 'CUR COST' value for new parts if the 'AVG COST' value is 0.
- Checked - Uses the 'CUR COST' value for new parts if the 'AVG COST' value is 0.
- Unchecked - Does not use the 'CUR COST' value for new parts if the 'AVG COST' value is 0.
Determines how many decimal places appear in the dollar values on the reports.
Options are:
- '2'
- '3'
- '4'
Determines whether focus is on the 'YES' or 'NO' button on the "Part not found. Would you like to add it?" prompt that opens on the Part Entry, PART PRICE ENTRY, or ORDER-COST screen when a part is entered that is not in the system and the 'Enter' key or 'Space' bar is pressed.
Options are:
- 'NO' - When a part is entered that is not found and the system prompts "Part not found. Would you like to add it?", the 'NO' button on the prompt is highlighted so that pressing the 'Enter' key or 'Space' bar answers 'No' to the prompt and the part is not added to the table.
- 'YES' (default) - When a part is entered that is not found and the system prompts "Part not found. Would you like to add it?", the 'YES' button on the prompt is highlighted so that pressing the 'Enter' key or 'Space' bar answers 'Yes' to the prompt and the part is added to the table.
FORCE REASON ON QUANTITY ADJUST SCREEN
Determines whether or not inventory adjustments made on the QUANTITY ADJUST screen must be tracked.
- Checked - the system forces the selection of a reason to track inventory adjustments made from the QUANTITY ADJUST screen.
- Unchecked (default) - The system allows for optional selection of a different reason to track for the changes made during inventory adjustments.
Drop-down with the following options:
-
'ALWAYS'
-
'NEVER'
-
'PROMPT DEFAULT NO' (default)
-
'PROMPT DEFAULT YES'
For the Part Entry and ORDER-COST screens:
-
The behavior of 'PROMPT DEFAULT NO' and 'PROMPT DEFAULT YES' are the same except for which button is highlighted in the decision pop-up when the prompt is displayed to the user on the Part Entry and ORDER - COST screens.
-
'ALWAYS'
-
If the 'MIN' and/or 'MAX' and/or 'ORDER POINT' fields are set to a value greater than zero and:
-
The 'DNR' checkbox is explicitly set (to either Yes or No), and the 'UPD' button is clicked, the DNR Setting 'AUTO UPDATE DNR' is ignored when the 'DNR' checkbox is adjusted.
-
No changes are made to the 'DNR' checkbox and the 'UPD' button is clicked, the application checks the existing state of the 'DNR' checkbox.
-
If the 'DNR' checkbox is checked, the application sets it to unchecked.
-
If the 'DNR' checkbox is unchecked, the application does nothing.
-
-
-
If the 'MIN' and 'MAX' and 'ORDER POINT' fields are set to zero and:
-
The 'DNR' checkbox is explicitly set (to either Yes or No) and the 'UPD' button is clicked, the DNR Setting 'AUTO UPDATE DNR' is ignored when the 'DNR' checkbox is adjusted.
-
No changes are made to the 'DNR' checkbox and the 'UPD' button is clicked, the application checks the existing state of the 'DNR' checkbox:
-
If the 'DNR' checkbox is checked, the application does nothing to the 'DNR' checkbox. The part will not be ordered/reordered.
-
If the 'DNR' checkbox is unchecked, the application will set the 'DNR' checkbox to checked.
-
-
-
-
PROMPT ('PROMPT DEFAULT YES' or 'PROMPT DEFAULT NO')
-
If the 'MIN' and/or 'MAX' and/or 'ORDER POINT' fields are set to a value greater than zero and:
-
The 'DNR' checkbox is explicitly set (to either Yes or No) and the 'UPD' button is clicked, the DNR Setting 'AUTO UPDATE DNR' is ignored when the 'DNR' checkbox is adjusted.
-
No changes are made to the 'DNR' checkbox and the 'UPD' button is clicked, the application checks the existing state of the 'DNR' checkbox:
-
If the 'DNR' checkbox is checked, a prompt displays stating: "Setting the stocking level fields above zero while the DNR flag is checked will not allow this part to be automatically ordered. Would you like to uncheck the DNR flag?" with 'YES' and 'NO' buttons.
-
If the setting is 'PROMPT DEFAULT YES', the 'YES' button is the default.
-
If the setting is 'PROMPT DEFAULT NO', the 'NO' button is the default.
-
Click 'YES' and the application sets the 'DNR' checkbox to unchecked.
-
Click 'NO' and the application does nothing to the 'DNR' checkbox.
-
-
If the 'DNR' checkbox is unchecked, the application does nothing to the 'DNR' checkbox.
-
-
-
If the 'MIN', 'MAX', and 'ORDER POINT' fields are set to zero and:
-
The 'DNR' checkbox is explicitly set (to either Yes or No) and the 'UPD' button is clicked, the DNR Setting 'AUTO UPDATE DNR' is ignored when the 'DNR' checkbox is adjusted.
-
No changes are made to the 'DNR' checkbox and the 'UPD' button is clicked, the system checks the existing state of the 'DNR' checkbox:
-
If the 'DNR' checkbox is unchecked, the application does nothing to the 'DNR' checkbox and the part is not ordered/reordered.
-
If the 'DNR' checkbox is unchecked, a prompt displays stating: "Setting the stocking level fields to zero may eliminate this part from being ordered. Would you like to set the DNR flag?" with 'YES' and 'NO' buttons.
-
If the setting is 'PROMPT DEFAULT YES', the 'YES' button is the default.
-
If the setting is 'PROMPT DEFAULT NO', the 'NO' button is the default.
-
Click the 'YES' button and the 'DNR' checkbox is set to checked.
-
Click the 'NO' button and nothing is done to the 'DNR' checkbox.
-
-
-
-
-
'NEVER'
-
Nothing is done to the 'DNR' checkbox regardless of whether any changes were made to the 'MIN', 'MAX', and 'ORDER POINT' fields.
-
For DFIU:
-
The behavior of 'PROMPT/DEFAULT NO' is similar to the behavior of 'NEVER' for the DFIU function since the function does not display any prompt pop-ups to the user when stocking levels are changed.
-
The behavior of 'PROMPT/DEFAULT YES' is similar to the behavior of 'ALWAYS' for the DFIU function since the function does not display any prompt pop-ups to the user when stocking levels are changed.
-
'ALWAYS'
-
If the user-provided file sets the 'MIN' and/or 'MAX' and/or 'ORDER POINT' fields to a value greater than zero and:
-
The user-provided file explicitly sets the 'DNR' checkbox (to either checked or unchecked), nothing is done to the 'DNR' checkbox.
-
The user-provided file explicitly makes no changes to the 'DNR' checkbox, the 'DNR' checkbox is set to unchecked. The part should be ordered/reordered.
-
-
If the user-provided file sets the 'MIN' and 'MAX' and 'ORDER POINT' fields to zero and:
-
The user-provided file explicitly sets the 'DNR' checkbox (to either checked or unchecked), nothing is done to the 'DNR' checkbox.
-
The user-provided file explicitly makes no changes to the 'DNR' checkbox, the 'DNR' checkbox is set to checked. The part should not be ordered/reordered.
-
-
-
'NEVER'
-
Nothing is done to the 'DNR' checkbox regardless of whether any changes were made by the user-provided file to the 'MIN', 'MAX', and 'ORDER POINT' fields.
-
For the RF Gun 'Part Inquiry' Screen:
-
The behavior of 'PROMPT/DEFAULT NO' is similar to the behavior of 'NEVER' for the RF Part Inquiry function since the function does not display any prompt pop-ups when stocking levels are changed.
-
The behavior of 'PROMPT/DEFAULT YES' is similar to the behavior of 'ALWAYS' for the RF Part Inquiry function since the function does not display any prompt pop-ups when stocking levels are changed.
-
'ALWAYS'
-
If the 'MIN' and/or 'MAX' and/or 'ORDER POINT' fields are set to a value greater than zero, the 'DNR' checkbox is set to unchecked. The part should be ordered/reordered.
-
If the 'MIN' and 'MAX' and 'ORDER POINT' fields are set to zero, the 'DNR' checkbox is set to checked. The part should not be ordered/reordered.
-
-
'NEVER'
-
Nothing is done to the 'DNR' checkbox regardless of whether any changes were made to the 'MIN', 'MAX', and 'ORDER POINT' fields.
-
Click to display the 'REPORT DECIMAL PLACES APPLIES TO THE FOLLOWING' pop-up that indicates the reports that the report decimal places functionality applies to.
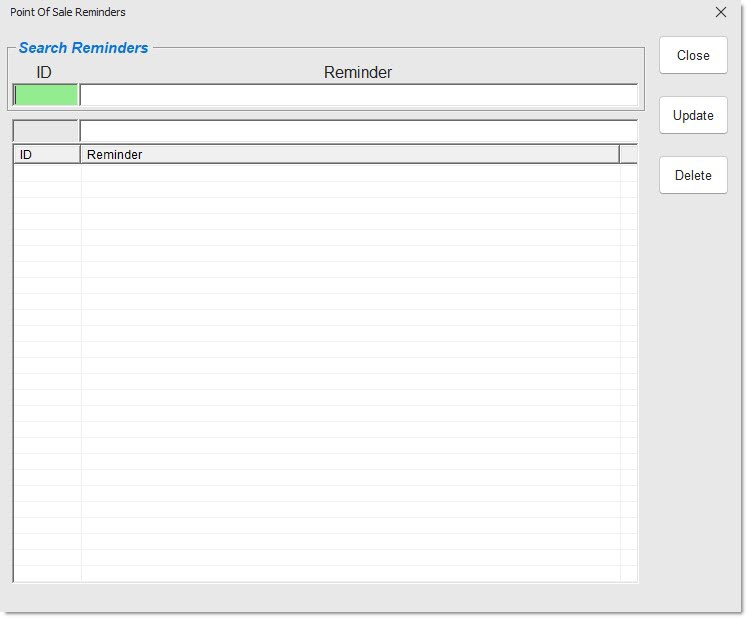
Click to display the 'POINT OF SALE REMINDERS' window used to set up a numbered table of POS reminders to assign one or more reminders to parts. Reminders display on both the CATALOG screen and Invoice Point of Sale screen.

Click to display the 'Edit Product Types' pop-up, which enables you to create a defined list of product types.
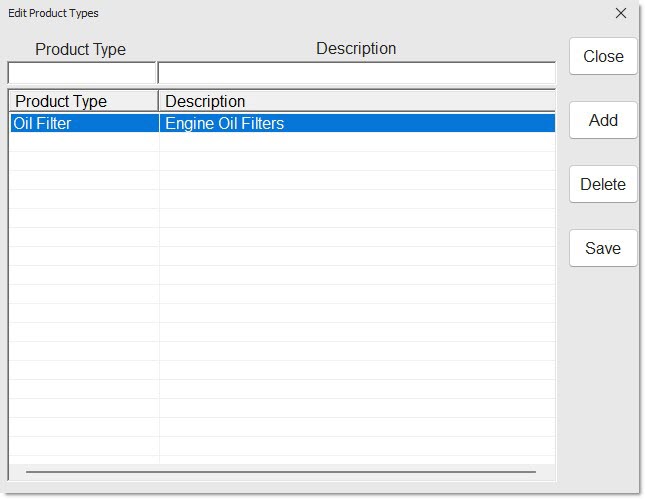
Optionally enter a 'Product Type' and a 'Description' and press the 'Enter' key to add it to the grid.
Click the 'Close' button to close the pop-up.
Click the 'Delete' button to delete the selected product type.
Click the 'Reset' button to reset the pop-up to the just-opened state, clearing anything in the top two fields.
Click the 'Save' button to save any newly entered product types.
Inventory Count Options
Drop-down selection menu with the following choices:
- 'QUANTITY AVAILABLE' (default) - The column 'QAVL' is displayed on the RF Gun 'Cycle Count Entry' screen. If the user edits a part's 'QAVL' value on the 'Cycle Count Entry' screen on the RF Gun, update the part's current quantity available in the store's inventory. On the INVENTORY COUNT ADJUSTMENT screen, compare the 'Count Qty' to 'QAVL' at Count to calculate the 'Diff Qty'.
- 'QUANTITY ON HAND' - The column 'QOH' is displayed on the RF Gun 'Cycle Count Entry' screen. If the user edits a part's 'QOH' value on the 'Cycle Count Entry' screen on the RF Gun, update the part's current quantity available in the store's inventory. On the INVENTORY COUNT ADJUSTMENT screen, compare the 'Count Qty' to 'QOH' at Count to calculate the 'Diff Qty'.
Drop-down menu with the following selections:
- 'ADJUST AND REPLACE' (default) - When the INVENTORY COUNT ADJUSTMENT screen opens, both the 'Adjust' and 'Replace' checkboxes are enabled and the 'Adjust' checkbox is checked.
- 'ADJUST ONLY' - When the INVENTORY COUNT ADJUSTMENT screen is open, the 'Adjust' checkbox is checked. The 'Replace' checkbox is disabled and unavailable.
- 'REPLACE ONLY' - When the INVENTORY COUNT ADJUSTMENT screen is open, the 'Replace' checkbox is checked. The 'Adjust' checkbox is disabled and unavailable.
Text box that allows for entry of a value from 0 to 99 to determine the maximum allowed difference in count between parts and the expected quantity of parts on the INVENTORY COUNT ADJUSTMENT screen.
When the ICA screen is open, for any part displayed in the grid that contains a 'Diff Qty' value equal to or greater than the entered value (e.g. 5), or equal to or less than the negative entered value (e.g. -5), the application displays the 'Diff Qty' value in red color; otherwise, the application displays the 'Diff Qty' value in black color.
NO COUNT WARNING PERCENT THRESHOLD
Text box that determines what percentage of parts on an order can be excluded (not counted) before the system prompts a warning pop-up.
When the INVENTORY COUNT ADJUSTMENT screen is open, after an inventory count ID is selected, after parts are loaded into the grid, the application displays a pop-up message if the percentage of parts "not counted" exceeds the default threshold set on the control screen.
Multi-Location
Insert/Update Parts
When the 'Update' button is clicked on the Inventory Mass Update screen, the value of this drop-down field will determine where to insert or update parts, based on the selection:
-
'Current Location'
-
'All Locations'
-
'Select Locations'
Delete Parts
Drop-down field that allows for selection of:
-
'Current Location'
-
'All Locations'
-
'Select Locations'