Set Min, Max, Order Point
The SET MIN MAX ORDER POINT screen is used to calculate new 'MIN', 'MAX', and/or 'ORDER POINT' stocking levels based on selected sales history periods and the updated quantities used for purchasing and reporting.
Menu Path: Inventory, Part Utility, Set Min / Max, SET MIN MAX ORDER POINT screen
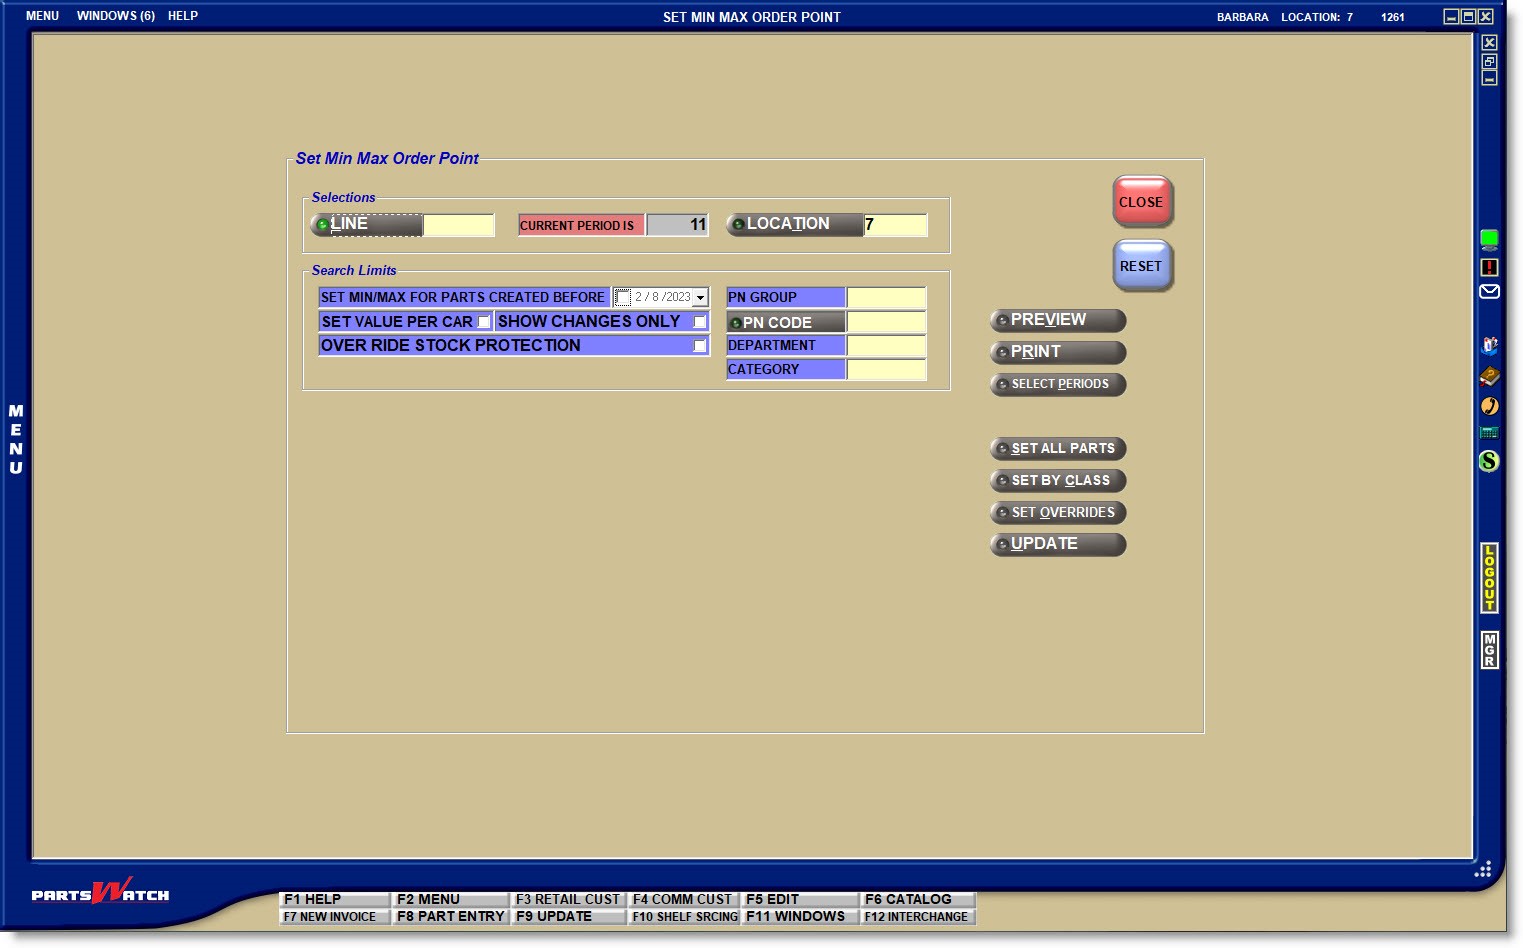
LINE
Enter a Line COde or click the 'LINE' button to open the 'BROWSE LINE CODES' window to search for and select a Line.
Displays the current period, for information only.
Multi-store: Displays the current store, and if EMPLOYEE SETUP permissions allow, enter a store number or click the 'LOCATIONS' button to select a location other than the current one.
Used to narrow the parts affected by the utility.
SET MIN/MAX FOR PARTS CREATED BEFORE
Displays the current date, by default. To use the default date, check the checkbox. To change the date, use the down arrow to display a calendar and select the date.
Determines whether or not the 'PER CAR' quantity will be considered to calculate the stocking level based on the number of units needed for a car. Example: Windshield wipers may be sold in a box of two and spark plugs may be sold in packs of 4.
- Checked - The system will calculate the stocking levels based on the 'PER CAR' quantities.
Note: This option should not be used in conjunction with the 'SELECT ALL PARTS' button. - Unchecked - The 'PER CAR' is not considered in this calculation.
If checked, the 'STOCK PROTECT' flag on the part table prevents new parts that have not had a chance to build up sales history, from having the stocking levels zeroed out or set too low when running the SET MIN MAX ORDER POINT utility.
The 'OVERRIDE STOCK PROTECTION' flag determines whether parts with the 'STOCK PROTECT' flag checked are included in the stocking level calculation or not.
- Checked - The 'STOCK PROTECT' flag is ignored and the parts are included in the calculation.
- Unchecked - Parts with the 'STOCK PROTECT' flag checked are not included in the calculation.
Filter the parts considered in the calculation by the following part table filters:
- 'PN GROUP'
- 'P/N CODE'
- 'DEPARTMENT'
- 'CATEGORY'
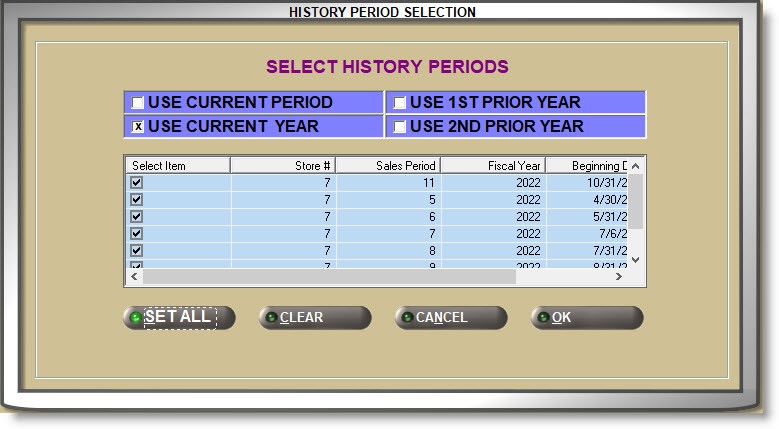
Click the 'SELECT PERIODS' button to display the 'HISTORY PERIOD SELECTION' window.
Select the relevant history periods from the pop-up. For example:
- To maintain the stocking levels monthly, check 'USE CURRENT PERIOD'.
- To maintain the stocking levels yearly, check 'USE CURRENT YEAR'.
- To compare this year to last year, check 'USE CURRENT YEAR' and 'USE 1ST PRIOR YEAR'.
Then check all or each of the relevant periods within the histories and the grid displays:
- 'Store #'
- 'Sales Period'
- 'Fiscal Year'
- 'Beginning Date'
- 'End Date'
Click 'OK' when done.
Closing the 'HISTORY PERIOD SELECTION' window displays the 'Search History Selection' section below the 'Search Limits' section.
The following fields display for information only:
- 'PERIOD'
- 'YEAR'
- 'START DATE'/'END DATE' (of the period)
- 'ACTUAL DAYS' (the store was open)
- 'HOLIDAYS' (the store was closed)
- 'WEEKENDS' (the store was closed)
The following fields can be edited as needed:
-
If the Store Work Schedule is set up, then the number of days the store is open for business will display in the 'SELL DAYS' field. If the Store Work Schedule is not set up, the number of calendar days in the period will display but can be edited.
-
The 'WEIGHT' determines how important the period is.
For example:-
If running this year against next year, this year might be more important so set those periods to 100% and last year might be less, so set them to 50%.
-
Spring months might be more important at 100% and the rest of the year less, at 50%.
-
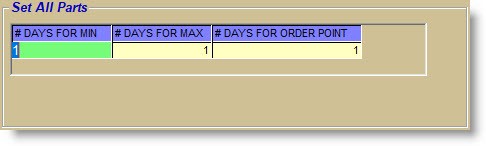
Click the 'SET ALL PARTS' button to display the 'Set All Parts' section below the 'Sales History Selection' section.
Enter the number of days to indicate how long the stock will last before being reordered. If the Line is ordered daily, for example, each stocking level used may be set to '1'.
- '# DAYS FOR MIN'
- '# DAYS FOR MAX'
- '# DAYS FOR ORDER POINT'
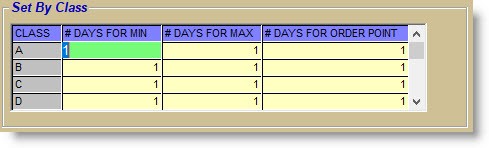
Click the 'SET BY CLASS' button to display the 'Set By Class' section below the 'Sales History Selection' section. The 'Set By Class' section is used to enter the number of days that the shelf quantities will last before being reordered per 'SALES CLASS' code.
If the 'Popularity Codes' section has been set up on the LINE CODE RANK SPECIFICS screen, then each 'SALES CLASS' code will display. If not, then each 'SALES CLASS' code set up on the INVENTORY POPULARITY AND RANKING screen displays. If neither option has been set up, the system will use the sales class codes entered in the system POP CODES / ORDER PROTECT screen.
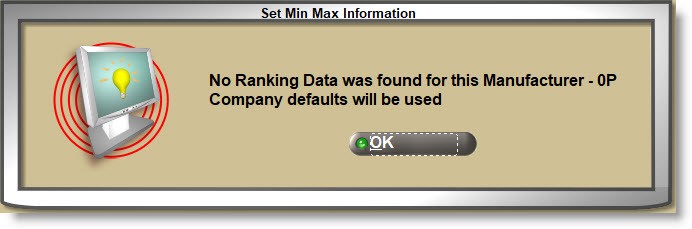
If the 'SALES CLASS' codes aren’t set up for a line, clicking the 'SET BY CLASS' button prompts that no ranking data was found and the system defaults will be used.
Enter the number of days to indicate how long the stock will last before being reordered for each 'SALES CLASS' displayed.
- '# DAYS FOR MIN'
- '# DAYS FOR MAX'
- '# DAYS FOR ORDER POINT'
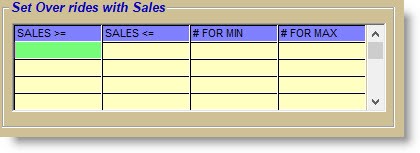
Click the 'SET OVERRIDES' button to display the 'Set Overrides with Sales' section below the 'Sales History Selection' section. The 'Set Overrides with Sales' section is used to enter the number of days that the shelf quantities will last before being reordered by using history values greater than and less than certain values.
Enter the number of parts sold in the 'SALES >=' (greater than or equal to) and the 'SALES <=' (less than or equal to) fields. For example: enter 'SALES >=' '50' and 'SALES <=' '100' and parts will only be included if quantities of 50 - 100 parts were sold in the history periods selected.
Then enter the number of days that the shelf quantities will last before being reordered for each sales history range in the stocking level fields:
- '# DAYS FOR MIN'
- '# DAYS FOR MAX'
- '# DAYS FOR ORDER POINT'
Running the Utility
Updating the results to the part table is optional, so once the utility parameters are set up the stocking level changes can be reported or updated.
Calculating the Stocking Levels

The 'SHOW CHANGES ONLY' flag is used to report only parts where a stocking level change was calculated or to show all parts considered.
- Checked - Click the 'PREVIEW' or 'PRINT' button to output a report with only the parts that will be updated if the 'UPDATE' button is clicked.
- Unchecked - Click the 'PREVIEW' or 'PRINT' button to output a report with all of the parts that were considered regardless of whether the stocking level would be updated or not if the 'UPDATE' button is clicked.
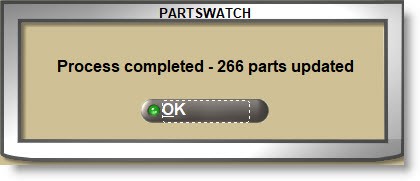
Click the 'UPDATE' button to initiate the utility and update the changes to the part stocking levels.
When finished, a prompt displays stating that the update was successful and displays the number of part records updated.