Supplier XMIT
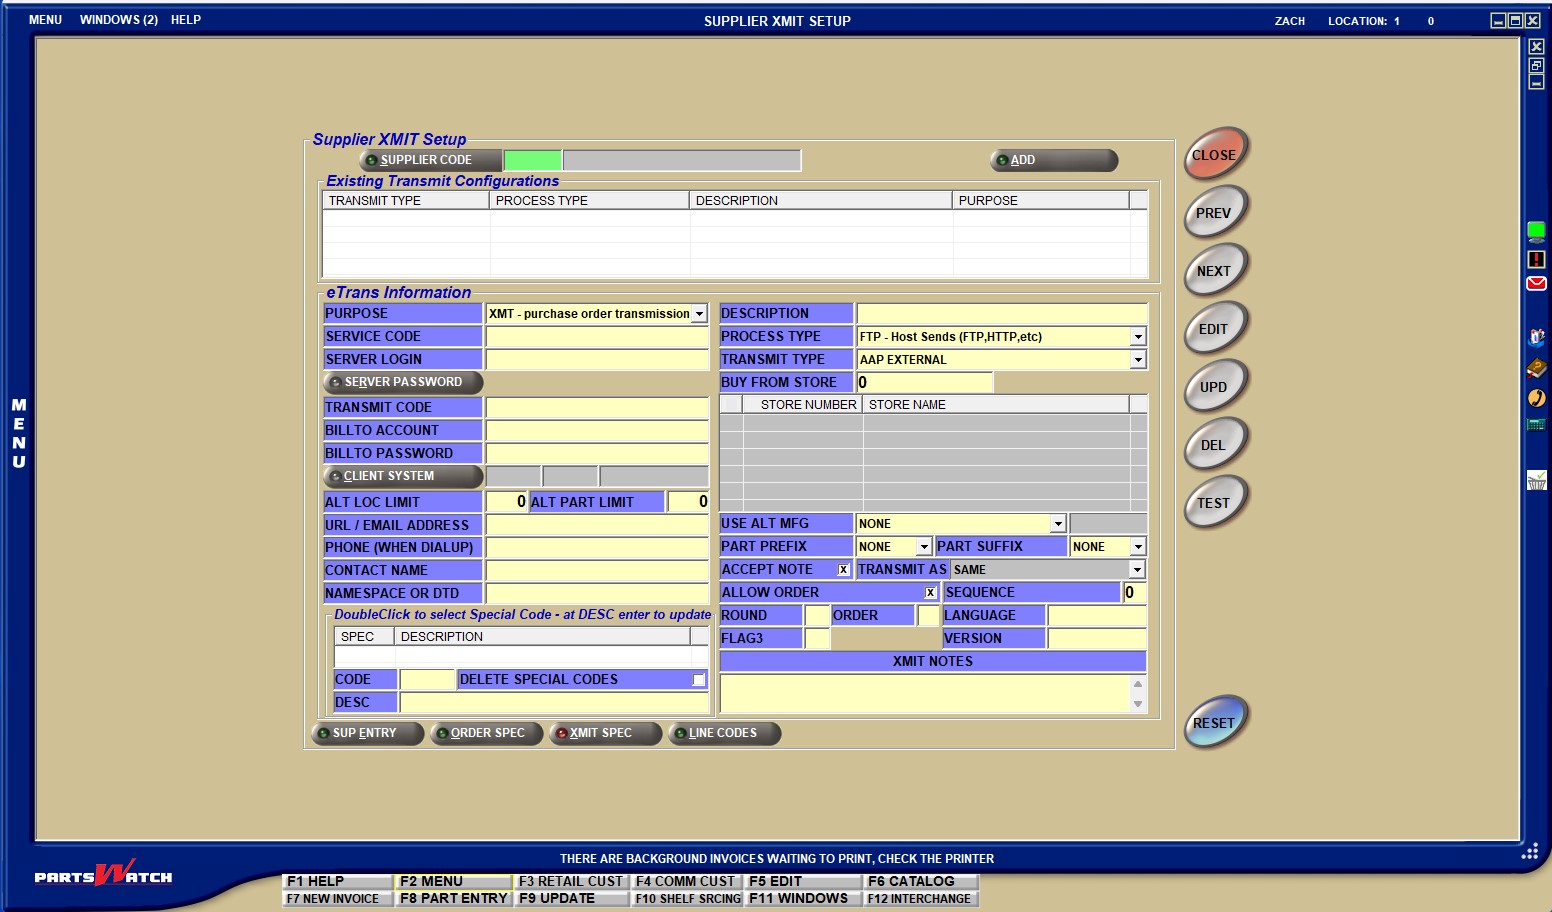
The SUPPLIER XMIT SETUP screen is used to add the transmission record information per vendor that will be used by sourcing and purchasing to send an order to another store or vendor.
Menu Path: Vendor, Supplier, Vendor/Supplier XMIT, SUPPLIER XMIT SETUP screen
Supplier XMIT Setup Guide - 8 pages
Supplier XMIT Setup
Enter the supplier code to start editing or updating the screen information for that supplier. Click the 'SUPPLIER CODE' button to open the 'BROWSE SUPPLIERS' window to manually search for and select a supplier code. A supplier code is required to display the supplier in the sourcing grid.
Click the button to add the entered supplier code.
Existing Transmit Configurations
Displays the existing method of transmission for the supplier in focus.
Displays the method used to transmit information to and from the supplier in focus. For example, using an FTP site to trade files.
Displays the supplier description for the selected supplier.
Indicates if the record is used for purchase order transmissions, part number lookups, or special orders through sourcing.
eTrans Information
Choose the purpose of this transmission setup. The purpose could be used for purchase order transmissions, part number lookups, or special orders through sourcing.
Displays the description for the supplier set up, for read-only purposes. The same information displays in the grid above.
Drop-down that allows for the selection of different process types, such as FTP (file transfer protocol), which determines how files are sent and received.
Indicates the method of transmission. eTrans Information is dependent upon the 'TRANSMIT TYPE' and changes according to which 'TRANSMIT TYPE' is selected.
GCOMMERCE supports:
- PO-850 - for transmission of POs
- POACK-855 - an electronic document sent by the supplier to acknowledge they received the PO-850 purchase order
- ASN-856 - an Advance Shipping Notice sent by the supplier against a PO-850 PO indicating what they intend to ship
- INVOICE-810 - an eInvoice sent by the supplier against a PO-850 PO
Displays the store that is sending the buy and return orders to the vendor.
Note: The following six fields are dependent on the 'TRANSMIT TYPE' and populate differently based on the customer:
- 'SERVICE CODE'
- 'SERVER LOGIN'
- 'SERVER PASSWORD'
- 'TRANSMIT CODE'
- 'BILL TO ACCOUNT'
- 'BILL TO PASSWORD'
Displays the Account Number of the selling location.
Displays the entered FTP site user ID.
Opens the 'EDIT SERVER PASSWORD' pop-up, when clicked.
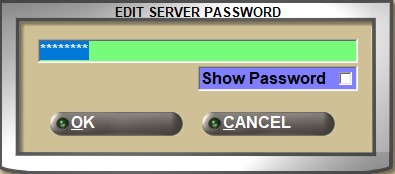
The password for the entered FTP site displays, hidden behind asterisks for security.
Re-type the password and click 'OK' to update the password. Check the 'Show Password' checkbox to unhide the password from behind the asterisks, to display it as plain text for readability and accuracy. Uncheck the checkbox to re-hide the password.
Click the 'CANCEL' button to exit.
Displays the location ID of the buyer that correlates to the 'BUY FROM STORE' field.
Displays the account information associated with the 'BILL TO' account for the purchase and return orders that will be transmitted.
Displays the account password associated with the 'BILL TO ACCOUNT'.
Identifies the client that each DC resides on so that as quantities for subsequent DCs are requested, the system knows that client was already called and, therefore, does not need to be called again to obtain the quantities.
Click the button to display the 'Client System Setup' window, which is used to add, edit, delete, and select an 'ENTERPRISE ID/CLIENT CODE'.

Click the 'CLIENT SYSTEM' button to access the 'Client System Setup' window.
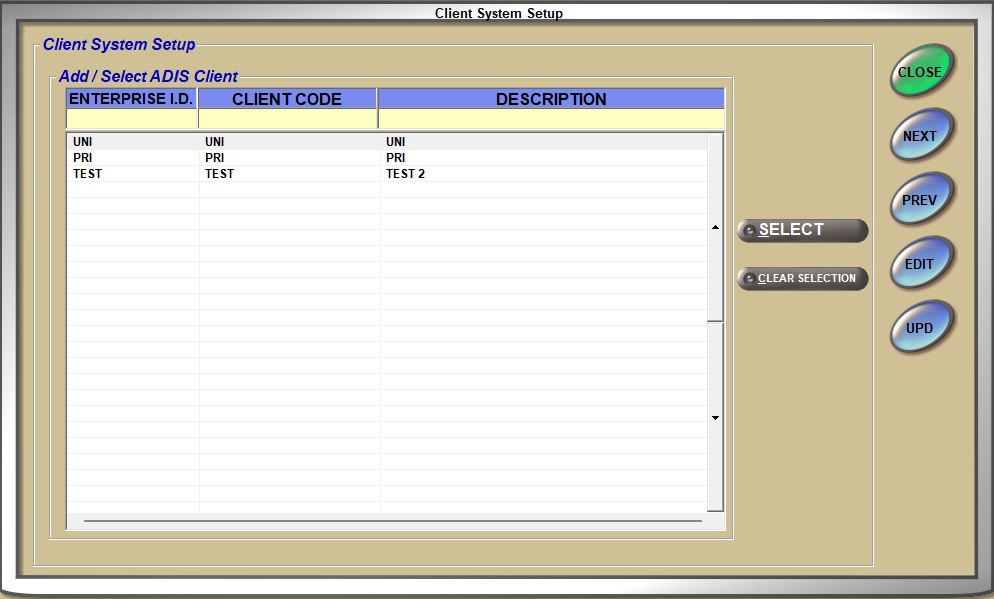
The 'Client System Setup' window is used to add, edit, delete, and select an Enterprise ID/Client Code.
When the system inquires on quantities for a particular DC, quantities for that part for all DCs on that same client are obtained and stored. The 'ENTERPRISE I.D.', 'CLIENT CODE', and 'DESCRIPTION' fields identify the client that each DC resides on so that as quantities for subsequent DCs are requested, the system knows that client was already called and therefore does not need to be called again to obtain the quantities. The quantities are already stored and just need to be displayed.
To add a code, fill out the 'ENTERPRISE I.D.', 'CLIENT CODE', and 'DESCRIPTION' data entry fields at the top of the grid.
To edit an existing code, double-click on the desired code. The code moves to the data entry lines at the top of the grid. Type over the existing information to make edits.
ENTERPRISE I.D.
Enter a unique identifier for the client. Works in conjunction with the 'CLIENT CODE'.
CLIENT CODE
Enter a unique identifier for the client. Works in conjunction with the 'ENTERPRISE I.D.'
DESCRIPTION
Enter a description of the location associated with the ID. For informational purposes only.
SELECT
Click a row in the grid and then click the 'SELECT' button to populate the SUPPLIER XMIT SETUP screen with the code information.
CLEAR SELECTION
Click this button to delete a selected code.
Indicates the alternate location limit. The value of 1 indicates that all quantities for all DCs on the client are pulled when calling the client associated with this DC. THis field is required.
Indicates the number of alternate parts to display from all the parts that are set by the supplier.
Displays the Server IP address. Provided this to Customer Support in order to set it up.
Indicates the "To" email address for Orders and Return Orders sent to the supplier via email from the Purchasing module. When the 'PROMPT FOR TRANSMIT DETAILS' flag is checked in the STORE PURCHASING SETUP screen, 'PURCHASING' tab, then the email address can alternately be entered in the 'Transmit Details' pop-up that displays when placing the order.
Indicates the telephone number used to connect to the internet for dial-up transmissions.
Indicates the person to contact regarding the transmission.
Specifies the correct formatting of all XML transmissions through AConneX. (Document Type Definition)
Store Grid
Indicates whether or not the selected stores for which supplier setups will be added or edited. The default is all checkboxes checked. To exclude stores from the transmissions, uncheck the checkbox next to the 'STORE NUMBER'.
Indicates the store numbers that are in the environment in order to determine which stores are receiving the transmissions.
Displays the names associated with the store number for each store number in the environment.
Indicates the alternate manufacturer, if applicable.
Options are:
'NONE'
'ALT1' - Mfg Alt1 code
'ALT2' - Mfg Alt2 code
'ALT3' - Mfg Alt3 code
'ALT4' - Mfg Alt4 code
'ALT5' - Mfg Alt5 code
'ALT6' - Mfg Alt6 code
'PRDT' - Part Product code
'GRP' - Part Group code
'MAST' - Mfg Master code
'USER' - manually enter
Indicates a part prefix and/or part suffix is used.
Options are:
- 'NONE'
- 'PRDT' - Part Product Code
- 'GRP' - Part Group
- 'PNC' - Part Number Code
Indicates that the vendor accepts a note or special instructions, when checked.
Indicates how to transmit.
Displays 'SAME' and is unavailable if the user is editing a PNL-XMIT record for sourced orders and there are no XMT-XMIT records previously set up for the same supplier. If there are more than one XMT-XMIT records for that supplier, the drop-down field becomes available.
If there is one XMT-XMIT record set up for that supplier, the 'TRANSMIT AS' field displays the 'DESCRIPTION' of that record in the drop-down alongside 'SAME'.
If there is more than one XMT-XMIT record set up for that supplier, the 'TRANSMIT AS' field displays the 'DESCRIPTION' of all those XMT-XMIT records.
Checkbox that determines whether or not the order will be allowed through from transmission.
- Checked - Orders to the suppliers' setups are allowed.
- Unchecked - Orders to the supplier based on the setups are not allowed.
Indicates the specific sequence order that the program checks from the source.
Checkbox that determines whether or not price rounding is used.
- Checked - Price rounding is used.
- Unchecked - Price rounding is not used.
If a user enters the letter "C" as a field value, and the 'PROCESS TYPE' is 'EML - Send Via Local Email', and the 'TRANSMIT TYPE' is 'GENERIC TXT', print the part cost from the store's inventory for all parts on the attached purchase order.
For purchase orders electronically transmitted to a supplier or manufacturer via an XMIT record where the 'PROCESS TYPE' is 'EML - Send via Local Email' and the 'TRANSMIT TYPE' is 'GENERIC TXT' and the 'ORDER' is 'C':
Print part cost in another row under each part row for all parts on the purchase order. The system uses a label of 'COST:'.
Optionally print core cost to the right of part cost, for only those parts that contain a non-zero core cost. The system uses a label of 'CORE:'.
Determines the language that the orders are transmitted in.
Determines whether the "From" address for the email for Orders and Return Orders sent to the supplier via email will be the employee's email address or the store's email address.
When the flag is populated with any character, the employee's email address set up in the 'E-MAIL' field in the EMPLOYEE SETUP screen, is used as the "From" address. When the flag is blank, the email address set up in the 'E-MAIL ADDRESS' field in the STORE GENERAL SETUP screen, is used as the "From" address.
When 'PLACE ORDER' is clicked in the PO Detail screen, an email is sent with the order attached in the form of a .txt file. The 'PO NOTE', if entered in the PO Info screen of the purchase order, outputs in the header of the .txt file.
For information only. Automatically populates with the AConneX version number when an AConneX setup is displayed.
Enter notes or comments about the supplier's transmit setups.
DoubleClick to select Special Code - at DESC enter to update
Use to set up GCommerce XMIT Codes.
Identifies the special code, as entered in the 'CODE' field. These are also know an XMIT codes.
Identifies the description of the special code, as entered in the 'DESC' field.
Identifies the EDI Name Entity identifier code.
Options are:
- 'BT' - Bill To identifier
- 'ST' - Ship To identifier
- 'VN' - Vendor identifier
Click this button to delete all special codes in the grid.
Stores the EDI Name Identification Code Qualifier and the EDI Name Identification Code that identifies the vendor to the PartsWatch client and the PartsWatch client to the vendor. Field consists of two parts: a 2-digit qualifier (assigned by Buyer/Vendor) and an alphanumeric identifier between 2 and 80 characters.
Click the 'TEST' button to make sure that transmission is successful with the entered setups.
Click the 'SUP ENTRY' button to navigate to the SUPPLIER ENTRY screen.
Click the 'ORDER SPEC' button to navigate to the SUPPLIER ORDER SPECIFICS screen.
Click the 'XMIT SPEC' button to navigate to the SUPPLIER XMIT SETUP screen.
Click the 'LINE CODES' button to navigate to the SUPPLIER LINE CODES screen.
Set Up Supplier XMIT
To set up the Supplier XMIT, follow the steps below.
-
From the Menu, select Vendor, Vendor/Supplier, Supplier XMIT. The SUPPLIER XMIT screen will display.
-
Select the appropriate supplier code in the 'SUPPLIER CODE' field. The screen will populate with the Supplier Code information.
-
Click the 'ADD' button. A window will display stating, "Enter Purpose & unique Description".
-
Select the purpose in the 'PURPOSE' field.
-
Type a description in the 'DESCRIPTION' field.
-
Press the 'Enter' key. The 'EDIT' and 'UPD' buttons will become enabled.
-
Select the appropriate process type in the 'PROCESS TYPE' field. Based on the selected type, the fields on the screen will automatically populate with information appropriate for the type.
-
Click the appropriate name in the grid. The fields on the screen will populate based on the type of transmission. Note: If setting up to transfer, an error displays if the transfer account is not set up correctly.
-
Click the 'UPD' button, and the information is saved.
-
Click the 'TEST' button to ensure that the transmission will work.
Send POs Via Email
To send POs via email, follow the steps below:
-
From the Menu, select Vendor, Vendor/Supplier, Supplier XMIT. The SUPPLIER XMIT screen will display.
-
Set the 'TRANSMIT TYPE' drop-down to 'ADIS', 'ADIS EXTERNAL', 'CORCENTRICEDI', 'GCOMMERCEEDI', 'GENERIC TXT', or 'GENERIC WD'. Note: If 'TRANSMIT TYPE' is set to 'GENERIC TXT', a number must be entered in the 'BILL TO ACCOUNT' field.
-
The "To" email address must be set up in the 'URL / EMAIL ADDRESS' field. Note: If the 'PROMPT FOR TRANSMIT DETAILS' checkbox is checked in the STORE PURCHASING SETUP screen, 'PURCHASING' tab, then the email address can be alternatively entered in the 'Transmit Details' pop-up that displays when placing the order.
-
The 'FLAG3' field on the SUPPLIER XMIT SETUP screen determines whether the "Reply To" address for the email will be the employee's email address or the store's email address. Note: If 'FLAG3' is populated with any character, then the employee's address for the EMPLOYEE SETUP screen is used. If 'FLAG3' is left blank, the store email address from the STORE GENERAL SETUP screen, 'EMAIL' tab is used.
-
Parameters in the script.cfg file determine the outgoing sever and the "From" email address, and must be set up by an administrator to match the server processing the outgoing emails.
-
Click the 'PLACE ORDER' button on the PO DETAIL screen. An email is sent with the order attached in the form of a .txt file.
-
If a 'PO NOTE' was entered on the PO INFO screen of the Purchase Order, it is output in the header of the .txt file on the lines between the Ship/Bill To addresses and the body column headers.