Shelf Sourcing Overview
The Shelf Sourcing functionality provides a method of acquiring certain anticipated stock for the shelf quickly and easily without creating a shelf purchase order (PO) or calling the Distribution Center (DC). An application switch determines whether Shelf Sourcing is available.
The functionality affords the user the same flexibility to shelf source as customer source, which includes the ability to:
- Order from multiple sources without waiting for the next regular stock order for each vendor
- Allow a vendor stock check at the time the part is entered on the order
- Eliminate the time needed to create a shelf order
- Eliminate disruption at the DC with calls from the store
The Shelf Sourcing process utilizes the SHELF SOURCING screen to allow stores to source much needed parts for the shelf directly from a sourcing screen. The process is driven by the keyboard. Minimum keystrokes provide fast stock checks that make the process quick and easy to use. However, the mouse can be used, if preferred. The SHELF SOURCING screen is accessed by pressing the 'F10' key, clicking the 'F10 SHELF SRCING' function key located at the bottom screen border and from the Menu, Purchasing, Shelf Sourcing. The 'F10' function key is enabled only when a store is using Shelf Sourcing functionality.
The program uses the sources set up in the STORE SOURCE SETUP screen to determine the sources to use for Shelf Sourcing. The program checks the Serving DC, Hub Store and Sister Store and displays the available quantity, source name and/or store key, city and state of the source.
After the parts are entered on the SHELF SOURCING screen, click 'PLACE ORDER' to place the order. The PO is created and finalized. A confirmation message displays when the PO create process is successfully completed. The PO transmits as a background job. When the PO does not successfully transmit, a message displays in the lower screen border to notify the user to manually transmit the PO.
Shelf sourced POs can be auto received if the 'SHELF SOURCED PO' flag is checked in the LINE CODE ORDER SPECIFICS screen and/or the SUPPLIER ORDER SPECIFICS screen. Existing shelf PO receipt functionality is used to receive shelf sourced POs with or without an ASN.
The shelf sourced purchase order displays in the PURCHASE ORDER MENU screen when created and finalized with the same status values that display for shelf orders created and finalized in the Purchasing module. The 'SOURCE' value of 'SHELFSRC' is used to track shelf sourced POs and parts for the shelf that are sourced from a sister store. The 'METHOD' is 'WRITE-IN' for the shelf sourced PO and VISION for the shelf sourced PO that is sourced from Vision. The letter ‘R’ in the first position of the PO# identifies the PO as a shelf sourced purchase order.
The following screens and window are used in the setup and utilization of the Shelf Sourcing functionality.
Store General Setup Screen
The STORE GENERAL SETUP screen is used to set up the following Shelf Sourcing fields.
- 'SHELF SOURCING' - Determines whether the store uses the Shelf Sourcing functionality.
- 'PRINT SHELF SOURCED PO' - Determines whether the purchase orders created in the SHELF SOURCING screen print at the time of creation. When printed, the PO prints to the default printer.
- 'DEFAULT SHIP METHOD' - Indicates the shipping method. Options are 'DELIVERY', 'EXPEDITE', 'NEXT TRUCK', 'REGULAR', and 'WILL CALL'.
- 'DEFAULT SHIP CODE' - Indicates the default Shipping Code regardless of the vendor used to source the order in the SHELF SOURCING screen.
- 'Shelf Sourced Purchase Order Cost' - Determines which costs display in the Shelf Sourcing grid.
Line Order Setup Screen
The 'SHELF SOURCED PO' flag in the LINE CODE ORDER SPECIFICS screen determines whether shelf sourced POs are auto received when the ASN arrives.
Supplier Order Setup Screen
The 'SHELF SOURCED PO' flag in the SUPPLIER ORDER SPECIFICS screen determines whether shelf sourced POs are auto received when the ASN arrives.
Furthermore, the 'Use Supplier Price for Sourced Part Cost' setting is used to determine pricing for parts/accounts in the Shelf Sourcing screen:

Store Source Setup Screen
The Shelf Sourcing functionality uses the same sources that are set up in the STORE SOURCE SETUP screen for customer sourcing. Separate setups for Shelf Sourcing are not required. The SHELF SOURCING screen includes the ability to source from a Serving DC, Hub Stores, Sister Stores (within or outside the current database), Other DCs, and Other Sources.
Part Entry Screen
Once the shelf sourced purchase order is finalized, the ordered quantity is updated to the 'ON ORD' field in the Part Entry screen which then displays in the Invoice Point of Sale screen when the part is entered for sale.
Shelf Sourcing Screen
The SHELF SOURCING screen is used to enter the parts to be sourced specifically for the shelf and select the sources to be used. The system informs the user when the quantity ordered from a DC is not a multiple of the 'BUY QTY' and the DC requires the ordered quantity to be a multiple of the buy quantity. Once selected, "accept" the ordered quantities and place the order. With User Security permission, editing shipping information is available via the 'EDIT SHIPPING' window, which is accessed from the SHELF SOURCING screen.
The 'SHELF SOURCING COST TOTALS' security proc in the USER SECURITY SETUP screen, located under 'PURCHASING', 'SHELF SOURCING' allows/disallows edit of the 'TOTAL PARTS ($)' and 'TOTAL ORDER ($)' fields in the SHELF SOURCING screen.
When the proc is set to 'NOT VISIBLE', the 'TOTAL PARTS ($)' and 'TOTAL ORDER ($)' fields in the SHELF SOURCING screen display, but no values display in the fields.
When the proc is set to 'VIEW ONLY', the 'TOTAL PARTS ($)' and 'TOTAL ORDER ($)' fields in the SHELF SOURCING screen display, but the values cannot be edited.
When the proc is set to 'ALLOW EDIT', the 'TOTAL PARTS ($)' and 'TOTAL ORDER ($)' fields in the SHELF SOURCING screen display and the values can be edited.
Edit Shipping Window
The 'EDIT SHIPPING' window displays the shipping information, which is editable, if user security permissions allow. After making the appropriate edits, either return to the SHELF SOURCING screen or place the order. When the order is placed from the 'EDIT SHIPPING' window, the purchase order is created, finalized and transmitted using the same process as if the order was placed from the SHELF SOURCING screen. When the 'PLACE ORDER' button is clicked, and the PO(s) is successfully created and finalized, the program displays a success message and closes the screen. Transmission of the order(s) is performed in the background, thus freeing up the application to continue working.
Purchase Order Information Screen
Shipping, Handling, and/or Other Charges added to a PO from Shelf Sourcing is tracked with the PO and is included in the PO total. This combined total displays in the 'FREIGHT' field in the PURCHASE ORDER INFORMATION section of the PURCHASE ORDER screen. Access the PURCHASE ORDER screen from the PURCHASE ORDER MENU screen. Click on the desired PO in the grid. The PURCHASE ORDER screen displays. Click 'PO INFO' from the 'MENU' drop-down list to display the PURCHASE ORDER INFORMATION screen.
System Messages Screen
The SYSTEM MESSAGES screen displays successful and failed PO creation and to transmit purchase orders. The application notifies the user of the status upon next login.
Inventory Feed
The inventory feed contains the 'SHELF SOURCED PO' flag to determine whether or not to auto receive shelf sourced POs when the ASN arrives.
Reports
PATI
The PATI REPORT reports received shelf sourced PO information.
Part Ledger
The Part Ledger Report reports changes to inventory by receipt of shelf sourced POs when 'ALL' is selected in the 'DETAIL' field.
Line Purchases
The Line Purchases Report tracks all purchase orders created in the SHELF SOURCING screen in the same manner that Shelf POs are created in the PURCHASE ORDER PROFILE screen.
User Security Setup Screen
Security procs in the USER SECURITY SETUP screen control the user's ability to perform various Shelf Sourcing functionalities.
Shelf Sourcing Screen
The 'SHELF SOURCING' menu in the 'MENU TASKS' section, located under 'PURCHASING', allows/disallows access to the module.
- When the 'MENU TASK' is set to 'HIDDEN', the 'SHELF SOURCING' menu under the Purchasing menu is not visible and the 'F10' function key is disabled thus preventing access to the module.
- When the 'MENU TASK' is set to 'GRAYED', the 'SHELF SOURCING' menu under the Purchasing menu and the 'F10' function key are visible, however, both are grayed out (disabled) thus preventing access to the module.
- When the 'MENU TASK' is set to 'ALLOW EDIT, VIEW ONLY', the 'SHELF SOURCING' menu and the 'F10' function key are available and the SHELF SOURCING screen is accessible. However, no functionality is available from the screen.
- When the 'MENU TASK' is set to 'ENABLED, ALLOW EDIT', the 'SHELF SOURCING' menu button and the 'F10' function key are available and full shelf sourcing functionality is available.
Edit Shipping Window
The 'SHELF SOURCING EDIT SHIPPING' security proc in the USER SECURITY SETUP screen, located under 'PURCHASING', 'SHELF SOURCING', allows/disallows access to the 'EDIT SHIPPING' button from the SHELF SOURCING screen.
- When the proc is set to 'NOT VISIBLE', the 'EDIT SHIPPING' button in the SHELF SOURCING screen does not display.
- When the proc is set to 'VIEW ONLY', the 'EDIT SHIPPING' button in the SHELF SOURCING screen displays and the 'EDIT SHIPPING' window opens, however, shipping cannot be edited.
- When the proc is set to 'ALLOW EDIT', the 'EDIT SHIPPING' button in the SHELF SOURCING screen displays and is accessible and the 'EDIT SHIPPING' window opens if selected.
The 'SHELF SOURCING EDIT COST' security proc in the USER SECURITY SETUP screen, located under 'PURCHASING', 'SHELF SOURCING' allows/disallows edit of the 'COST $ (detail)' and 'CORE $ (detail)' fields in the 'EDIT SHIPPING' window.
- When the proc is set to 'NOT VISIBLE', the 'COST' and 'CORE' Cost fields in the 'EDIT SHIPPING' window display, but no values display in the fields.
- When the proc is set to 'VIEW ONLY', the 'COST' and 'CORE' Cost fields in the 'EDIT SHIPPING' window and field values display, but cannot be edited.
- When the proc is set to 'ALLOW EDIT', the 'COST' and 'CORE' Cost fields in the 'EDIT SHIPPING' window and field values display, but can be edited.
The 'SHELF SOURCING COST TOTALS' security proc in the USER SECURITY SETUP screen, located under 'PURCHASING', 'SHELF SOURCING' allows/disallows edit of the 'COST $ (total)', 'CORE $ (total)', 'TOTAL $', and 'TOTAL ORDER $' fields in the 'EDIT SHIPPING' window.
- When the proc is set to 'NOT VISIBLE', the 'COST $' (detail on the part detail row), 'CORE $' (detail on the part detail row), 'TOTAL $' (total on the Total PO row), and 'TOTAL ORDER $' fields in the 'EDIT SHIPPING' window display, but no values display in the fields.
- When the proc is set to 'VIEW ONLY', the 'COST $' (detail on the part detail row), 'CORE $' (detail on the part detail row), 'TOTAL $' (total on the Total PO row), and 'TOTAL ORDER $' fields in the 'EDIT SHIPPING' window display, but the values cannot be edited.
- When the proc is set to 'ALLOW EDIT', the 'COST $' (detail on the part detail row), 'CORE $' (detail on the part detail row), 'TOTAL $' (total on the Total PO row), and 'TOTAL ORDER $' fields in the 'EDIT SHIPPING' window and the values can be edited.
Shelf Sourcing Screen
The SHELF SOURCING screen is used to create sourced orders for the store rather than for the customer, without creating a shelf purchase order (PO) or calling the Distribution Center (DC).
Menu Path: Purchasing, Shelf Sourcing, SHELF SOURCING screen

Displays the line code for the Invoice Item. Enter a line code or click the button to display the 'BROWSE LINE CODES' window to select a line code. The accelerator key to display the 'BROWSE LINE CODES' window is 'Alt' + 'L'.
Displays the part number. Enter a part number or click the button to display the 'FIND PART' window to search for a part. Non-SKU lookup is available from the 'FIND PART' window when the program is set to allow the sourcing of non-SKU parts. The accelerator key to display the 'FIND PART' window is 'Alt' + 'T'.
Part Entry Grid
The upper section of the screen is the PART ENTRY section. Enters and edits the line code, part number, and need quantity into the grid. The selected sources, ordered quantity, and available quantity per source and several part record values per part display for information purposes only.
This grid is a PartsWatch grid. See the PartsWatch Grid Help for more details on functionality.
Note: The On Order quantities on a shelf sourced purchase order cannot be edited from the PURCHASE ORDER DETAIL screen since the orders are automatically transmitted.
Displays the entered line code.
Displays the part number from the store's part table or the nonsku table.
When a line code is not first entered in the 'LINE' field and a part number is entered, and a part exists in both the part table and nonsku table, the 'AVAILABLE MATCHES' window displays with parts from both the store's part table and nonsku table, in alphabetical order and indistinguishable from each other. If a part is not selected from the 'AVAILABLE MATCHES' window and 'CANCEL' is clicked, the 'FIND PART' windows display. When a UPC is identical to the part number, and there are no other duplicates, the 'AVAILABLE MATCHES' window does not display. Instead, the part displays on the 'SELL' line.
Indicates the quantity that needs to be ordered.
Indicates the quantity sourced from the vendor. When the 'PROMPT FOR FULL PACKS' setting is checked so that suppliers require the ordered quantity to be a multiple of the 'BUY QTY', and when the value entered is not an increment of the Buy Qty, a prompt displays stating, "<line> <part number> is shipped in a <buy measure> of <buy qty>. Do you want to order the full increment of the buy quantity?"
Indicates the source name.
Indicates the quantity the vendor has on hand.
Indicates the store's part cost from the part table. Editable with User Security permission.
Indicates the store's core cost from the part table. Editable with User Security permission.
Indicates the store's quantity on hand.
Indicates the order point from the parts table.
This column displays based on the 'Stocking Level' field on the System Purchasing Setup screen.
Indicates the minimum amount from the parts table.
This column displays based on the 'Stocking Level' field on the System Purchasing Setup screen.
Indicates the maximum amount from the parts table.
This column displays based on the 'Stocking Level' field on the System Purchasing Setup screen.
Indicates the quantity on order (on other purchase orders).
Displays the total 'ORD QTY' of the entire order regardless of the number of sources selected.
Displays the total dollar value of all the parts and core regardless of the number of sources selected. Amount is scrambled when the cost/core cost amounts are scrambled per Employee Setup. Field heading does not display when scrambled.
Displays the total dollar value of part costs plus shipping costs regardless of the number of sources selected. Amount is scrambled when the cost/core cost amounts are scrambled per Employee Setup. Field heading does not display when scrambled.
Displays the 'Edit Shipping' window, with User Security permission. The accelerator key is 'Alt' + 'H'
FDO+
Before the 'Other Sources' button is clicked, but after the 'Other DCs' button has been clicked, click the 'FDO+' button. When the 'FDO+' button is clicked, the application returns and displays all appropriate FDO+ quantities on the “sources” lower grid.
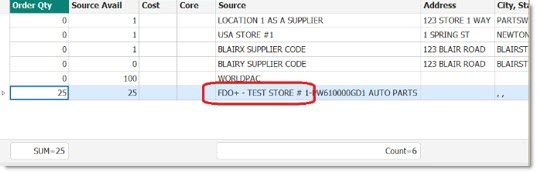
If an FDO+ source is accepted, then the FDO+ source is displayed in the upper "part items" grid.

Select Sources Grid
The program uses the STORE SOURCE SETUP screen to determine the sources to use for Shelf Sourcing. As each need is entered in the 'NEED' field in the PART ENTRY section, the available quantity is retrieved and displayed with each preferred source. The program checks the Serving DC, Hub Store, and Sister Store and displays the available quantity, source name, city and, state of the source. Click 'SOURCE' or press 'Enter' at the 'NEED' field and the 'SRC AVL' quantity of each preferred source displays in the lower grid.
This grid is a PartsWatch grid. See the PartsWatch Grid Help for more details on functionality.
The footer of the grid displays the following:
-
'COUNT=' – Displays the count of how many sources are displayed in the lower sources grid.
-
'SUM=' – Displays the aggregate of all 'Order Qty' values entered in the lower sources grid.
When the request for a stock check goes to a vendor, the 'SRC AVL' field displays the same values as the customer sourcing functionality. These values are:
- 'WAIT' - The stock check has not yet been processed or the response has not yet arrived. 'WAIT' displays in the upper grid.
- 'CALL' - The stock check response returns an indicator that something went wrong with the request. For example, '-1'.
- [Blank] - No response was returned for the part. A possibility is that part was superseded so the information is not available.
- '0 (Zero)' - Stock check response is zero (0). The vendor does not have any available quantity for the part.
- 'Number > 0' - The stock check response returns the customer availability greater than zero (0).
When the 'SRC AVL' quantity for the Serving DC is equal to or greater than the 'NEED' quantity, the 'NEED' quantity is copied to the 'ORD QTY' field.
- Press 'Enter' or click 'ACCEPT' to accept the 'NEED' quantity from the primary source.
- Use the 'Tab' key and Arrow keys to move through the 'ORD QTY' field of each preferred source and enter the 'ORD QTY' for any of the preferred sources until the 'NEED' quantity is filled. Then, press 'Enter' or click 'ACCEPT'.
- Click 'DCs' or 'OTHER SOURCES' to display the availability from those sources.
When the 'SRC AVL' quantity for the Serving DC is less than the 'NEED' quantity, the 'SRC AVL' quantity for the Serving DC is copied in the 'ORD QTY' field. Then source the balance of the 'NEED' from the other available sources.
When the 'SRC AVL' quantity is 0 (zero), blank, or 'CALL' for the Serving DC, the cursor is in the 'ORD QTY' field and the field is blank. Source from a vendor and enter an 'ORD QTY' greater than the 'SRC AVL' quantity in the 'SELECT SOURCES' grid.
Displays the quantity sourced from the vendor.
Displays the quantity that the vendor has on hand.
Cost
Displays the cost of the part from the selected source.
Note: This column only displays if the 'Sourced Purchase Order Cost' drop-down is set to 'Sourcing Cost' on the Store General Setup screen, 'Shelf Sourcing' tab. This column is hidden when the drop-down is set to 'PO Part Cost'.
If a source returns a 'Cost' for a replacement part instead of the 'Cost' for the original part sourced, the application displays the text 'CALL' in the 'Source Avail' column and displays a zero in the 'Cost' column.
Core
Displays the core cost of the part from the selected source.
Note: This column only displays if the 'Sourced Purchase Order Cost' drop-down is set to 'Sourcing Cost' on the Store General Setup screen, 'Shelf Sourcing' tab. This column is hidden when the drop-down is set to 'PO Part Cost'.
Displays the source name.
Displays the city and state where the source is located.
Displays a valid 'Shipper #' an 'Ship Method' for each source.
Appends all sources set up under 'OTHER DCs' in the STORE SOURCE SETUP screen to the list of displayed sources in the 'SELECT SOURCES' grid. The accelerator key to display vendors set up under the 'ADD OTHER DCs' section of the STORE SOURCE SETUP screen is Alt + D.
The primary 'SERVING DC', as designated by the value of '1' in the 'SEQ' field in the STORE SOURCE SETUP screen, always displays first in the SHELF SOURCING screen, regardless of the sourcing rule selected for all preferred DCs and available stock at the primary 'SERVING DC'.
All Sister Stores still display providing the Sister Store Sourcing Rule is not set to show all sources with stock.
Appends all sources set up under 'OTHER SOURCES' in the STORE SOURCE SETUP screen to the list of displayed sources in the 'SELECT SOURCES' grid. The accelerator key to display vendors set up under the ADD OTHER SOURCE section of the STORE SOURCE SETUP screen is Alt + O.
Accepts the ordered quantities and moves the selected sources into the upper grid. (This provides mouse functionality the same as pressing the 'Enter' key after selecting sources provides keyboard functionality.) The accelerator key to accept the sources and position the cursor in the 'LINE' field in the upper grid to enter a new part is 'Alt' + 'A' or the 'Enter' key.
When the 'PROMPT FOR FULL PACKS' flag in the SYSTEM INVOICE OPTIONS screen is checked so that suppliers require the ordered quantity to be a multiple of the 'BUY QTY' and the quantity ordered is not a multiple of the buy quantity for the DC, a prompt displays stating, "<line> <part number> is shipped in a <buy measure> of <buy qty>. Do you want to order the full increment of the buy quantity? The customer sell quantity will not change." Click 'YES' and the customer's order quantity ('ORD' quantity) remains the same, however, the quantity ordered is automatically rounded up to the next increment of the buy quantity. Click 'NO' and the 'ORD' field resets to '0'.
When the 'PROMPT FOR FULL PACKS' flag is checked, and the 'ACCEPT' button is clicked from the 'ORD QTY' field, and the 'SRC AVL' is less than the value in the 'ORD QTY' field or the available quantity returned is 'CALL', a prompt displays stating, "<line> <part number> The quantity ordered exceeds the quantity available." Click 'EDIT ORDER QTY' and the prompt closes and the order quantity that was entered in the 'ORD QTY' field is cleared to allow for a new order quantity to be entered. Click 'ORDER ANYWAY' and the prompt closes to allow an order a quantity in excess of the supplier's available quantity.
Clears the availability for the sources and returns the cursor to the upper grid. The accelerator key to clear the 'Src Avl' in the lower grid and move the cursor back to the 'Need' field in the upper grid.
Reset
Resets the screen to a "just-opened" state.
Delete
Deletes the sourced part. Alternatively, highlight a row in the grid and right-click and click 'Delete'.
Order
Creates, finalizes and transmits the purchase order. Only enabled when parts have been entered and sources have been selected. Can be accessed from either the Shelf Sourcing screen or 'Edit Shipping' window. The accelerator key is 'Alt' + 'P'.
If the number of Timeout Minutes expires before placing the order, when 'Order', or 'Edit Shipping', is clicked, the program prompts to re-enter and resource the parts.
Right-Click Menu
Right-click a part in the upper grid to display a command list. The selections are:
- 'VIEW IN PART LEDGER' - Displays the PART LEDGER REPORT screen with the part displayed.
- 'ON ORDER' - Displays a pop-up with any quantity on order or inbound.
- 'GENERAL PART INFO' - Displays the Part Entry screen.
- 'PART PRICES' - Displays the PART PRICE ENTRY screen.
- 'ORDER/COST' - Displays the ORDER-COST screen.
- 'PART HISTORY' - Displays the PART HISTORY screen.
- 'UPC SETUP' - Displays the UPC Setup screen.
- 'DELETE PART' - Clears the part, with or without a quantity entered in the 'ORD' field, from the Sourcing Matrix for any vendor.
- 'EDIT SOURCE' - Select new sources for the part.
Accept Sources
The 'ACCEPT' button accepts the fully satisfied ordered quantities and moves the selected sources into the upper grid. When a 'NEED' quantity is not fully satisfied, press the 'Enter' or 'Tab' key to move to the next source in the lower grid.
Each part must be fully sourced when entered or edited. The user cannot partially source a part, enter another part and go back and finish sourcing the previous part.
When the 'NEED' quantity is less than the 'ORD QTY' and 'ACCEPT' is clicked, a message displays stating that the ordered quantity is greater than the needed quantity and does the user want to increase the needed quantity. When 'Yes' is selected, the 'NEED' is increased to equal the 'ORD QTY', the source(s) is accepted and the cursor goes to the next available part entry row in the upper grid. No changes are made when 'No' is selected. The cursor returns to the lower grid to edit the 'ORD QTY'.
When the 'NEED' quantity is greater than the 'ORD QTY' and 'ACCEPT' is clicked, a message displays stating that the ordered quantities are less than the needed quantity and does the user want to decrease the needed quantity. When 'Yes' is selected, the 'NEED' is reduced to equal the 'ORD QTY', the source(s) is accepted and the cursor goes to the next available part entry row in the upper grid. No changes are made when 'No' is selected. The cursor returns to the lower grid to edit the 'ORD QTY'.
The Buy Quantity Rules are used for shelf sourcing for PO creation. The program does not use the Buy Quantity Rules for stock checks from the SHELF SOURCING screen.
Sourcing Procedures
Note: Serving DC, as used in the procedures, means the primary or first preferred source set up from the 'SERVING DC' button in the STORE SOURCE SETUP screen.
Procedure to Place Order
To place an order, follow the steps below:
-
From the Menu, select Purchasing, Shelf Sourcing. The SHELF SOURCING screen displays.
-
Enter a line in the 'LINE' field.
-
Enter a part in the 'PART NUMBER' field.
-
Enter a need in the 'NEED' field.
-
The store's 'QOH', 'ORDER POINT', 'MIN', 'MAX', 'ON ORDER', 'BACK ORDER', and 'ASN' quantities from the part table or nonsku table (depending on the application switch) display in the upper grid in the same row as the 'LINE', 'PART NUMBER', and 'NEED'. Note: Not-In-File (NIF) parts cannot be ordered through Shelf Sourcing.
-
Press 'Enter' or click 'SOURCE'. The 'SRC AVL' quantity from the Serving DC, Hub Store, and Sister Store displays in the lower grid.
Alternate 1a: Serving DC Quantity Meets or Exceeds Need Quantity
-
From the Menu, select Purchasing, Shelf Sourcing. The SHELF SOURCING screen displays.
-
Enter a line in the 'LINE' field.
-
Enter a part in the 'PART NUMBER' field.
-
Enter a need in the 'NEED' field.
-
The store's 'QOH', 'ORDER POINT', 'MIN', 'MAX', 'ON ORDER', 'BACK ORDER', and 'ASN' quantities from the part table or nonsku table (depending on the application switch) display in the upper grid in the same row as the 'LINE', 'PART NUMBER', and 'NEED'. Note: Not-In-File (NIF) parts cannot be ordered through Shelf Sourcing.
-
Press 'Enter' or click 'SOURCE'. The 'SRC AVL' quantity from the Serving DC, Hub Store, and Sister Store displays in the lower grid.
-
Press 'Enter' or click 'ACCEPT'. The program verifies that the 'ORD QTY' equals the 'NEED'. The 'ORD QTY', 'SOURCE', 'SRC AVL', 'COST', and 'CORE' (if permitted) for the selected source moves to the upper grid.
-
Click 'PLACE ORDER'.
Alternative 1b: Need Quantity Greater Than Serving DC Source QTY
-
From the Menu, select Purchasing, Shelf Sourcing. The SHELF SOURCING screen displays.
-
Enter a line in the 'LINE' field.
-
Enter a part in the 'PART NUMBER' field.
-
Enter a need in the 'NEED' field.
-
The store's 'QOH', 'ORDER POINT', 'MIN', 'MAX', 'ON ORDER', 'BACK ORDER', and 'ASN' quantities from the part table or nonsku table (depending on the application switch) display in the upper grid in the same row as the 'LINE', 'PART NUMBER', and 'NEED'. Note: Not-In-File (NIF) parts cannot be ordered through Shelf Sourcing.
-
Press 'Enter' or click 'SOURCE'. The 'SRC AVL' quantity from the Serving DC, Hub Store, and Sister Store displays in the lower grid. The 'ORD QTY' field of the Serving DC in the lower grid populates with the 'SRC AVL' quantity.
-
Press 'Enter', 'Tab', the 'Down Arrow', or click the next 'ORD QTY' field for the 'Source' in the lower grid and enter an 'ORD QTY' or not.
-
Repeat the above step until the 'NEED' quantity has been met.
-
Press the 'Enter' key or 'ACCEPT'. The program verifies that the 'ORD QTY' equals the 'NEED'. The 'ORD QTY', 'SOURCE', 'SRC AVL', 'COST', and 'CORE' (if permitted) for the selected source moves to the upper grid.
-
Click 'PLACE ORDER'.
Alternative 2a: Ord Qty Exceeds Need Qty / Need Increased
-
From the Menu, select Purchasing, Shelf Sourcing. The SHELF SOURCING screen displays.
-
Enter a line in the 'LINE' field.
-
Enter a part in the 'PART NUMBER' field.
-
Enter a need in the 'NEED' field.
-
The store's 'QOH', 'ORDER POINT', 'MIN', 'MAX', 'ON ORDER', 'BACK ORDER', and 'ASN' quantities from the part table or nonsku table (depending on the application switch) display in the upper grid in the same row as the 'LINE', 'PART NUMBER', and 'NEED'. Note: Not-In-File (NIF) parts cannot be ordered through Shelf Sourcing.
-
Press 'Enter' or click 'SOURCE'. The 'SRC AVL' quantity from the Serving DC, Hub Store, and Sister Store displays in the lower grid. The 'ORD QTY' field of the Serving DC in the lower grid populates with the 'SRC AVL' quantity. The 'ORD QTY' is edited.
-
Press 'Enter' or click 'ACCEPT'. The program verifies and sees that the 'ORD QTY' is greater than the 'NEED'. A message displays stating that the 'ORD QTY' exceeds the 'NEED' and asks if the 'NEED' should be increased.
-
Click 'Yes'. The 'NEED' quantity in the upper grid increases to equal the 'ORD QTY'. The accepted 'ORD QTY' and 'SRC AVL' fields for the first source populate. The accepted 'ORD QTY' and 'SRC AVL' fields for the each additional source populate. The 'COST' and 'CORE' cost fields populate from the vendor or the store cost, if User Security permission allow. The cursor moves to the next available part row in the upper grid.
Alternative 2b: Ord Qty Exceeds Need Qty / Need Not Increased
-
From the Menu, select Purchasing, Shelf Sourcing. The SHELF SOURCING screen displays.
-
Enter a line in the 'LINE' field.
-
Enter a part in the 'PART NUMBER' field.
-
Enter a need in the 'NEED' field.
-
The store's 'QOH', 'ORDER POINT', 'MIN', 'MAX', 'ON ORDER', 'BACK ORDER', and 'ASN' quantities from the part table or nonsku table (depending on the application switch) display in the upper grid in the same row as the 'LINE', 'PART NUMBER', and 'NEED'. Note: Not-In-File (NIF) parts cannot be ordered through Shelf Sourcing.
-
Press 'Enter' or click 'SOURCE'. The 'SRC AVL' quantity from the Serving DC, Hub Store, and Sister Store displays in the lower grid. The 'ORD QTY' field of the Serving DC in the lower grid populates with the 'SRC AVL' quantity. The 'ORD QTY' is edited.
-
Press 'Enter' or click 'ACCEPT'. The program verifies and sees that the 'ORD QTY' is greater than the 'NEED'. A message displays stating that 'ORD QTY' exceeds the 'NEED' and asks if the 'NEED' should be increased.
-
Click 'NO'. The cursor return to the lower grid to continue sourcing.
-
Edit the 'ORD QTY' in one or more sources.
-
Press 'Enter' or click 'ACCEPT'. The program verifies that the 'ORD QTY' equals the 'NEED'.
-
Click 'PLACE ORDER'.
Alternative 3a: Need Qty Exceeds Order Qty / Need Decreased
-
From the Menu, select Purchasing, Shelf Sourcing. The SHELF SOURCING screen displays.
-
Enter a line in the 'LINE' field.
-
Enter a part in the 'PART NUMBER' field.
-
Enter a need in the 'NEED' field.
-
The store's 'QOH', 'ORDER POINT', 'MIN', 'MAX', 'ON ORDER', 'BACK ORDER', and 'ASN' quantities from the part table or nonsku table (depending on the application switch) display in the upper grid in the same row as the 'LINE', 'PART NUMBER', and 'NEED'. Note: Not-In-File (NIF) parts cannot be ordered through Shelf Sourcing.
-
Press 'Enter' or click 'SOURCE'. The 'SRC AVL' quantity from the Serving DC, Hub Store, and Sister Store displays in the lower grid. The 'ORD QTY' field of the Serving DC in the lower grid populates with the 'SRC AVL' quantity. The 'ORD QTY' is edited.
-
Press 'Enter' or click 'ACCEPT'. The program verifies and sees that the 'ORD QTY' is less than the 'NEED'. A message displays stating that 'NEED' exceeds the 'ORD QTY' and asks if the 'NEED' should be decreased.
-
Click 'Yes'. The 'NEED' quantity is decreased to equal the 'ORD QTY'. The accepted 'ORD QTY' and 'SRC AVL' fields for the first source populate. The accepted 'ORD QTY' and 'SRC AVL' fields for the each additional source populate. The 'COST' and 'CORE' cost fields populate from the 'PO COST LEVEL' or Current Cost, if User Security permission allow. The cursor moves to the next available part row in the upper grid.
-
Click 'PLACE ORDER'.
Alternative 3b: Need Qty Exceeds Order Qty / Need Not Decreased
-
From the Menu, select Purchasing, Shelf Sourcing. The SHELF SOURCING screen displays.
-
Enter a line in the 'LINE' field.
-
Enter a part in the 'PART NUMBER' field.
-
Enter a need in the 'NEED' field.
-
The store's 'QOH', 'ORDER POINT', 'MIN', 'MAX', 'ON ORDER', 'BACK ORDER', and 'ASN' quantities from the part table or nonsku table (depending on the application switch) display in the upper grid in the same row as the 'LINE', 'PART NUMBER', and 'NEED'. Note: Not-In-File (NIF) parts cannot be ordered through Shelf Sourcing.
-
Press 'Enter' or click 'SOURCE'. The 'SRC AVL' quantity from the Serving DC, Hub Store, and Sister Store displays in the lower grid. The 'ORD QTY' field of the Serving DC in the lower grid populates with the 'SRC AVL' quantity. The 'ORD QTY' is edited.
-
Press 'Enter' or click 'ACCEPT'. The program verifies and sees that the 'ORD QTY' is less than the 'NEED'. A message displays stating that 'NEED' exceeds the 'ORD QTY' and asks if the 'NEED' should be decreased.
-
Click 'No'. The cursor returns to the lower gird to continue sourcing.
-
Edit the 'ORD QTY' in one or more sources.
-
Press Enter or click 'ACCEPT'. The program verifies that the 'ORD QTY' equals the 'NEED'.
Alternative 4: Edit Need Qty After Selecting Sources
-
From the Menu, select Purchasing, Shelf Sourcing. The SHELF SOURCING screen displays.
-
Enter a line in the 'LINE' field.
-
Enter a part in the 'PART NUMBER' field.
-
Enter a need in the 'NEED' field.
-
The store's 'QOH', 'ORDER POINT', 'MIN', 'MAX', 'ON ORDER', 'BACK ORDER', and 'ASN' quantities from the part table or nonsku table (depending on the application switch) display in the upper grid in the same row as the 'LINE', 'PART NUMBER', and 'NEED'. Note: Not-In-File (NIF) parts cannot be ordered through Shelf Sourcing.
-
Press 'Enter' or click 'SOURCE'. The 'SRC AVL' quantity from the Serving DC, Hub Store, and Sister Store displays in the lower grid. The 'ORD QTY' field of the Serving DC in the lower grid populates with the 'SRC AVL' quantity. Change the 'NEED' quantity in the upper grid.
-
Press 'Enter' or click 'SOURCE'. The selected source(s) in the upper grid for that part is refreshed. The source list in the lower grid is refreshed. The 'SRC AVL' quantity from the Serving DC, Hub Store, and Sister Store display in the lower grid.
-
Follow Alternates 2 or 3, as applicable.
Edit Shipping Window
Click the 'EDIT SHIPPING' button to display the 'EDIT SHIPPING' window. Access to the 'EDIT SHIPPING' button is controlled by User Security. Double-click a part row to display the shipping information in the lower portion of the 'EDIT SHIPPING' window.
When a part being ordered from a vendor has a Shipping Method/Shipper # relationship set up under the 'VENDOR SOURCE SETUP' tab in the SYSTEM SOURCE SETUP screen, a single 'SHIP METHOD' and 'SHIPPER #' table displays in the grid.

When a part being ordered from a vendor does not have a Shipping Method/Shipper # relationship setup under the 'VENDOR SOURCE SETUP' tab in the SYSTEM SOURCE SETUP screen, the 'SHIP METHOD' table displays in the grid and a separate 'SHIPPER #' field/button displays.

LINE
Displays the line number.
PART NUMBER
Displays the part number from the store's part table or the nonsku table.
SOURCE
Indicates the source name.
SHIP METHOD
Displays the shipping method.
SHIPPER #
Displays the shipper number.
ORD QTY
Displays the quantity ordered.
COST $
Displays the store's part cost from the part table.
CORE $
Displays the store's core cost from the part table.
SHIPPING $
Displays the shipping dollar amount for the part or for the order.
HANDLING $
Displays the handling dollar amount for the part or for the order.
OTHER $
Displays the other dollar amount for the part or for the order.
TOTAL $
Displays the sum of each individual purchase order, per sources, created for the order, as defined by:
(QTY x PART COST) + (QTY x CORE COST) + SHIPPING + HANDLING + OTHER.
Amount is scrambled when the cost/core cost amounts are scrambled per Employee Setup. Field heading does not display when scrambled.
Total PO:
In the 'Total PO:' row, the application multiplies the 'Ord Qty' amount for each part on the order by its 'Cost $' and 'Core $', and then aggregates the extended amount for each part.
See the chart below for an example:

SHIP DATE
Displays the date the parts were shipped.
NOTE
Displays the vendor note, if applicable.
TOTAL ORDER ($)
Displays the grand total of all purchase orders for all sources for the order.
Amount is scrambled when the cost/core cost amounts are scrambled per Employee Setup. Field heading does not display when scrambled.
EDIT SHIPPING
Displays a part row's shipping information when clicked with a part row highlighted. Alternatively, double-click a part row to display the part row's shipping information.
Edit Shipping Per Part - The following information displays for each highlighted part in the upper grid.
LINE
Displays the line number per part.
PART
Displays the part number per part.
SOURCE
Displays the vendor name per part.
PO NOTE
Displays the purchase order note of up to 28 characters per part.
SOURCED PO VENDOR NOTE
Displays the vendor note of up to 28 characters per part for vendors.
SHIPPING & HANDLING
Displays the shipping and handling amount for the highlighted part. When a value is entered, the value displays in the 'SHIPPING' field in the upper grid and is tracked as the shipping amount.
SHIPPER #
Displays the designated shipper code. Value defaults from the value entered in the STORE GENERAL SETUP screen. Click the button to display the 'BROWSE SHIPPER #S' window to search for a shipper number. Access is controlled by User Security. Displays only when a part being ordered does not have a Shipping Method/Shipper # relationship set up under the 'VENDOR SOURCE SETUP' tab in the SYSTEM SOURCE SETUP screen. The accelerator key is 'Alt' + 'S'.
Grid
[Checkbox]
Selects the line item, when checked.
SHIP METHOD
Displays the shipping method per part for vendors.
SHIPPER #
Displays the designated shipper code. Value defaults from the value entered in the STORE GENERAL SETUP screen. Displays only when a part being ordered has a Shipping Method/Shipper # relationship setup under the 'VENDOR SOURCE SETUP' tab in the SYSTEM SOURCE SETUP screen.
ACCEPT
Save the changes. The accelerator key is 'Alt' + 'A'.
TO SHELF SOURCING
Displays the SHELF SOURCING screen. The accelerator key is 'Alt' + 'T'.
PLACE ORDER
Creates, finalizes and transmits the purchase order. Only enabled when parts have been entered and sources have been selected from either the SHELF SOURCING screen or 'EDIT SHIPPING' window. The accelerator key is 'Alt' + 'P'.
Edit Cost and Core Cost
When the entered part exists in the store's part file, the cost level entered in the 'PO COST LEVEL' field in the LINE CODE ORDER SPECIFICS screen and the SUPPLIER ORDER SPECIFICS screen is used from the part file. With User Security permission, the values in the 'COST' and 'CORE' cost fields in the SHELF SOURCING screen can be edited.
Press 'Tab' or the Right Arrow at the 'NEED' field to move to the 'COST' field. If a 'CORE' exists for the part, press Tab, Enter, or Right Arrow to save any changes to the 'COST' field and move to the 'CORE' cost field. Pressing 'Enter' at either the 'COST' or 'CORE' field does not retrieve the available quantity from the sources.
Edit Sources
When a part is fully sourced, edit the 'NEED' quantity by changing the quantity in the 'NEED' field in the upper grid.
When the 'NEED' quantity is sourced across two or more sources, when accepted and moved into the upper part entry grid, the part and all source rows for the part is considered a "group".
When the 'NEED' is edited for the last part entered and the 'Enter' key is pressed or 'SOURCE' is clicked, the following occurs:
- Accepted sources for the edited part are cleared.
- Preferred sources (Serving DC, Hub Store. and Sister Store) are stock checked and vendor availability displays in the 'SRC AVL' field in the 'SELECT SOURCES' grid.
- 'NEED' quantity in the 'ORD QTY' field for the Serving DC is filled if the available quantity is greater than or equal to the 'NEED'.
- 'SRC AVL' quantity in the 'ORD QTY' field for the Serving DC is filled if the available quantity is less than the 'NEED'.
- 'ORD QTY' for the Serving DC is highlighted by the cursor.
When the 'NEED' is edited for a part row that has other part rows under it and the 'Enter' key is pressed or 'SOURCE' is clicked, the following occurs:
- Accepted sources for the edited part are cleared.
- Edited part is left in the same row.
- Preferred sources (Serving DC, Hub Store, and Sister Store) are stock checked and vendor availability displays in the 'SRC AVL' field in the 'SELECT SOURCES' grid.
- 'NEED' quantity in the 'ORD QTY' field for the Serving DC is filled if the available quantity is greater than or equal to the 'NEED'.
- 'SRC AVL' quantity in the 'ORD QTY' field for the Serving DC is filled if the available quantity is less than the 'NEED'.
- 'ORD QTY' for the Serving DC is highlighted by the cursor.
- New source information displays in the edited part row when the new sources are selected and the 'Enter' key is pressed or 'ACCEPT' is clicked.
Press 'Enter' or click 'SOURCE' from the 'NEED' field. If you decide not to source the part, click 'RESET' to clear the sources in the lower grid. The cursor returns to the 'NEED' field in the upper grid. Then delete the part, if needed.
Press 'Enter' or click 'ACCEPT' for a fully sourced part in the lower grid, the program verifies that the 'NEED' equals the 'ORD QTY'.
Superseded Parts
When a preferred source, be it a Serving DC, Hub Store, or Sister Store, does not have sufficient 'NEED' quantity and a supersede part is returned from that vendor for the entered part, both the available quantity for the original part and the supersede part are returned with separate stock checks as long as the supersede part is in the store's part table or in the nonsku table.
The background of the cell is colored orange in both the 'Line' and 'Part Number' columns.

When the user sources a quantity from the original part in the lower grid and presses 'Enter' or 'ACCEPT', and the 'ORD QTY' is less than the 'NEED' quantity, the 'NEED' quantity for the original part is reduced and the balance of the needed quantity in the 'NEED' field for the supersede part displays. Press 'Enter' or 'SOURCE' to display the available quantity for any preferred sources that have the supersede part. Source the 'ORD QTY' and press 'Enter' or click 'ACCEPT'.
The user does not have to source the original or the supersede part. To not source the original part, click 'RESET' to clear the available quantity when the available quantity of the original part displays in the lower grid. Edit the 'NEED' for the original part to zero (0) to leave the part on the screen, or delete the part. If edited to zero (0), the 'NEED' is not increased for the supersede part. If edited to zero (0), refresh the screen to remove the part.
When the user does not want to source the supersede part, click 'DEL' in the 'NEED' field. However, if the user pressed 'Enter' or clicked 'SOURCE' at the 'NEED' field and the available quantity for the supersede part now displays in the lower grid, click 'RESET' to clear the available quantity. Now, edit the 'NEED' for the supersede part to zero (0) to leave the part on the screen, or delete the part. If edited to zero (0), refresh the screen to remove the part.
When two or more vendors return different supersede parts for the same original part, both supersede parts display in the upper grid. Accept all, one, or none of the alternates.
Procedure to Source from Original and Supersede Parts
To source from original and supersede parts, follow the steps below:
-
From the Menu, select Purchasing, Shelf Sourcing. The SHELF SOURCING screen displays.
-
Enter a line in the 'LINE' field.
-
Enter a part in the 'PART NUMBER' field.
-
Enter a need in the 'NEED' field.
-
Press 'Enter' or click 'SOURCE'. The 'SRC AVL' quantities for the preferred sources are retrieved. The Serving DC returns a quantity less than the 'NEED' for the entered part in the lower grid. The supersede part displays in pink in the upper grid. A supersede message displays at the top of the screen. The 'SRC AVL' quantity displays in the 'ORD QTY' field in the lower grid for the Serving DC. The cursor is positioned in the 'ORD QTY' field in the lower grid for the Serving DC.
-
Press 'Enter' or click 'ACCEPT'. The 'ORD QTY' from the lower grid populates the 'ORD QTY' field in the upper grid for the original part. The 'NEED' quantity for the original part changes to match the 'ORD QTY'. The balance of the 'NEED' quantity from the original part displays in the 'NEED' field for the supersede part.
-
Press 'Enter' or click 'SOURCE'. The 'SRC AVL' quantities for the supersede part are retrieved from any preferred sources that have the supersede part. The 'ORD QTY' field from the Serving DC populates with the 'NEED' from the supersede part if the full quantity exists. If the full quantity does not exist, the 'ORD QTY' field from the Serving DC populates with the 'SRC AVL' quantity from the Serving DC.
-
Press 'Enter' or click 'SOURCE' to accept the source or edits. The 'NEED' quantity is filled. The 'ORD QTY' for each selected source is moved to the upper grid for the supersede part. The lower grid is reset. The supersede message clears. The cursor returns to the next part row in the upper grid.
-
Click 'PLACE ORDER'.
Procedure to Source from Supersede Part Only
To source from a supersede part only, follow the steps below:
-
From the Menu, select Purchasing, Shelf Sourcing. The SHELF SOURCING screen displays.
-
Enter a line in the 'LINE' field.
-
Enter a part in the 'PART NUMBER' field.
-
Enter a need in the 'NEED' field.
-
Press 'Enter' or click 'SOURCE'. The 'SRC AVL' quantities for the preferred sources are retrieved. The Serving DC returns a quantity less than the 'NEED' for the entered part in the lower grid. The supersede part displays in pink in the upper grid. The retrieved quantities for the preferred sources display in the lower grid. A supersede message displays at the top of the screen. The 'SRC AVL' quantity displays in the 'ORD QTY' field in the lower grid for the Serving DC. The cursor is positioned in the 'ORD QTY' field in the lower grid for the Serving DC.
-
Click 'RESET'. The grid is reset. The cursor is positioned in the 'NEED' field of the original part in the upper grid.
-
Change the 'NEED' to zero (0).
-
Press 'Enter', 'Tab', or the Down Arrow to move the cursor to the 'NEED' field fore the supersede part. Or, delete the original part to move the cursor to the 'NEED' field for the supersede part.
-
Enter the need quantity in the 'NEED' field in the supersede part row.
-
Press Enter or click SOURCE.
-
The SRC AVL is retrieved from each preferred source for the supersede part.
-
Source the part.
-
Press 'Enter' or click 'ACCEPT'. The 'ORD QTY' for each selected source moves to the upper grid for the supersede part. The lower grid is reset. The supersede message clears. The cursor returns to the next part row in the upper grid.
-
Click 'PLACE ORDER'. The original part is not on the order.
Procedure to Source from Original Part Only
To source from an original part only, follow the steps below:
-
From the Menu, select Purchasing, Shelf Sourcing. The SHELF SOURCING screen displays.
-
Enter a line in the 'LINE' field.
-
Enter a part in the 'PART NUMBER' field.
-
Enter a need in the 'NEED' field.
-
Press 'Enter' or click 'SOURCE'. The 'SRC AVL' quantities for the preferred sources are retrieved. The Serving DC returns a quantity less than the NEED for the entered part in the lower grid. The supersede part displays in pink in the upper grid. The retrieved quantities for the preferred sources display in the lower grid. A supersede message displays at the top of the screen. The 'SRC AVL' quantity displays in the 'ORD QTY' field in the lower grid for the Serving DC. The cursor is positioned in the 'ORD QTY' field in the lower grid for the Serving DC.
-
Enter the 'ORD QTY' for each source.
-
Source the part.
-
Press 'Enter' or click 'ACCEPT'. The 'ORD QTY' for each selected source moves to the upper grid. The lower grid is reset. The supersede messages clears. The supersede part continues to display in the upper grid with a 'NEED' of zero (0) or delete the part. The cursor returns to the next part row in the upper grid.
-
Click 'PLACE ORDER'. The supersede part is not on the order.
Procedure to Source from Multiple Supersedes
To source from multiple supersedes, follow the steps below:
-
From the Menu, select Purchasing, Shelf Sourcing. The SHELF SOURCING screen displays.
-
Enter a line in the 'LINE' field.
-
Enter a part in the 'PART NUMBER' field.
-
Enter a need in the 'NEED' field.
-
Press 'Enter' or click 'SOURCE'. The 'SRC AVL' quantities for the preferred sources are retrieved. Three preferred sources return a quantity less than the 'NEED' for the entered part. Three preferred sources each returns a different supersede part. The retrieved quantities for the preferred sources display in the lower grid. The supersede lines and parts display on separate rows below the original part in pink in the upper grid. A supersede message displays at the top of the screen. The 'SRC AVL' quantity displays in the 'ORD QTY' field in the lower grid for the Serving DC. The cursor is positioned in the 'ORD QTY' field in the lower grid for the Serving DC.
-
Press 'Enter' or click 'ACCEPT'. The 'ORD QTY', 'SOURCE', 'SRC AVL', 'COST', and 'CORE' (if permitted) for the selected source moves to the upper grid. The 'NEED' for the original part is reduced to match the 'ORD QTY'. The balance of the 'NEED' displays in the 'NEED' field for the first supersede part. The lower grid is reset.
-
Press 'Enter' or click 'SOURCE'. The 'SRC AVL' quantities for the first supersede part are retrieved. The 'ORD QTY' field for the Serving DC populates with the 'NEED' quantity.
-
Press 'Enter' or click 'ACCEPT'. The 'ORD QTY', 'SOURCE', 'SRC AVL', 'COST', and 'CORE' (if permitted) for the selected source moves to the upper grid for the first supersede part. The other supersede 'NEED' fields remain blank. The supersede messages clears.
-
Click 'PLACE ORDER'. The second and third supersede parts are not on the order.
Delete a Part
When it is decided to not source an entered part, with or without a quantity entered in the 'ORD QTY' field, the part must be deleted. While in the upper grid, either highlight the part, right-click the row and select 'DELETE' from the command list, or click 'DEL'. Deleting the part row also deletes any sourced rows for the deleted part. While in the lower grid, click 'RESET' and return to the 'NEED' field in the upper grid to delete the part.
A part and multiple sources for the part may be on different rows; therefore, parts are deleted as a group. A single source under a part cannot be deleted. To delete a source that has already been accepted, edit the 'NEED' or the sources.
Place Order
The 'PLACE ORDER' button creates, finalizes, and transmits the purchase order. The button is enabled only when parts have been entered. The order can be placed from either the SHELF SOURCING screen or 'EDIT SHIPPING' window. A purchase order can only be created, finalized, and transmitted when all parts are fully sourced. A separate purchase order is created for each source and ship method. Once all parts are fully sourced, click 'ACCEPT' to save the changes and then 'PLACE ORDER' to place the order. The purchase order prints when the 'PRINT SHELF SOURCED PO' flag is checked on the STORE GENERAL SETUP screen. Any freight charges added to the shelf sourced purchase order print and transmit with the PO.
PO Creation / Finalization Success
A confirmation message displays when a purchase order is successfully created and finalized.

Click 'OK' to close the window and the SHELF SOURCING screen. The purchase orders that have a valid transmission setup are transmitted as a background process.
PO Creation Failure
When a purchase order is not successfully created when 'PLACE ORDER' is clicked, all purchase orders that should be created for the purchase order fail. A message displays stating that the PO creation failed.

Click 'OK'. The system returns to the screen/window from which the 'PLACE ORDER' button was clicked. Either the SHELF SOURCING screen or the 'EDIT SHIPPING' window displays. The failed PO is logged to the System Messages.
PO Finalization Failure
When purchase orders are successfully created but one or more fail to finalize, a message displays stating that the PO finalization failed.

Click 'OK' to close the window and the SHELF SOURCING screen. The purchase order still prints if the 'PRINT SHELF SOURCED PO' flag is checked in the STORE GENERAL SETUP screen. Access the PURCHASING DASHBOARD screen to finalize and transmit any purchase order that failed to finalize.
Transmission Failure
When a customer or shelf sourced PO does not transmit successfully, a message displays, centered in the lower screen border, stating, "SOURCED PO TRANSMISSION FAILURE; CHECK SYSTEM MESSAGES". The failure is logged to the System Messages. The System Message envelope icon in the right screen border turns red. Click the envelope to display a list of system messages. Click any message to display detailed information. The failed PO(s) displays in the PURCHASE ORDER MENU screen. Access the eTRANS JOB QUEUE UTILITY window and re-transmit.
Double-click a message in order to mark it as read and to have it removed from the window the next time the window opens.
Cancel
The 'CANCEL' button clears the sourced order request to void the order and not continue. However, when one or more parts have been fully sourced, a message displays stating, "Are you sure you want to cancel this order?" 'Yes' cancels the order and closes the screen without creating a PO. 'No' returns to the screen without canceling the order.
Procedure to Source a Part for the Shelf
To source a part for the shelf, follow the steps below:
-
From the Menu, select Purchasing, Shelf Sourcing. The SHELF SOURCING screen displays.
-
Enter a line code in the 'LINE' field.
-
Enter a part number in the 'PART NUMBER' field.
-
Enter a need quantity in the 'NEED' field.
-
Press 'Enter' or click 'SOURCE'. The program retrieves the available quantity from the Serving DC, Hub Store, and Sister Stores that are set up in the STORE SOURCE SETUP screen.
-
If the full order quantity exists for the Serving DC, the 'ORD QTY' field in the 'SELECT SOURCES' grid populates with the 'NEED' quantity. Press 'Enter' or click 'ACCEPT' to source the full 'NEED' from that source. The program validates that the full 'NEED' has been met.
-
If the full order quantity does not exist for the Serving DC, the 'ORD QTY' field in the 'SELECT SOURCES' grid populates with the 'SRC AVL' quantity from the Serving DC. Enter the quantity to order in one or more other sources until the 'NEED' is filled. Press 'Enter' or click 'ACCEPT' to source the full 'NEED' from the selected sources. The program validates that the full 'NEED' has been met.
-
If the 'ORD QTY' exceeds the 'NEED' and 'Enter' is pressed or 'ACCEPT' is clicked, a message displays asking if the 'NEED' should be increased. If 'YES', the 'ORD QTY' field populates to equal the 'NEED', the source is accepted and the cursor moves to the next available part row.
-
If the 'NEED' quantity exceeds the 'ORD QTY' and 'ACCEPT' is clicked, a message displays asking if the 'NEED' should be decreased. If 'YES', the 'NEED' field populates to equal the 'ORD QTY', the source is accepted and the cursor moves to the next available part row. If 'NO', the cursor returns to the lower grid to edit the 'ORD QTY'.
-
Edit the part 'NEED' by re-sourcing the part before placing the order, if necessary.
-
Click 'EDIT SHIPPING' to edit the shipping information, if necessary and if User Security permission allows.
-
Click 'PLACE ORDER'. A purchase order is created with the source of 'SHELFSRC' and is added to the list of open POs in the PURCHASE ORDER MENU screen. The PO is finalized and transmitted and the ordered quantity is added to the 'ON ORD' field in the Part Entry screen. A confirmation message displays stating that the purchase order has been successfully created and is being transmitted as a background process. The screen closes and normal work can continue. The purchase order prints if the 'PRINT SHELF SOURCED PO' flag is checked. Note: If the purchase order does not successfully transmit, a message displays at the bottom of the screen to alert to manually re-transmit.