Purchasing Dashboard
Since the Purchasing module is a powerful tool for cost-effective stock acquisition, the Purchasing Dashboard can provide the ability to quickly monitor and manage the orders, identify issues, and help make informed decisions based on real-time insights. Functionality is available to track all open purchasing "buy" and "return" orders in real time, including charts and graphs that make data easier to understand, analyze, and process into informed, actionable decisions.
Purchase orders listed on this screen may also be generated via the Inventory Redistribution Review screen to redistribute stock from overstocked stores to understocked stores, as well as through invoicing using sourced orders or transfer orders. Furthermore, Purchase orders can be generated using Shelf Sourcing or the Timed Orders Queue.
Menu Path: Purchasing, Purchasing Dashboard, Purchasing Dashboard screen

Training Packet: Purchasing Dashboard - 1 page
When the screen first opens, the application checks for issues with any of the orders and if any are found, a warning displays in a red font in the upper-left above the grid "Review the Problem Orders tab". The warning clears when the issues have been resolved or the purchase/return order with the issue is deleted.

Purchasing Dashboard Configuration Setups
Three settings on the Store Purchasing Setup screen, 'Purchasing' tab are available to control the Purchasing Dashboard.

Menu Path: Controls, Store, Purchasing Setup, Store Purchasing Setup screen, 'Purchasing' tab

Default Tab
The Purchasing Dashboard screen defaults to display the 'All Orders' tab when the screen first opens. Click the drop-down and select the tab that will display instead:
- 'All Orders'
- 'Purchase Orders'
- 'Return Orders'
- 'Suggested Orders'
- 'Flagged Orders'
- 'Transfer Orders' (available to multi-stores only)
- 'Problem Orders'
Include Transfer Orders Default
Controls whether the 'Include Transfer Orders' checkbox is checked or unchecked by default when the Purchasing Dashboard screen opens:
- Checked - Defaults to checked. Transfer order data will be included in all tabs.
- Unchecked - Disabled (Disabled and unchecked for single-stores). Transfer order data will not be included in all tabs.
Display Orders For All Locations Default
Multi-store Only: Controls whether or not orders for all locations are displayed on the Purchasing Dashboard screen.
- Checked - Orders for all locations display. The Store Group will control visibility to each location.
- Unchecked - (default) Orders from the current location only display.
Default Screen Profile
If a default screen profile is saved, the screen opens with the settings saved in that profile and displays the profile number and name in use at the top of the screen. If no profile is set up, the screen loads with the default view. A default profile can override the 'Default Tab' and 'Include Transfer Orders Default' setting configured on the Store Purchasing Setup screen, 'Purchasing' tab.
Note: A default screen profile is configured per employee on the Employee Setup screen.

The 'Default PDASH Profile' functionality is used to set the defaults that display each time the Purchasing Dashboard screen opens.
Click the 'Default PDASH Profile' button on the Employee Setup screen to open the 'Select Default Profile' pop-up and select a saved profile from the list.
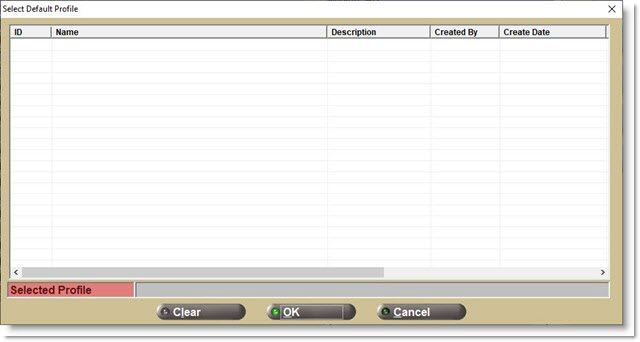
- Click 'Ok' to save the Selected Profile and close the pop-up.
- Click 'Cancel' to close the pop-up without saving the setup.
- Click 'Clear' button when there is an existing default profile to remove the existing profile.
Note: Since Profiles are not connected to a 'Store Group' at this time, it is recommended that any default profile selected for employees with access to more than one location should have 'View Access' of 'All' on the saved profile.
If the properties of an employee's default profile are changed, the employee may no longer have access to it on the Purchasing Dashboard but it will remain assigned to them on the Employee Setup screen.
The upper-center of the screen displays totals for the selected tab for information purposes:
-
'Buy' - Displays the total number of "buy" purchase orders and the total dollar value of all of the "buy" purchase orders.
-
'Return' - Displays the total number of "return" orders and the total dollar value of all of the "return" purchase orders.
-
'Total' - Displays the total number of "buy" and "return" orders and the total summed dollar amount for all of the "buy" and "return" orders.
Include Transfer Orders
For multi-stores: Determines whether or not transfer orders are included in the list of orders displayed across all tab screens.
-
Checked - Includes transfer orders in the list of orders displayed.
-
Unchecked - Does not include transfer orders in the list of orders displayed.
Note: For multi-stores, if the 'Display Orders For All Locations Default' checkbox is checked, then the grid displays orders for all locations. If unchecked, then the grid displays orders for just the current location. The 'Employee Security Setup' window is used to determine the orders that display depending on the stores the orders were created in.
Tabs
Screen tabs provide a list of open orders filtered by:
-
'All Orders' tab - All "buy" and "return" orders with any open status.
-
'Purchase Orders' tab - "Buy" orders only in any status other than 'WIP' or 'New'.
-
'Return Orders' tab - "Return" orders only.
-
'Suggested Orders' tab - "Buy" orders with the Status or 'WIP' or 'New'.
-
'Flagged Orders' tab - User-flagged orders only.
-
'Transfer Orders' tab - Multi-store transfer orders only. This tab is hidden for single stores.
-
'Problem Orders' tab - Orders with the 'Vendor Reply' = 'Reject' or 'Adjust' or where the order transmission has failed.
Note: If the 'Default Tab' is set to a tab other than 'All Orders', that tab will be in focus when the screen is first opened or Reset. However, if a default Profile is used, the tab in focus may be different.
Purchasing Dashboard Grid
The Purchasing Dashboard displays one row per order and when a tab is initially selected, sorts the orders by the most recent 'Create Date'.
Note: Refer to the PartsWatch Grid help topic or watch the PartsWatch Grid Training Packet - 1 page training videos in order to understand all available grid functionality.
Resetting or opening the Purchasing Dashboard reverts to sorting by 'Create Date' (in descending order) unless a default profile is used.
Since all columns cannot display on the screen at once, use the horizontal scroll bar on the bottom of the grid to view additional columns.
Rearrange the columns to view the most used and save the Profile to always view those columns without scrolling.
If the columns are rearranged or hidden, the Default View of all columns can be restored by right-clicking on any column heading or the 'Group By' area and selecting 'Restore Default View'.
Grid changes made, such as: font size, column order, column filters, etc. will not be retained from session to session. To save grid characteristics, a Profile must be created. A column width change is not retained when the screen is closed and reopened, even when using a Profile.
Grid Columns
The grid on each tab has the following columns in the order below from left to right by default. Since the columns can be reorganized, when the columns displayed are in this order it is considered the 'Default View'.

Used to manually "flag" an order in order to follow it more closely. Blue indicates the order is flagged. Flagged orders are available from the 'Flagged Orders' tab for easy tracking.
Gray indicates the order is not flagged.

The flag displays in the column at the beginning of each row.
The flag icon appears on the order in any grid/tab in which the order exists.
An order remains "flagged" until the flag is manually removed.
Date the order was created.
Order #
'Purchase' or 'Return' order number.
Vendor
Up to 3-characters supplier code maintained on the Supplier Order Setup screen.
Vendor Name
Supplier business name maintained on the Supplier Order Setup screen.
Vendor Reply (or Vendor PO)
Displays the response from the Vendor, such as 'Confirmed', 'Rejected', 'Accepted', 'Adjusted', 'Partial', 'Pending', or 'None'.
Due Date
Calculated due date based on the order create date, and the 'Delivery Days'. Additionally, the 'Delivery Days' value can be overridden on the Order Create screen ('Options' tab) on an order by order basis. In this case, the override 'Delivery Days' value will be used in the calculation of the 'Due Date'.
Note: If any 'Due Date' shown is in the past, it will display in red text.
Delivery Days
Supplier lead time; the typical number of days for delivery on the Supplier Order Setup screen at the time the order was created or possibly modified at order creation on the Order Create screen). It is recalculated every day after order creation by subtracting the 'Current Date' from the 'Due Date'. If the 'Due Date' is in the past, 'Delivery Days' will be a negative number.
Status
'Status' of the order e.g. 'New', 'WIP', 'Fin', 'Ord', etc. For ASN status, see the ASN Behavior section.
*Total Cost
The sum of the 'Part Cost' + 'Core Cost' (numerical value with currency symbol).
*Part Cost
The amount for all non-core parts on the order (numerical value with currency symbol).
*Core Cost
The amount for all core parts on the order (numerical value with currency symbol).
*Note: 'PO Cost Totals' User Security Setup restriction determines field availability.
Source
Type of order created e.g. 'Shelf', 'Shelfsrc', 'Ovrstk', 'Xfer', etc.
Method
Order method used to create the order e.g. 'Max', 'Min', 'Order Point', etc.
Type
Indicates whether this is a 'Buy' or 'Return' order.
Profile
Number and name of the profile used to create the PO.
ASN #
ASN number provided, if one exists. If multiple ASNs are accepted/applied, "Multiple" displays.
ASN Date
Date of the ASN, if one exists. If multiple ASNs are applied, the date of the first ASN displays.
ASN Behavior
The 'Status', 'ASN #', and 'ASN Date' column behavior is determined by the order ASNs are received for the same order.
Store/location number for the order. Displays "Multi" for a multi-store PO.
Total Units
Total number of units for each part on the order.
Total Parts
Total number of unique parts within the order.
Total Weight
Total weight of all parts on the order, if available.
Total Volume
Total volume of all parts on the order, if available.
Total Packs
Total number of packs on the order.
Min Weight
Minimum weight threshold for an order for this supplier from the Supplier Order Setup screen at the time the order was created or possibly modified at order creation on the Order Create screen.
Min Cost
Minimum cost threshold for an order for this supplier from the Supplier Order Setup screen at the time the order was created or possibly modified at order creation on the Order Create screen.
Min Volume
Minimum volume threshold for an order for this supplier from the Supplier Order Setup screen at the time the order was created or possibly modified at order creation on the Order Create screen.
Min Packs
Minimum packs threshold for an order for this supplier from the Supplier Order Setup screen at the time the order was created or possibly modified at order creation on the Order Create screen.
Min Units
Minimum number of units threshold for an order for this supplier from the Supplier Order Setup screen at the time the order was created or possibly modified at order creation on the Order Create screen.
Disc %
Supplier discount for the order from the Supplier Order Setup screen at the time the order was created or possibly modified at order creation on the Order Create screen.
First Name
First name of the customer for a Sourced PO.
Last Name
Last name of the customer for a Sourced PO.
Bill To Name
Business name of the customer for a Sourced PO.
Invoice #
This column will be blank when the order is not a result of a customer sourced order. Otherwise, it will display either the Invoice # (auto-sourced order) or Ref # (sourced order).
Fill Policy
'Cancel' or 'Backorder' based on the setting from the Supplier Order Setup screen at the time the order was created or possibly modified at order creation on the Order Create screen.
Buy Qty Rule
'Yes' or 'No' depending on whether or not the 'Use Buy Qty Rule' checkbox is checked or unchecked for the order.
Multi-Store Type
'Consolidated', 'Distributed', or 'Consecutive' depending on the multi-store order type. Displays a blank cell for single-location orders.
Note: If 'Consecutive' is selected as the Multistore PO Type when creating the order from the Order Create screen, and then an "empty" order is created (no file is imported on 'Parts' tab), the Order Created becomes a single order. However, the entry in the grid will display the text 'Consecutive' since that was part of the criteria used to generate the order.
Buyer ID
Login name of the employee who either created the order manually or created the timed order that generated the order.
Finalized
Date the order was finalized.
Ordered
Date the order was transmitted to the vendor, and is left blank if not transmitted.
Cost Level
'PO Part Cost Level' for the supplier from the Supplier Order Setup screen at the time the order was created or possibly modified at order creation on the Order Create screen.
Shipper #
'Shipper #' from the Purchase Order information screen of the order detail.
Ship Method
'Ship Method' from the Purchase Order information screen of the order detail.
Timed Order
'Yes' or 'No' based on whether a timed order was used to generate the order.
Times Posted
Number of times the order was posted.
Auto Posted
'Full', 'Partial', or 'None', based on the fields in the 'Auto Post' frame on the Supplier Order Setup screen. This could be different based on the type of order for the same Supplier.
Last Posted
Date the order was last posted.
Total Freight
Freight amount from the order's Purchase Order information screen.
Return Point ID
Return point from the Supplier Entry screen at the time the order was created. If no Return Point was defined on the Supplier Entry screen, use the Return Point defined on the 'Returns' tab of the Store Invoice Options screen.
Deal #
Displays only when Deal Order functionality is enabled.
Note
Note optionally entered on the order's Purchase Order information screen.
Vendor Type
'Supplier' or 'Manufacturer'.
Ref #
Reference number for the order.
Grid Rows
Colors are used to identify the rows in the grid as:
-
A shaded row indicates the row in focus.
-
A single field, or "cell" in focus is outlined.
-
A return order displays the 'Return' cell in the 'Type' column with faded red shading for the 'All Orders', 'Flagged Orders', 'Transfer Orders', and 'Problem Orders' tabs.
The row in focus is marked with a "glyph" indicator symbol.
Note: A "glyph" symbol is the small arrow at the start of a row to indicate that row is in focus.

Multiple rows are highlighted/selected by using standard Windows keys, 'Shift' and 'Ctrl'.
Function Buttons Above the Grid
Click the 'New Purchase Order' button to open the Order Create screen to add a new purchase order.
Click the 'Timed Order Queue' button to open the Timed Orders Queue screen to manage the list of timed orders.
Post PO
Click the 'Post PO' button to post (receive) the selected PO into stock following the Auto-Receive functionality.
User Security Procs control access to the 'Post PO' button.
The security proc 'Purchasing Dash - Post PO Button' controls access to this button.
- If the proc is set to 'Not Visible', the 'Post PO' button will be hidden on the Purchasing Dashboard. The right-click menu item 'Post PO’ will also not be visible.
- If the proc is set to 'View Only', the 'Post PO' button will be visible but disabled on the Purchasing Dashboard. The right-click menu item 'Post PO’ will be grayed out and unavailable.
- If the proc is set to 'Allow Edit', the 'Post PO' button will be enabled for single row selection and follow existing rules as to when an order can be received/posted. (e.g. orders in 'NEW' status cannot be received). The right-click menu item 'Post PO' will be enabled for single row selections.
If the order's location is different from the location in which the user is logged into, check the security proc 'Purchasing Dash - Allow Remote Post'.
- If the proc is set to 'Not Visible', the 'Post PO' button will be hidden on the Purchasing Dashboard. The right-click menu item 'Post PO' will also not be visible.
- If the proc is set to 'View Only', the 'Post PO' button will be visible but disabled on the Purchasing Dashboard. The right-click menu item 'Post PO' will be grayed out and unavailable.
- If the proc is set to 'Allow Edit', the 'Post PO' button will be enabled for single row selection and follow existing rules as to when an order can be posted. The right-click menu item 'Post PO' will be enabled for single row selections.
If one order is selected and 'Post PO' is clicked:
The following prompt displays stating:

The 'Vendor' code and 'Order' number are included for reference in the prompt.
- Click 'No' to close the pop-up. The order is not posted.
- Click 'Yes' and:
- If the PO is in 'New' or 'WIP' status, a message prompt displays with the text: "This PO has not yet been finalized. Posting this PO is not allowed." with an 'Ok' button to clear the message. When 'Ok' is clicked, the message is cleared and the PO is not posted.
- If the order's location is the same as the location to which the employee is logged in, the pop-up closes and the system continues with functionality for auto-receiving a PO.
- If the PO is in 'New' or 'WIP' status, a message prompt displays with the text: "This PO has not yet been finalized. Posting this PO is not allowed." with an 'Ok' button to clear the message. When 'Ok' is clicked, the message is cleared and the PO is not posted.
- If the order's location is different from the location to which the employee is logged in, another message prompt displays with the text "This order is for a remote location. Are you sure you want to post this order for location xx?" with a 'Yes' and 'No' (default) option.
- Click 'Yes' to proceed with the auto-receipt/post of the order for the remote location.
- Click 'N0' to close the pop-up. The order is not posted.
After order post, the system remains on the current tab.
If multiple rows are selected, the 'Post PO' button is disabled.
Click to open the 'Post ASN' pop-up, allowing the selection of ASNs that have arrived for one or more purchase orders.
The 'Post ASN' button is controlled via a user security proc.
Click to open the 'Search Orders' pop-up. This pop-up will search all orders in the displayed grid for the criteria specified and filter the displayed orders to only those that contain the specified parts.

This button appears only when the 'Problem Orders' tab is selected.
When clicked, the 'eTrans Queue Utility' pop-up is opened.
![]()
Function Buttons Below the Grid
In order to open an order for edit from a tab on the Purchasing Dashboard screen:
-
Double-click the row in the grid.
-
Select the order and click the 'Edit' button.
-
Right-click the order and select 'Edit'.
The Purchase Order or Return Order screen will open with the selected order in focus.
Refer to Purchase Order or Return Order functionality to edit an order.
For multi-locations, if an order opened for other than the current location, editing Order Quantities as well as the 'Finalize', 'Place Order', 'Set Post Qty', 'Post', 'Write-In Part', 'Delete', 'Move', and 'Split' buttons will be disabled. Log in to that location to edit the order.
When the edited order is closed, regardless whether or not changes were made, focus will return to the Purchasing Dashboard with the screen refreshed to reflect any changes to the order.
Whether or not orders can be deleted from the Purchasing Dashboard screen is based on the 'Purchasing Dash - Delete Button' User Security Setup permission.
In order to delete an order on the Purchasing Dashboard screen:
-
Double-click the row in the grid.
-
Select the order and click the 'Edit' button.
-
Right-click the order and select 'Edit'.
Click the 'Delete' button to permanently delete the selected order.
Highlight an order and click the 'Reports' button to open the 'PO Reports' window for the selected order. Or, right-click the order and select 'Reports'.
Navigation Buttons Below Grid
Scan Receive
When clicked, the Scan Receive screen is opened.
Return Manifests
When clicked, the Return Manifests screen is opened.
Create Edit Layout
When clicked, the PO Edit Layout Setup screen is opened.
Font Size Slider
A slider bar displays to control the size of the font displayed in the grid. This setting will control the font size of each grid on all tabs.

Right-Click Menu - Row Level
The row-level right-click menu is dynamic, based on parameters of the order highlighted. A different menu will appear if a single row is selected versus if multiple rows are selected.
Purchase Orders - Single Row Selected

Only available on orders with failed transmission, i.e. 'Status' = 'ORD-F'. When clicked, the existing 'eTrans Job Queue Utility' pop-up opens to allow the order to be re-transmitted.
A pop-up opens for adjusted POs with a list of the parts with their 'Ord Qty' and 'Fulfill Qty'. Only available when the PO has a value of 'Adjusted' in the 'Vendor Reply' column.
When clicked, the flag icons turns blue and the highlighted order is available from the 'Flagged Orders' tab so that it can be followed closely.
The right-click menu option changes to 'Unflag' on a flagged order. Click 'Unflag' to change the flag back to gray and remove the order from the 'Flagged Orders' tab.
It is possible to flag / unflag orders that were flagged by other employees in the same store.
The option is available to available flag / unflag multiple selected rows at the same time. The row with the adjacent glyph symbol will determine which option is available ('Flag' or 'Unflag').


Edit
Opens the order in the Purchase Order (PO Detail) screen following the same functionality defined for the 'Edit' button.
Delete…
Follows the same functionality to delete the highlighted order as defined for the 'Delete' button.
Post PO…
Follows the same functionality to posts the highlighted order as defined for the 'Post PO' button.
Reports…
Follows the same functionality to posts the highlighted order as defined for the 'Reports' button.
Go to Vendor XXX
When clicked for all orders except transfer orders, the Supplier Entry screen opens for the vendor the highlighted order was created for. The Supplier Entry screen opens in the current store, regardless what store the order was created in.
When clicked for transfer orders, the 'Supplier Information' pop-up opens with the information from the Store General Setup screen, 'Store Information' tab of the store/location/branch that the parts are coming from.

The pop-up displays the supplier's:
-
'Location Name'
-
'Address Line 1' / 'Address Line 2'
-
'City' / 'State' / 'Zip'
-
'State Name'
-
'County'
-
'Country'
-
'Phone'
-
'Fax'
-
'Web'
-
'Timezone'
Opens a 'Display Parts' pop-up that lists all parts contained in the selected order.
The pop-up displays the following columns:
- 'Vendor'
- 'Order #'
- 'Location' Note: The 'Location' column will only display for a "Multi-Store" order. It will identify the store that created the order.
- 'Line'
- 'Part'
- 'Description 1'
- 'Ord Qty'
- 'BQR Qty'
- *'Part Cost'
- *'Core Cost'
- *'Total Cost'
*Note: This column is available / hidden depending on the 'PO Cost Detail' User Security Setup permission.

The list will display all parts contained in the selected order. If multiple rows are selected, the list will display all parts contained in all selected orders.
The list will be sorted in ascending order first by 'Vendor', then by 'Order #', then by 'Location', then by 'Line', and then by 'Part'.
The pop-up can be expanded or repositioned using the mouse.

Following PartsWatch Grid functionality, column lists can be sorted by clicking the heading, sorted by clicking the filter icon and resized, hidden or rearranged.
Right-click a column header for right click menu functionality.
Show Recent Message
Existing functionality: Displays a pop-up showing the most recent System Message for the selected PO. The details of the message may contain the reason for the PO transmission failure (if provided by the source).
This option is only visible if a System Message exists for the order.
If multiple rows are selected, this option will not be visible in the right-click menu.
Note: If the message has been removed due to Record Retention configuration, no message will appear. If this option is selected, the right-click menu will simply close.
Multi-Store Distributed PO #
Existing functionality: Only visible when any secondary store XFER PO that is linked to the originating store's distributed PO is right-clicked. Displays the originating store's PO Number and the vendor code of the vendor that the originating store is buying from.
The entry in the menu is displayed with grey text and is not clickable. It is informational only.
Purchase Orders - Multiple Rows Selected
If multiple rows in the grid are selected, right-click any of the selected rows to display the following right-click menu:
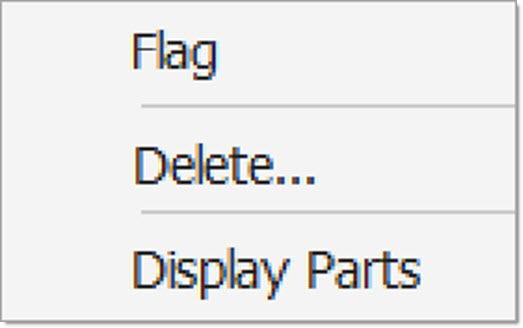
Flag
Flags all rows with the flag symbol, as with single-row selection.
Delete…
With multiple rows selected, click the ‘Delete…’ button to remove them from the grid.
When 'Delete…' is selected for one or multiple rows in the grid, the ‘Confirm Delete’ pop-up displays.
Note: Deleting orders is only available on the current tab. Deleting orders across tabs is not supported.
Note: There is no limit to the number of rows that can be deleted at once.
Display Parts
Opens a 'Display Parts' pop-up that lists all parts contained in the selected order, as with single-row selection.
Chart Button
Click 'Chart' from the right-click menu to open a pop-up that displays a pie chart showing each vendor's costs based on the orders displayed in the current tab of the grid.

Click a slice of the pie and the grid will be filtered by the orders of the selected vendor. (The same would be true if a bar or line is clicked on the other charts.) This is equivalent of selecting the 'Vendor' filter in the column heading. This is only available for 2D charts/graphs.
Click and drag to change the position of a pie slice within the chart.
Chart By:
Allows the chart to sort by 'Vendor' (default) and 'Location'. It is possible to change the chart to display the 'Total PO Amount per Location' by selecting 'Location' in the 'Chart By' drop-down.
Chart Type:
Determines what type of chart is shown, a bar, pie, or line chart in either 2D or 3D.
Preview Grid
Click 'Preview Grid' from the right-click menu to display the Export report of the columns displayed in the grid. You may want to hide columns in order to achieve a desirable report.

Note: This allows for the exporting of the data to .PDF, .HTML, .MHT, .RTF, .DOCX, .XLS, .XLSX, .CSV, Text files, and Image files.

Report data may also be printed or emailed.
Return Orders
In the right-click menu for return orders, the 'Post' option will reduce stock quantity on hand for all parts on the order and then eliminate the return order from the screen. The same functionality applies if the 'Post' button below the grid is used on a return order.
Application Function Buttons
Save and Load Profiles Pop-up
Click the 'Profile' button to open the 'Save and Load Profiles' pop-up. The pop-up displays profiles relating to the Purchasing Dashboard screen.
When a profile is saved, the following attributes are saved with that Profile:
- Order (arrangement) of columns
- Hidden columns or displayed columns
- Sort order of columns
- 'Select Top Row After Sorting' setting
- Grouping
- Column filters
- Auto Filter Row and its settings
- Filters set by the 'Search Orders for Parts' pop-up
- Conditional Filters
- Show Find Panel
- Show Auto Filter Row
- 'Include Transfer Orders' setting
- Selected tab (this effectively becomes the profile's default tab, the one that is displayed when the profile is loaded)
Settings made to all tabs and the 'Include Transfer Orders' checkbox status will be saved within a "Profile". A Profile governs the entire screen. Settings are unique to each tab. For instance, if a column is hidden only on the 'Purchase Orders' tab, and a Profile is saved, when that Profile is used, the column will still only be hidden on the 'Purchase Orders' tab. It will not be hidden on all tabs unless explicitly hidden on other tabs before saving the Profile.
If a profile is in use, the text "Profile:" displays followed by the profile number and profile name on the screen, similar to other screens that use profiles.

When a profile is loaded, all tabs are updated based upon the settings and formatting of the profile.
If a profile is loaded and a change is made to a grid on any tab (e.g. sort order), the text in the upper-left of the screen will disappear since the profile display settings have been modified.
- If another tab is clicked, the profile text will still not display since the profile controls the entire screen but the tab will still reflect the settings from the previously loaded profile.
- If the 'Profile' button is clicked, the pop-up will highlight the last profile selected to allow the updating of the profile with the new settings.
Open Purchase Order Report
Click the 'Preview' or 'Print' buttons to preview or print the 'Open PO Report':

Grid Functionality
The PartsWatch Grid has many functions beyond the row-level right-click functions described in this document. Refer to The PartsWatch Grid help topic for more information.