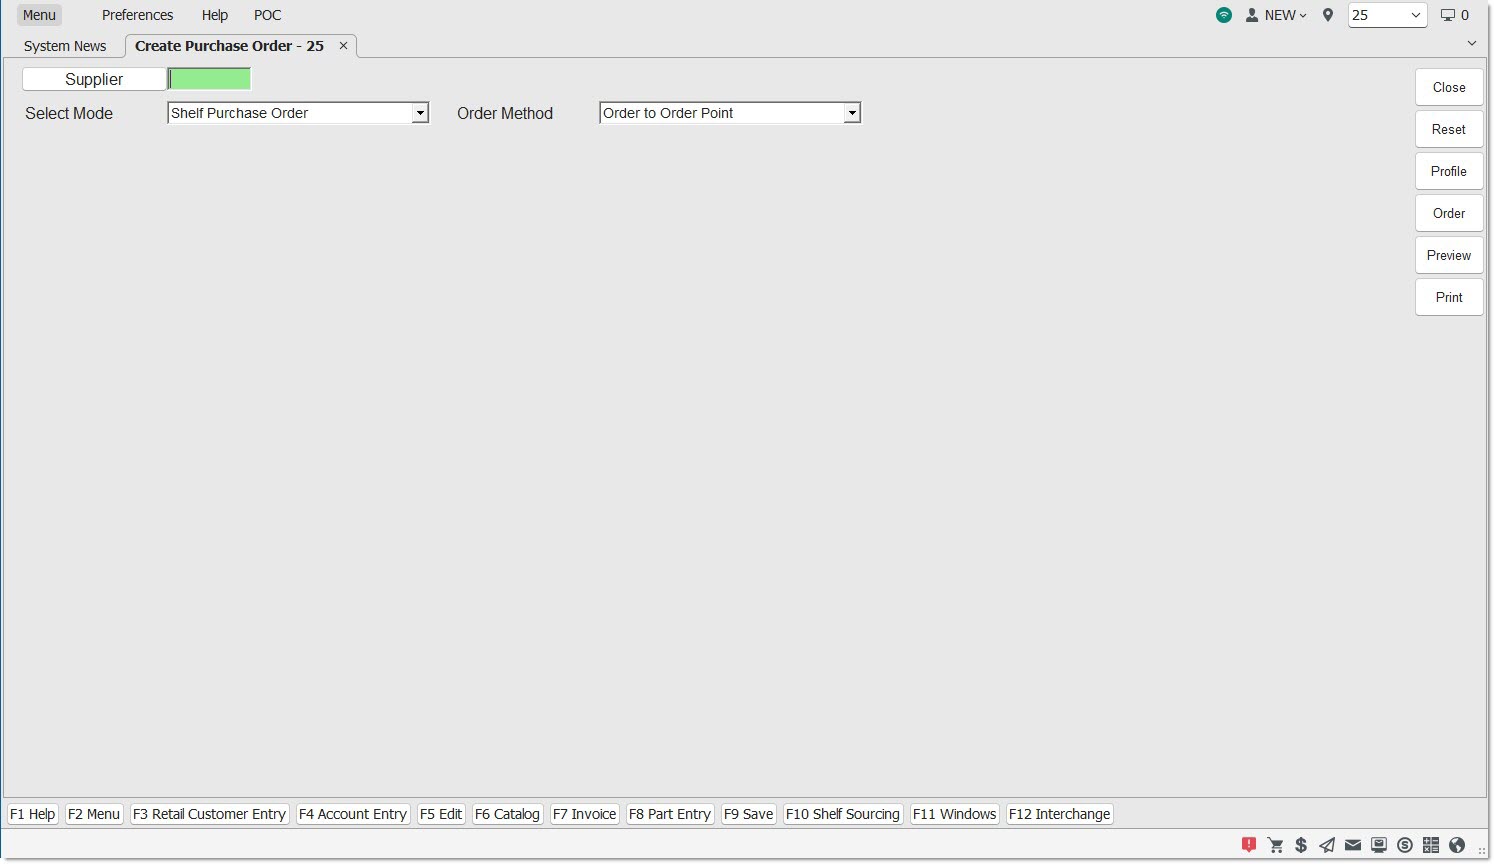
Order Create Screen
The Order Create screen is used to manually create purchase and return orders.
Menu Path: Purchasing, Create Purchase Order, Order Create screen
Menu Path: Purchasing, Purchasing Dashboard, Purchasing Dashboard screen, 'Add' button
Note: The 'User Order Create Screen Instead of PO PROFILE' setting must be enabled.
Purchasing Training Packet - 2 pages
Order Create Definitions

Upon opening, the screen defaults to the 'Select Mode' of 'Shelf Purchase Order' with the 'Order Method' set up in the system-level 'Default PO Method' field. If 'Overstock Return' is selected as the 'Select Mode', the 'Order Method' defaults to the 'Default RO Method' setup.
To order using the defaults, enter or select a Supplier in the 'Supplier' field and press the 'Enter' key. The screen refreshes with the 'Criteria' tab in focus.
The change the defaults:
- Select the type of purchase or return order using the 'Select Mode' drop-down.
- Select the ordering method to use from the 'Order Method' drop-down.
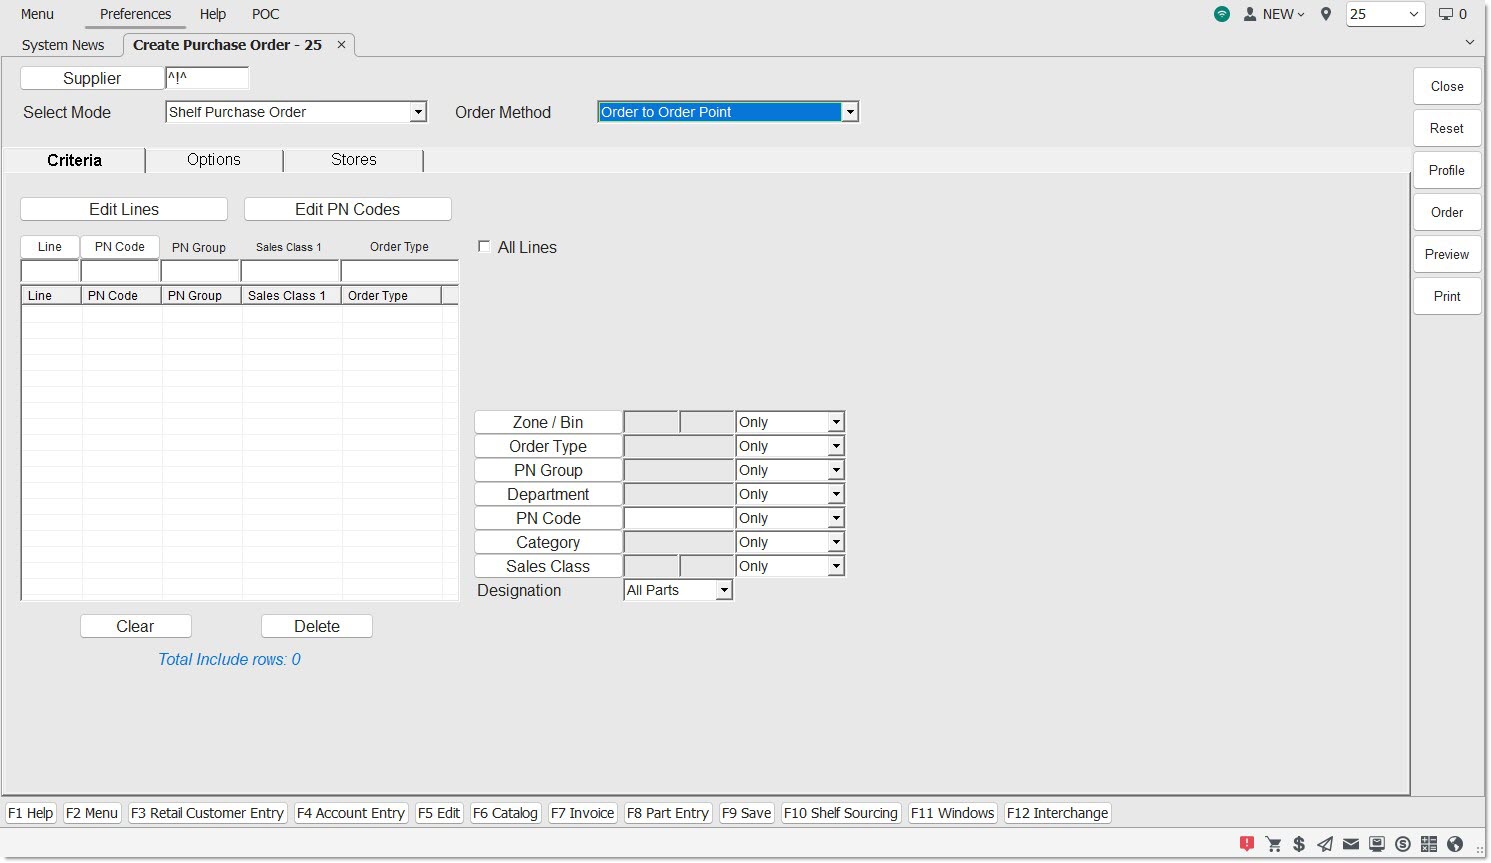
Depending on the 'Order Method' selected, use the available tabs to set the actual order parameters or order requirements:
- 'Criteria' Tab - Optionally edit Lines ordered for the selected 'Supplier'/select part filter criteria to narrow the parts considered for the order.
- 'Options' Tab - Optionally select options to further narrow the parts considered for the order.
- 'Stores' Tab - If in a multi-store environment, edit the stores covered by the owner.
- 'Sales' Tab - Used to select periods to cover for part history forecasted orders.
- 'Parts' Tab - Used to import parts for a Write-In Order.
- 'Scan Session' Tab - Used to order scanned parts on Scan-In Order.
- 'Profiles' Tab - Used to create a Lowest Cost Profile order to compare multiple Suppliers in order to create one purchase order with the lowest total cost for all parts being ordered.
When setup is complete:
- Save the order parameters as a 'Profile' to use when manually running the same order or to set up in the timed order queue for automatic order creation.
- Optionally click the 'Preview' or 'Print' buttons to output a report of the parts on the order in case any changes are needed before creating the actual order.
- Click the 'Order' button to generate the actual Purchase or Return Order. When created, the Purchase Order screen opens with the order displayed to edit, view, print, and/or transmit.
Supplier
Enter a Supplier Code or click the 'Supplier' button to search for a supplier in the 'Browse Suppliers' window.
When a supplier is entered, the screen is refreshed with additional information.
Optionally select a different type of order from the 'Select Mode' and 'Order Method' fields as needed.
Select Mode
Click the 'Select Mode' drop-down and select the type of order to be created.
Buy Orders
- 'Shelf Purchase Order' (default) - Used to purchase stock for the shelf.
- 'Stock Adjustment Purchase Order' - The "buy" order created to increase needed shelf quantities.
Note: "Stock Adjustment" orders are normally run per Line after resetting stocking levels to balance the inventory and therefore, both Stock Adjustment "buy" and Stock Adjustment "return" orders can be created, thus bringing the stock to the desired shelf quantities.
Return Orders
- 'Overstock Return' - Used to return all stocked or non-stocked parts, that for whatever reason, were not sold and should be returned to the supplier or warehouse.
- 'PDC Return' - Used to close a store and remove the entire inventory.
- 'Recall Return' - Used to return parts that are being recalled for any reason, such as repackaging or obsolescence.
- 'Stock Adjustment Return' - A "return" order created to decrease overstocked shelf quantities.
Note: "Stock Adjustment" orders are normally run per Line after resetting stocking levels to balance the inventory and therefore, both Stock Adjustment "buy" and Stock Adjustment "return" orders can be created, thus bringing the stock to the desired shelf quantities. - 'Buyout Manifest Return' - Used to return new parts to the vendor either by scanning or manually adding them as "write-ins".
- 'Core Manifest Return' - Used to return cores to the vendor either by scanning or manually adding them as "write-ins".
- 'Warranty Manifest Return' - Used to return items returned at Point-of-Sale using a defective modifier: 'D' Defective Return modifier.
- 'X Defective Exchange'
Order Method
With a type of order selected from the 'Select Mode' drop-down, click the 'Order Method' drop-down and select the method used to create the order. The 'Order Method' changes per the value of 'Select Mode'.
"Buy" Order Methods by Mode
Shelf Purchase Order
- Order to Max
- Order to Min
- Order Min to Max
- Order Average Min Max
- Order to Order Point
Sales History Ordering
Mix Ordering
Replenishment Ordering
Manual Ordering
Shelf Purchase Order
- Order to Max
- Order to Min
- Order Min to Max
- Order Average Min Max
- Order to Order Point
Sales History Ordering
Replenishment Ordering
Manual Ordering
"Return" Order Methods by Mode
Overstock Return
- Return to Max
- Return to Min
- Return to Order Point
Sales History Return
Manual Return
PDC Return
- Return to Max
- Return to Min
- Return to Order Point
Manual Return
Overstock Return
- Return to Max
- Return to Min
- Return to Order Point
Manual Return
Recall Return
Manual Return
Buyout Manifest Return
Manual Return
Core Manifest Return
Manual Return
Warranty Manifest Return
Manual Return
Kit Parts
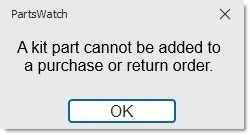
Kits parts are excluded from both purchase and return orders for all 'Order Methods'.
Attempting to add a kit part to a 'Write-In' Order or 'Write-In' Return displays a prompt stating that kit parts cannot be added.
However, if Kit parts are included in the Import files of 'Write-In' Orders or Returns, or 'Scan-In' Order or 'Scan-In' Return Scan Sessions, the kit parts are loaded into the order with all the other parts.
However, when the 'Order' button is clicked, the application excludes all kit parts from being included in the created order, regardless of the value of the 'Include Imported NIF' option, and does not display an error or notification message.
All kit component parts are included as regular parts not linked to any kit parts.
Saving Profiles
Once the parameters are set up for a 'Supplier', click the 'Profile' button to open the 'Save and Load Profiles' window.
Saved 'Profiles' are used to run orders without again setting up the parameters and to schedule for timed order creation.
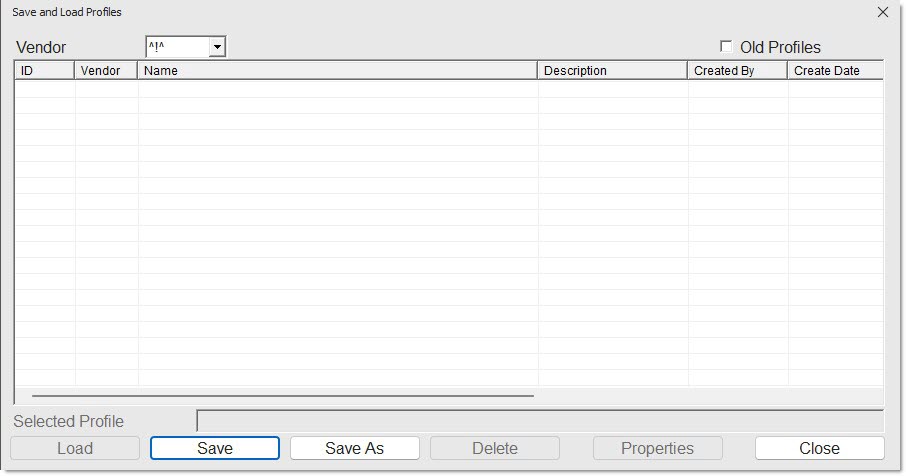
The field defaults to the 'Supplier' selected for the order and is used to display saved profiles for that supplier or to find a saved profile by 'Supplier'. Click the drop-down field and select:
- 'ALL' to display all saved profiles regardless of 'Supplier'.
- A 'Supplier' with one or more saved profiles. Select a 'Supplier' from the list to display saved profiles for that 'Supplier'.
Double-click or highlight a row in the grid and click the 'Load' button to load the profile to use that profile for the order creation.
To save a profile, click the 'Save' button and the 'Profile Properties' window opens to enter the profile information:
-
'Name' (required) - Enter up to 80 characters as the profile name.
-
'Description' (optional) - Enter up to 150 characters as the profile description.
-
'Edit Access' (required) - Select who can edit the profile:
-
'All' - Anyone
-
'Store' (default) - Anyone who has store security access.
-
'Creator' - Only the person who created the profile.
-
-
'View Access' (required) - Select who can use the profile:
-
'All' - Anyone
-
'Store' (default) - Anyone who has store security access.
-
'Creator' - Only the person who created the profile.
-
Click 'Save' to save the profile, or 'Cancel' to cancel the saving of the profile.
To save an existing profile under another name, click the 'Save As' button and the 'Profile Properties' window opens to enter the profile information.
To delete a profile, single-click the profile row, and click the 'Delete' button. The 'Edit Access' setting determines whether a user can delete a profile.
To view or edit a profile's existing properties, with the row highlighted, click the 'Properties' button. The 'Edit Access' setting determines whether the profile can be viewed and/or edited.
To close the pop-up, click the 'Close' button or press the 'Esc' key.
Save and Load Profiles Fields
Preview/Print Button
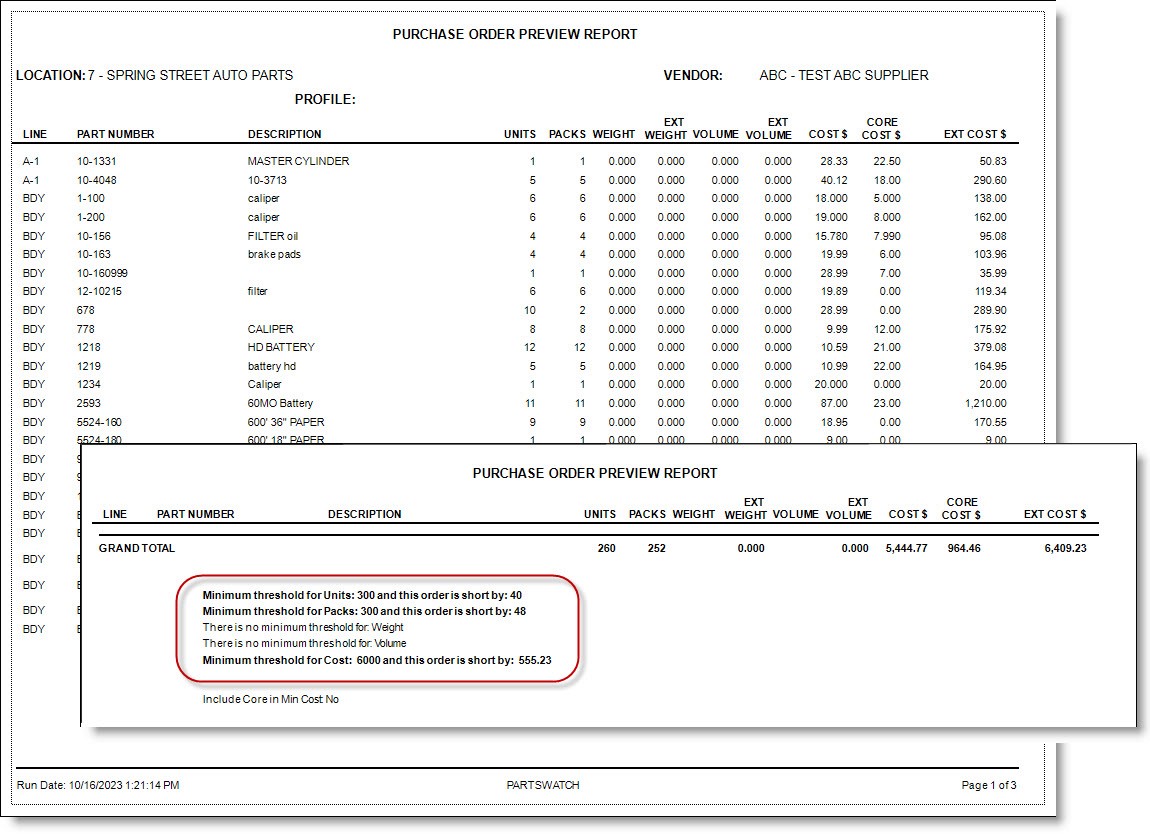
Click the 'Preview' or 'Print' button to output the Purchase Order Review Report with a purchase order "preview".
Purchase Order Preview Report
The purpose of the report is to assist in determining whether an order has met vendor 'Minimum Thresholds' without actually having to create the order.
The report "filters" parts and calculates order quantities using the same rules as if the 'Order' button was clicked, using all of the same information entered on the 'Criteria', 'Options', 'Sales', 'Parts', and 'Stores' tabs.
Note: Since the process contains two separate steps by first generating an "internal pre-order" using the order create function, and then passing that information to the preview report function, the output may not be instantaneous.
Order Button
Click the 'Order' button to create the order. If an order is generated, it will open in the Purchase Order detail screen for editing.
If no results are found, a prompt opens notifying that no parts were ordered and to change the settings before trying again.
Note: If the 'Block From PO' setting is checked for the supplier and the 'Order' button is clicked, a message displays stating the order cannot be created.
Suggested Orders
A "suggested" order is defined as a purchase order that is a draft or work-in-progress order. It could be in 'New' or 'WIP' status. When a suggested order is finalized, it becomes a true purchase order and its order quantities become 'On Order' quantities. Purchase orders may start out as suggested order, but return orders may not.
When a new order is created using the Order Create screen or the Timed Orders Queue it is in 'New' status, not 'WIP'.
Exceptions include:
- If the 'Auto Finalize Timed Order Purchase Orders' and 'Auto Finalize Time Order Return Orders' settings are checked on the SYSTEM PURCHASING SETUP screen, then the orders created via the Timed Orders Queue will be 'FIN'.
- If the order is generated as a result of a PO API feed, the feed may set the order to a state other than 'New'.
- If the 'Finalize Immediately' checkbox is checked on the Order Create screen, the new order will be in 'Fin' status.
The creation and deleting of suggested orders is controlled by the 'Always Overwrite Orders in NEW Status' checkbox on the 'Purchasing' tab of the Store Purchasing Setup screen.
When an order is created from the 'Order' button (using a Profile or not):
-
If the value of the 'Always Overwrite Orders in New Status' checkbox is unchecked, the order is added to the existing list of orders with a status of 'New'.
-
If the value of the 'Always Overwrite Orders in New Status' checkbox is checked. the system determines if there are any other orders in 'New' status contains the same Supplier and Store(s)/Location(s).
-
If there is an exact match, the new order is created and the existing orders that matched the criteria are deleted. Note: If there is a failure when one or more orders are to be deleted, the system displays a prompt to inform that the order must be manually deleted. Furthermore, the failure is recorded to the System Messages.
-
If there is not an exact match, the order is created normally.
-
Note: Return orders are not supported, only purchase orders that meet the criteria can be deleted.
Exceptions:
- Creating auto-distribute purchase orders will not invoke deleting matching 'New' status purchase orders.
- Creating manifest return orders will not invoke deleting matching 'New' status return orders.
- Using the re-create order feature will not invoke deleting matching 'New' status orders.
- The resurrect purchase order function (e.g. from ASN process with gone PO) will not invoke deleting matching 'New' status purchase orders.
- Using the reverse order feature will not invoke deleting matching 'New' status orders.
- Creating a store transfer order will not invoke deleting matching 'New' status orders.
- Creating a "manual" write-in order will not invoke deleting matching 'New' status purchase orders, regardless whether parts are imported in the application or not (in a feed). However, creating a multi-store consecutive order will delete matching orders with 'New' status in the target stores.
- Using the print or preview feature on the order create screen will not invoke deleting matching 'New' status orders.